
This guide explains how to configure and use the integration between Metadata for Confluence Cloud and Workflows for Confluence by AppFox. The integration enables users to dynamically assign workflow approvers based on Metadata fields.
Why use this integration? By linking Metadata fields to your workflows, you can automate responsibility assignment (like Process Owners or Subject Matter Experts) without manually updating every workflow instance.
Use Cases
1. Process Management
Assign responsibilities such as Process Owner, Reviewer, or Compliance Manager directly via Metadata fields. When workflows are applied, the system automatically sets the assigned users as approvers.
2. Knowledge Management
Ensure that updates to critical knowledge base content are reviewed by the correct subject-matter expert (e.g., Content Owner).
How the Integration Works
A Metadata field of type User serves as the source for assigning approvers. When the workflow runs:
-
It identifies the assigned Content Category and the specific User field.
-
It extracts the user(s) stored in that field.
-
It automatically assigns them as approvers in the relevant workflow step.
Prerequisites
-
Metadata for Confluence Cloud installed.
-
Workflows for Confluence (AppFox) installed.
-
At least one Content Category with a User field.
-
Confluence pages with assigned Metadata values.
-
An existing Approval Workflow.
For help with basic setup, refer to the Metadata Documentation or the Workflows for Confluence Guide.
Integration Technical Setup
This section walks you through the technical configuration required to connect Metadata fields with workflow approvals. First, retrieve the relevant Content Category and Metadata field IDs, then add those IDs to the approval workflow so approvers can be assigned automatically.
The documentation below is prepared using Google Chrome Developer Tools. The solution will work similarly in other browsers. If you use a different browser, you can adapt accordingly.
Step 1: Retrieve Content Category and Metadata field IDs
To configure the workflow, you need the unique IDs for the Content Category and the Metadata User field.
How to find the IDs:
-
Open a Confluence page that has the relevant Metadata assigned.
-
Open your browser's Developer Tools (F12) and select the Network tab.
-
Click Edit Metadata on the Confluence page. The request fires automatically.
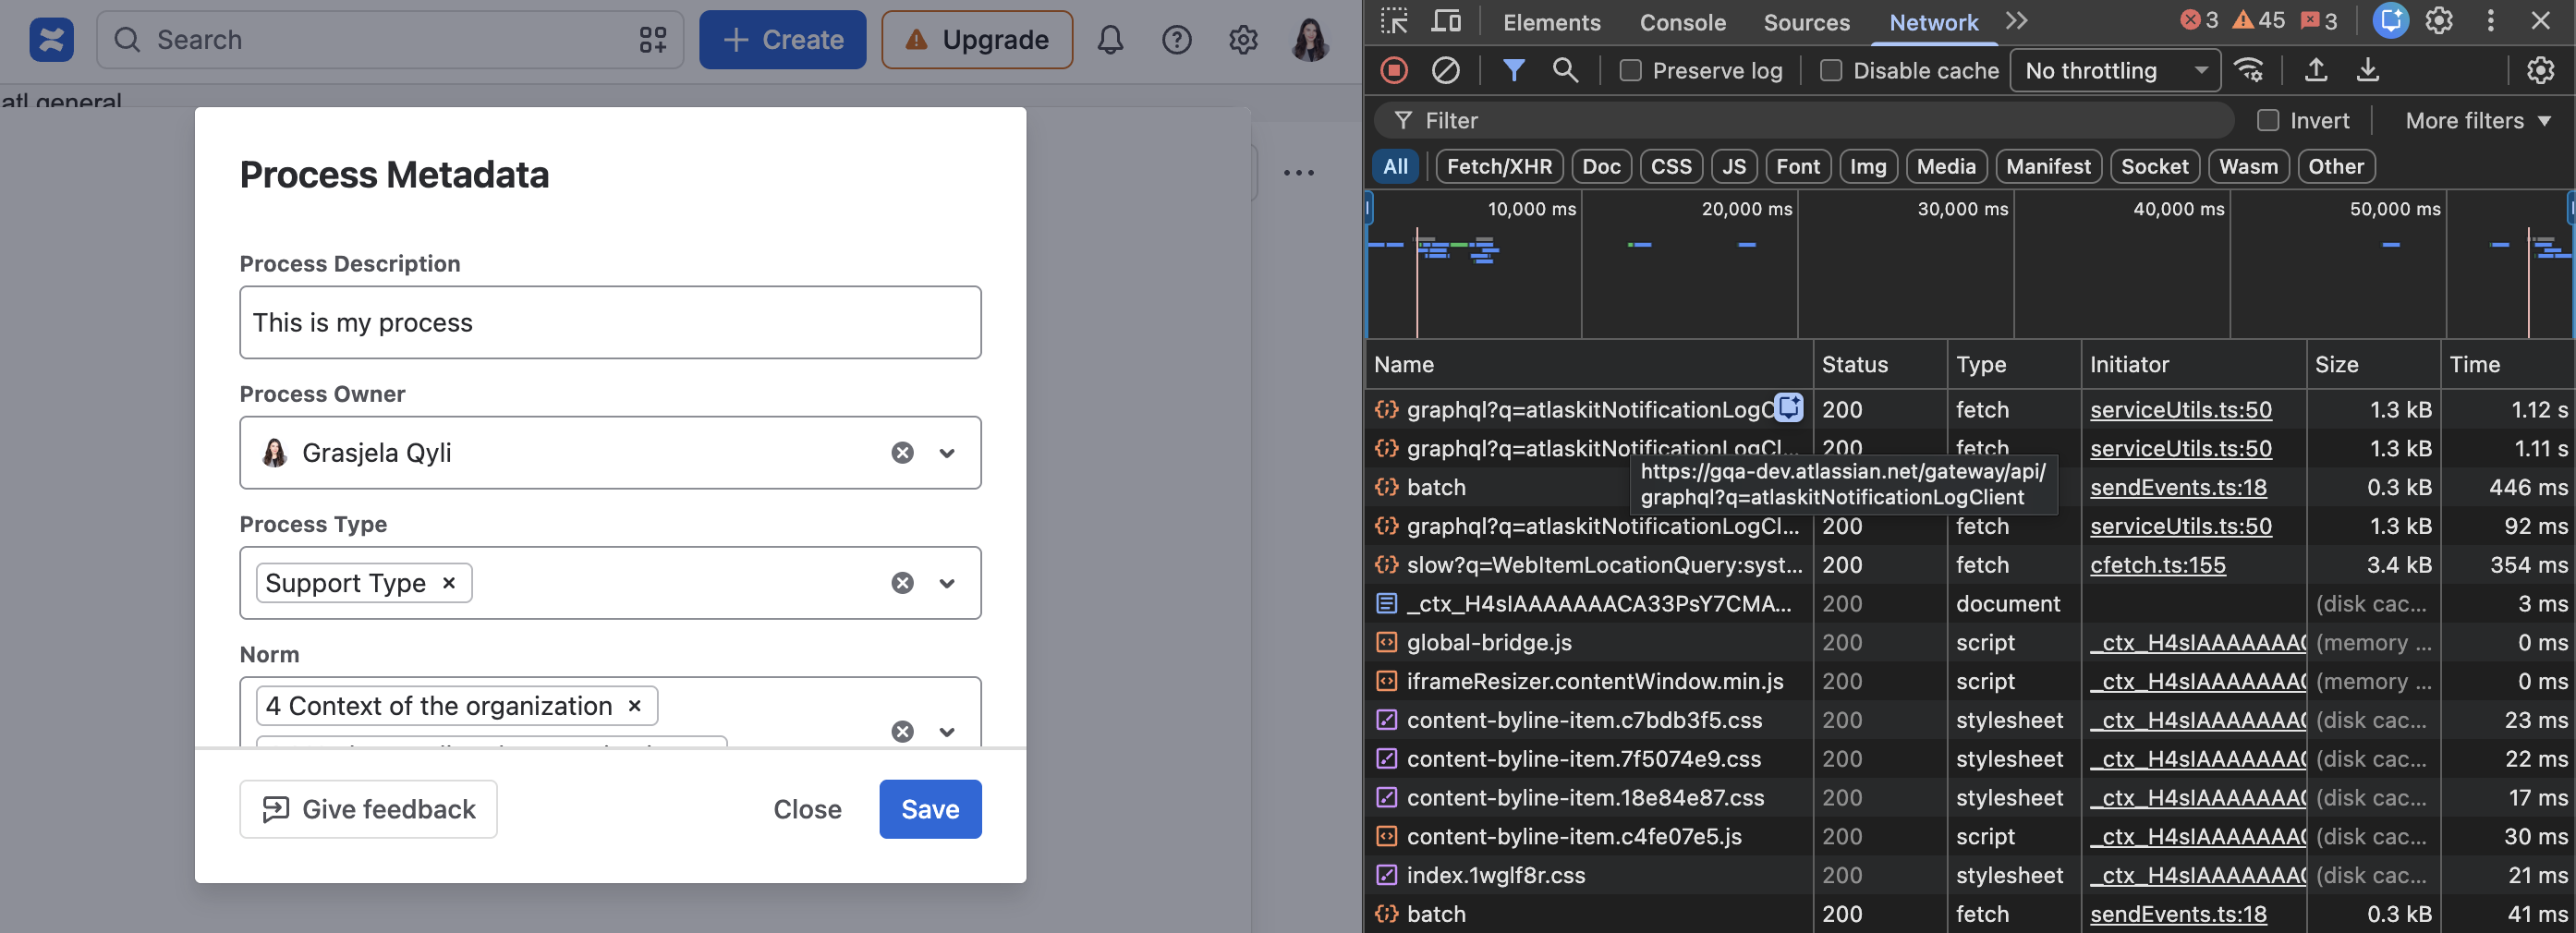
Image 1: Edit Metadata (click to enlarge) -
In the Network tab's filter bar, type
useInvokeExtensionRelayMutation.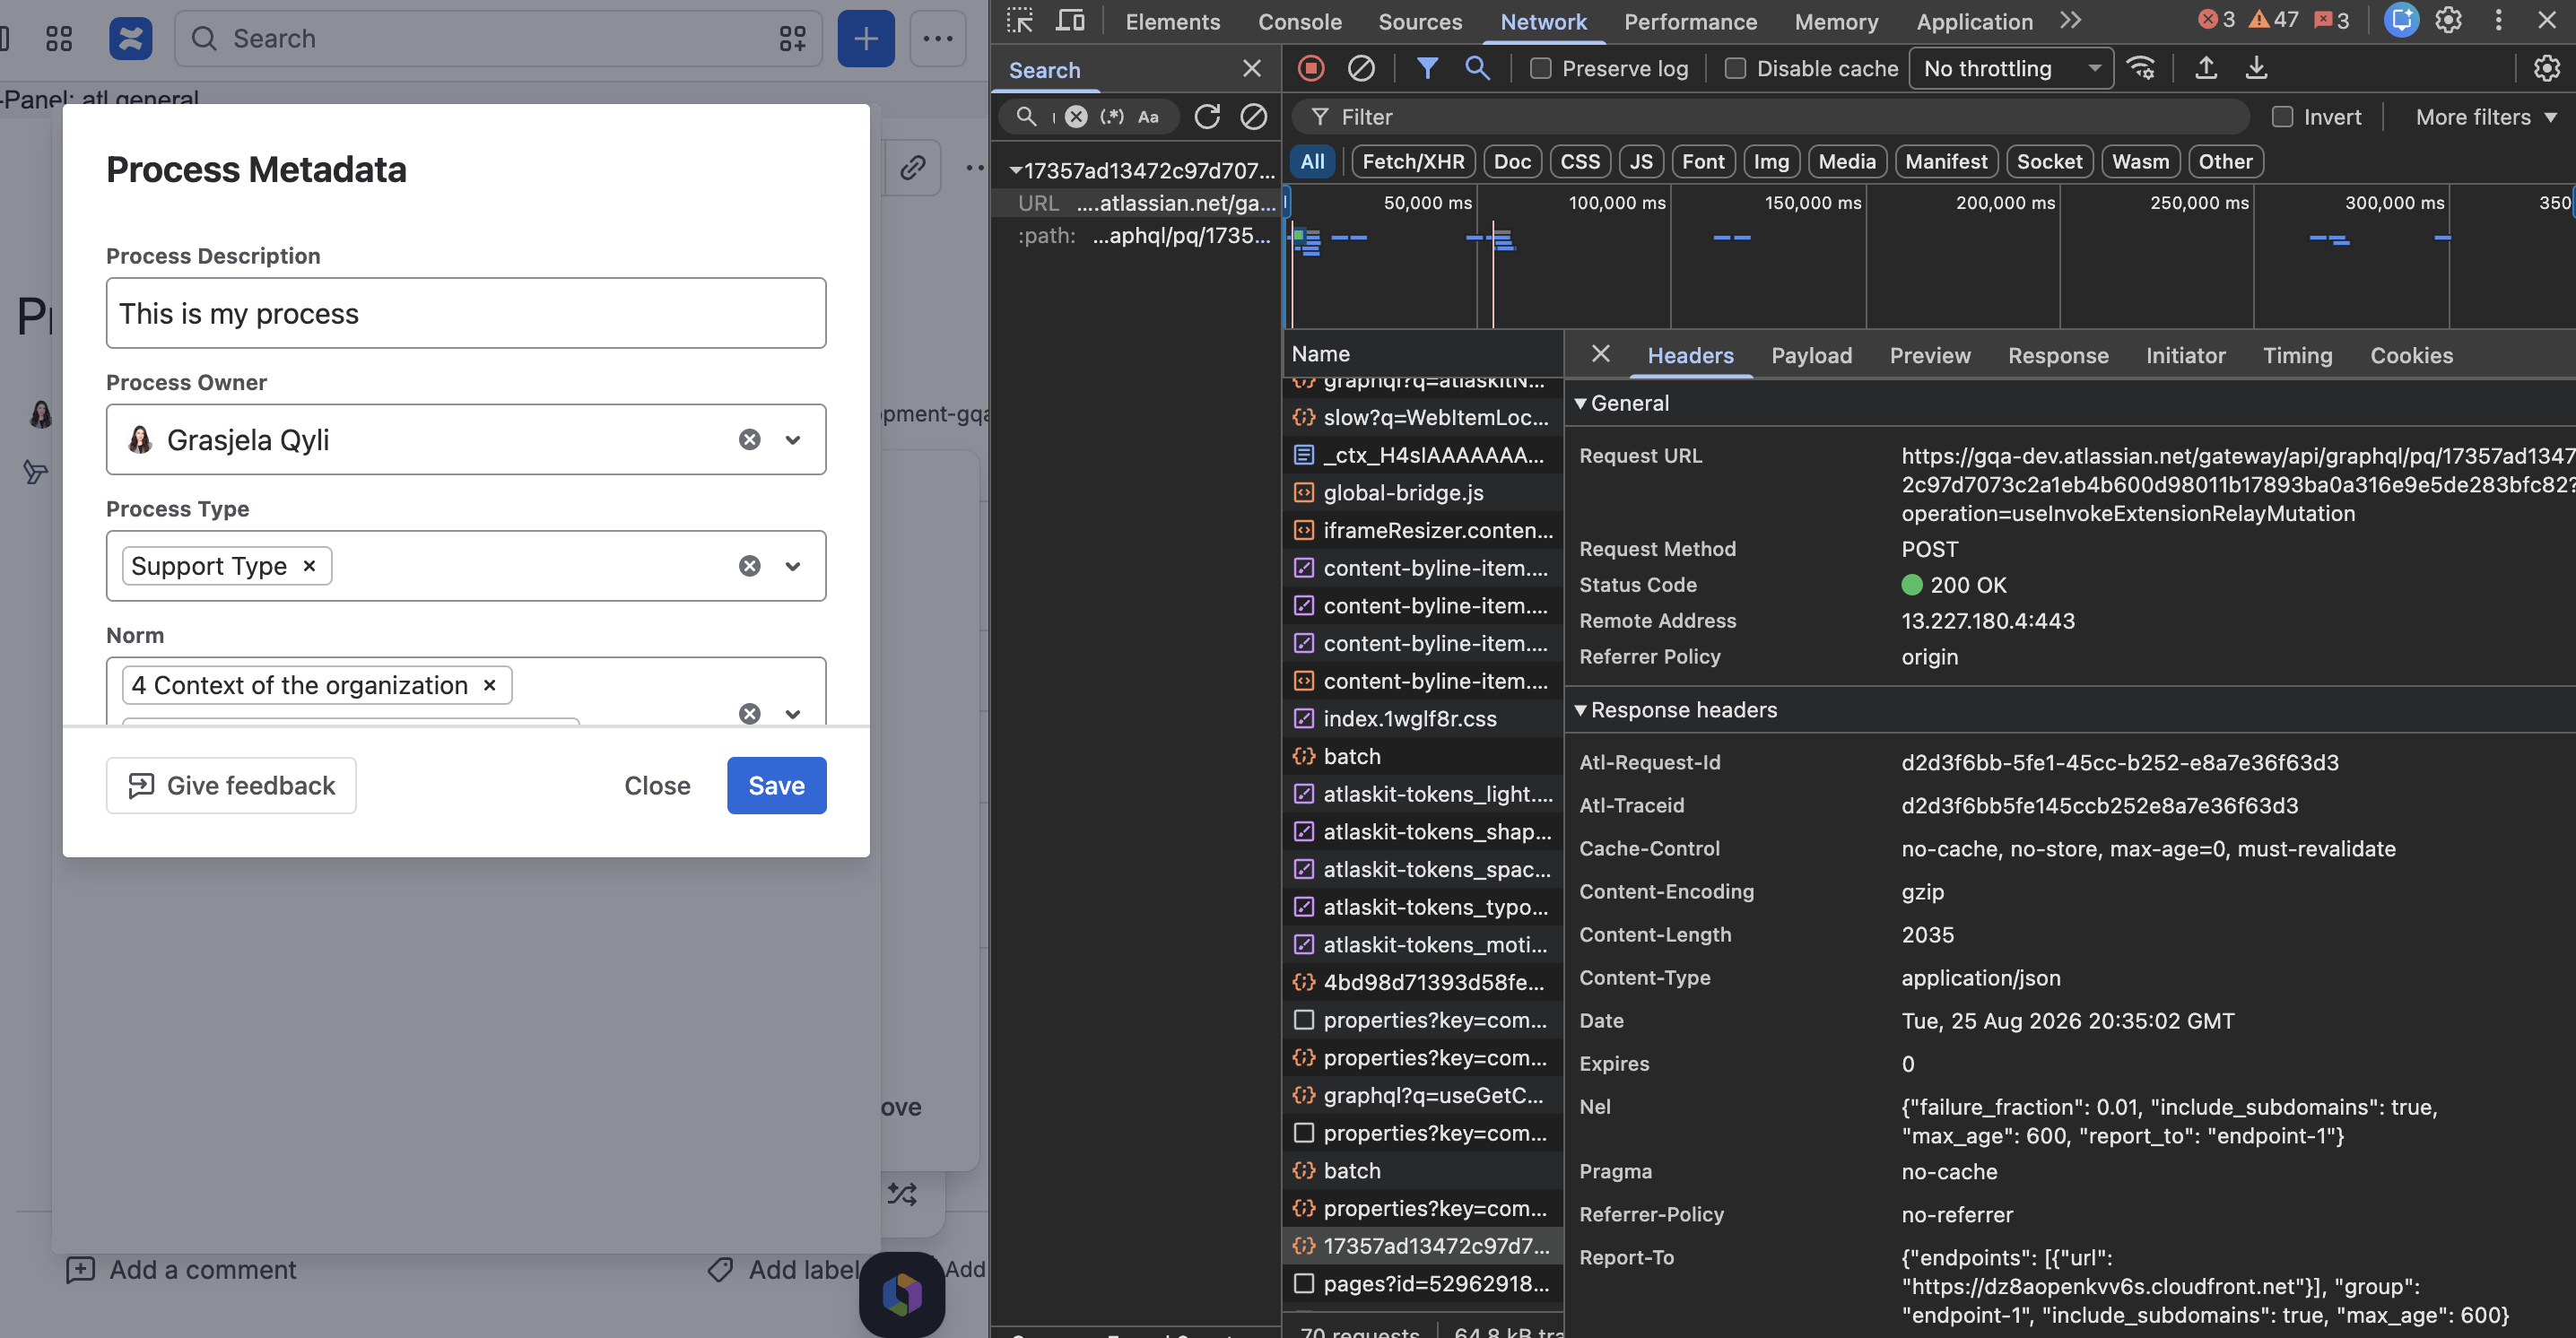
Image 2: Narrow down list to relevant calls (click to enlarge) -
Select the matching request and open the Payload tab. Expand
variables>input>payload>calland confirmfunctionKeyis"getContentCategoryById".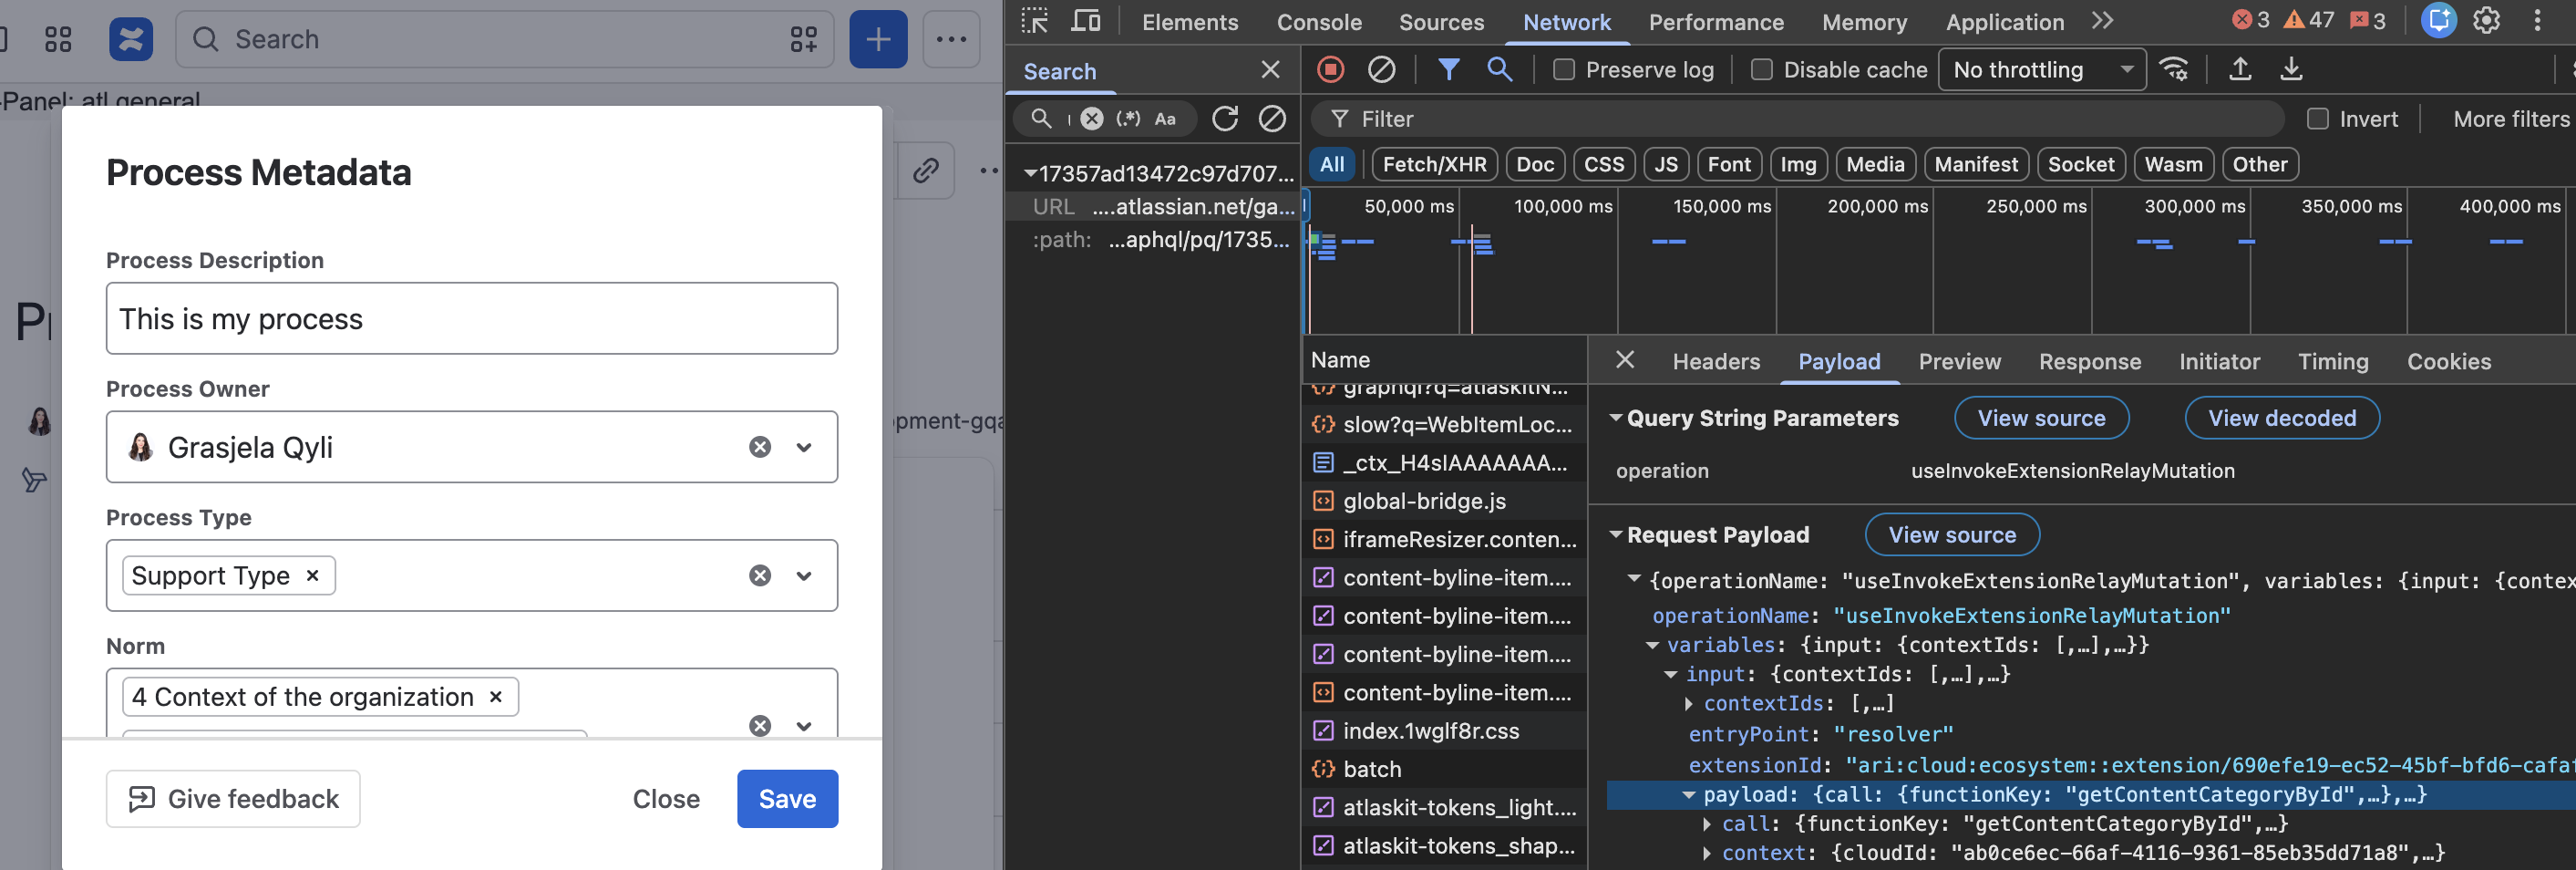
Image 3: Open payload tab (click to enlarge) -
Open the Response tab for that same request and expand
data>invokeExtension>response>body>result:-
The
idfield is your Content Category ID. -
Inside
fields, find the entry where thetitlematches your field name. Itsidis the Metadata field ID.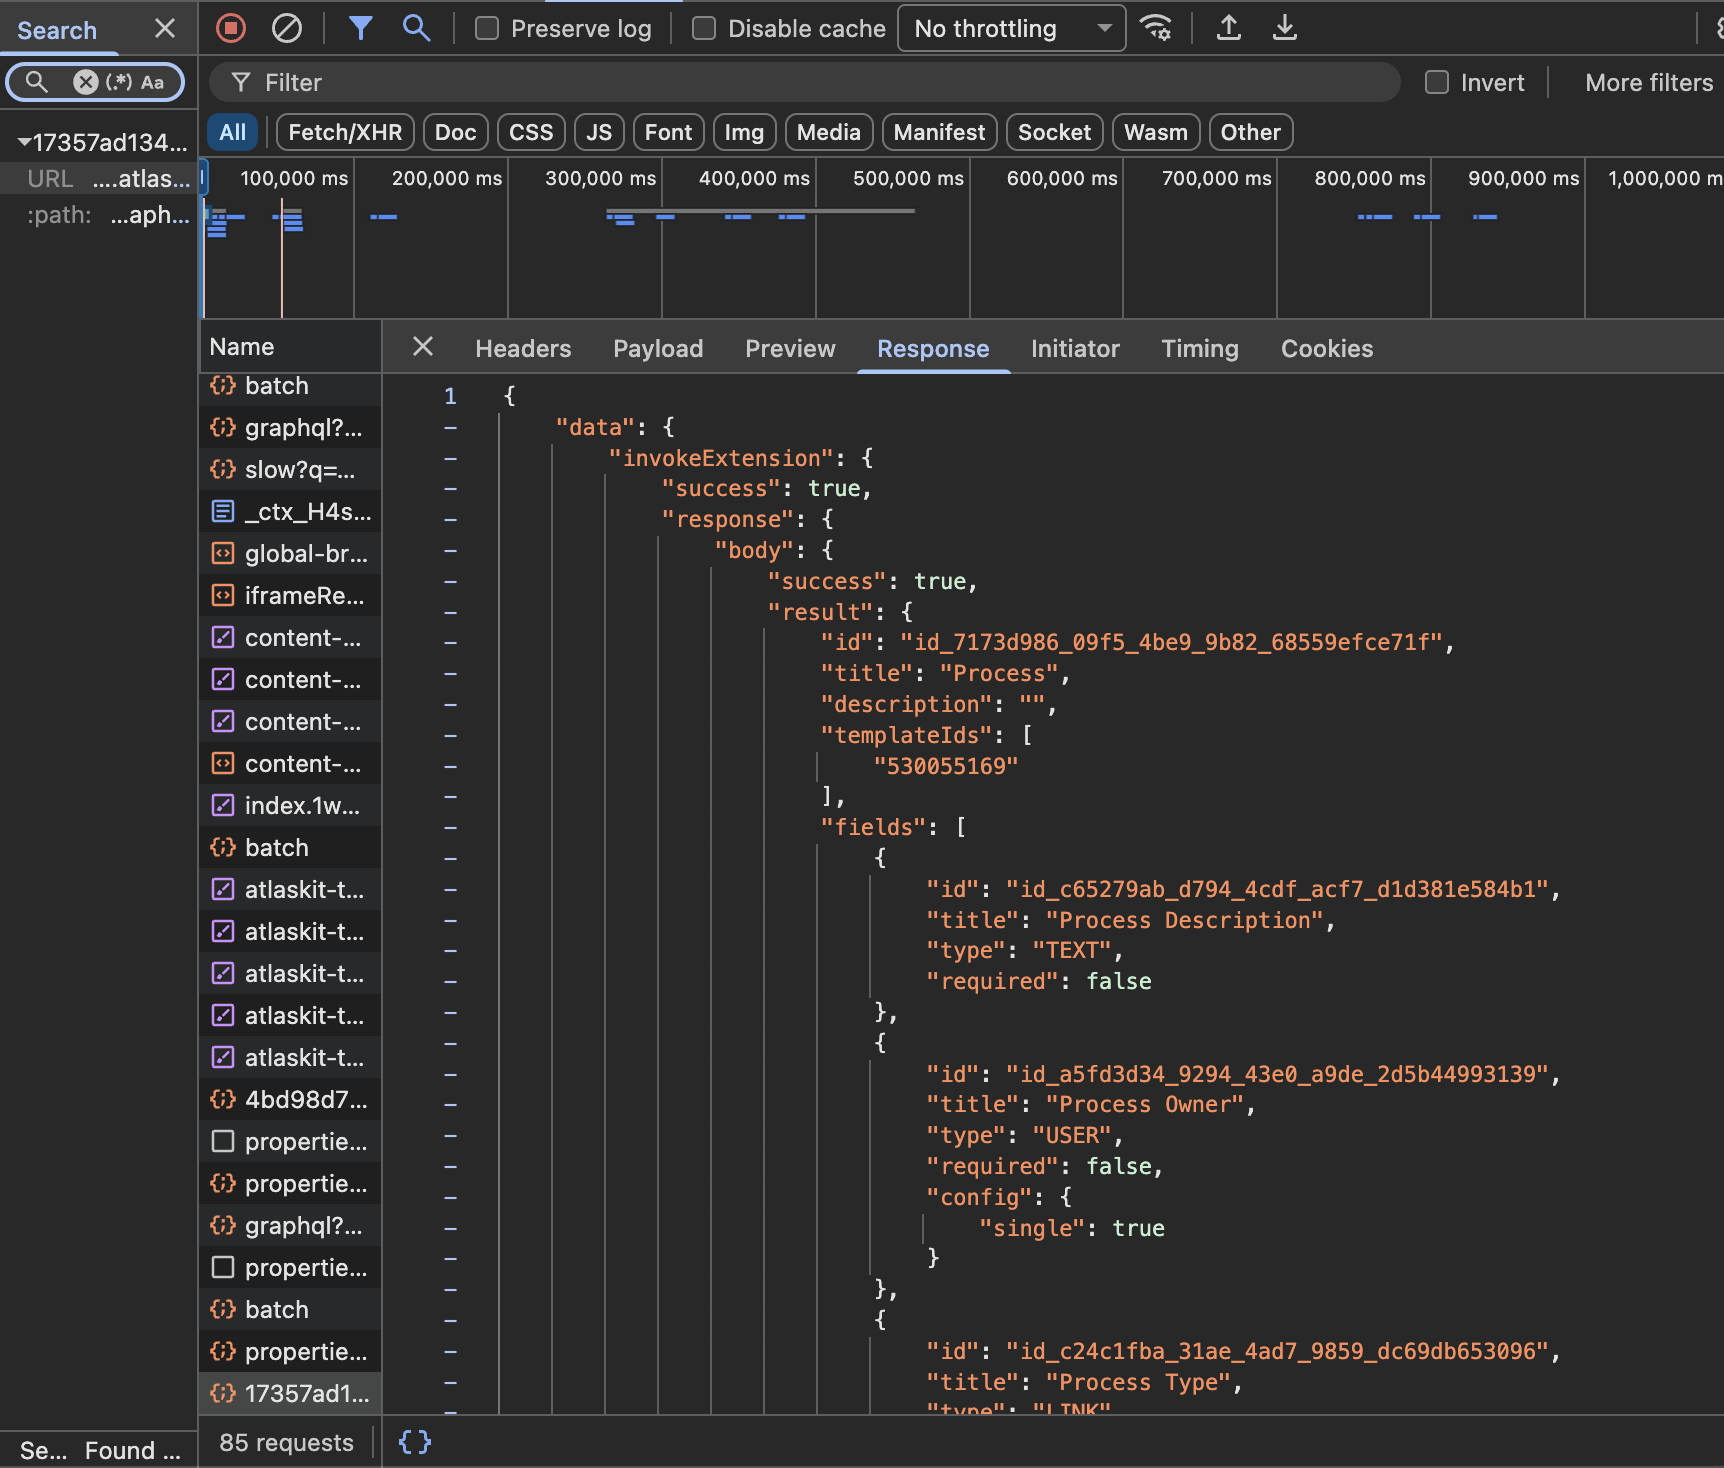
Image 4: Response tab (click to enlarge)
-
Example response:
{
  "data": {
    "invokeExtension": {
      "response": {
        "body": {
          "result": {
            "id": "id_<content-category-id>",
            "title": "Process",
            "fields": [
              { "id": "id_<field-id>", "title": "Process Owner", "type": "USER" }
            ]
          }
        }
      }
    }
  }
}
The following video shows the described workflow:
Reply
Step 2: Add IDs to the Workflow
-
Navigate to the Workflows Editor in the Workflows for Confluence app.
-
Select the workflow you want to edit.
-
Click on the Approval Node.
-
Scroll down to Advanced Configuration (only visible if Metadata is installed).
-
Add the IDs:
-
Category ID: Paste the ID from Step 1.
-
Field ID: Paste the field ID from Step 1.
-
Description: Give the field a friendly name (e.g., "Process Owner" as the original Metadata field name) - you will still be able to hover over the field once added to view the original IDs.
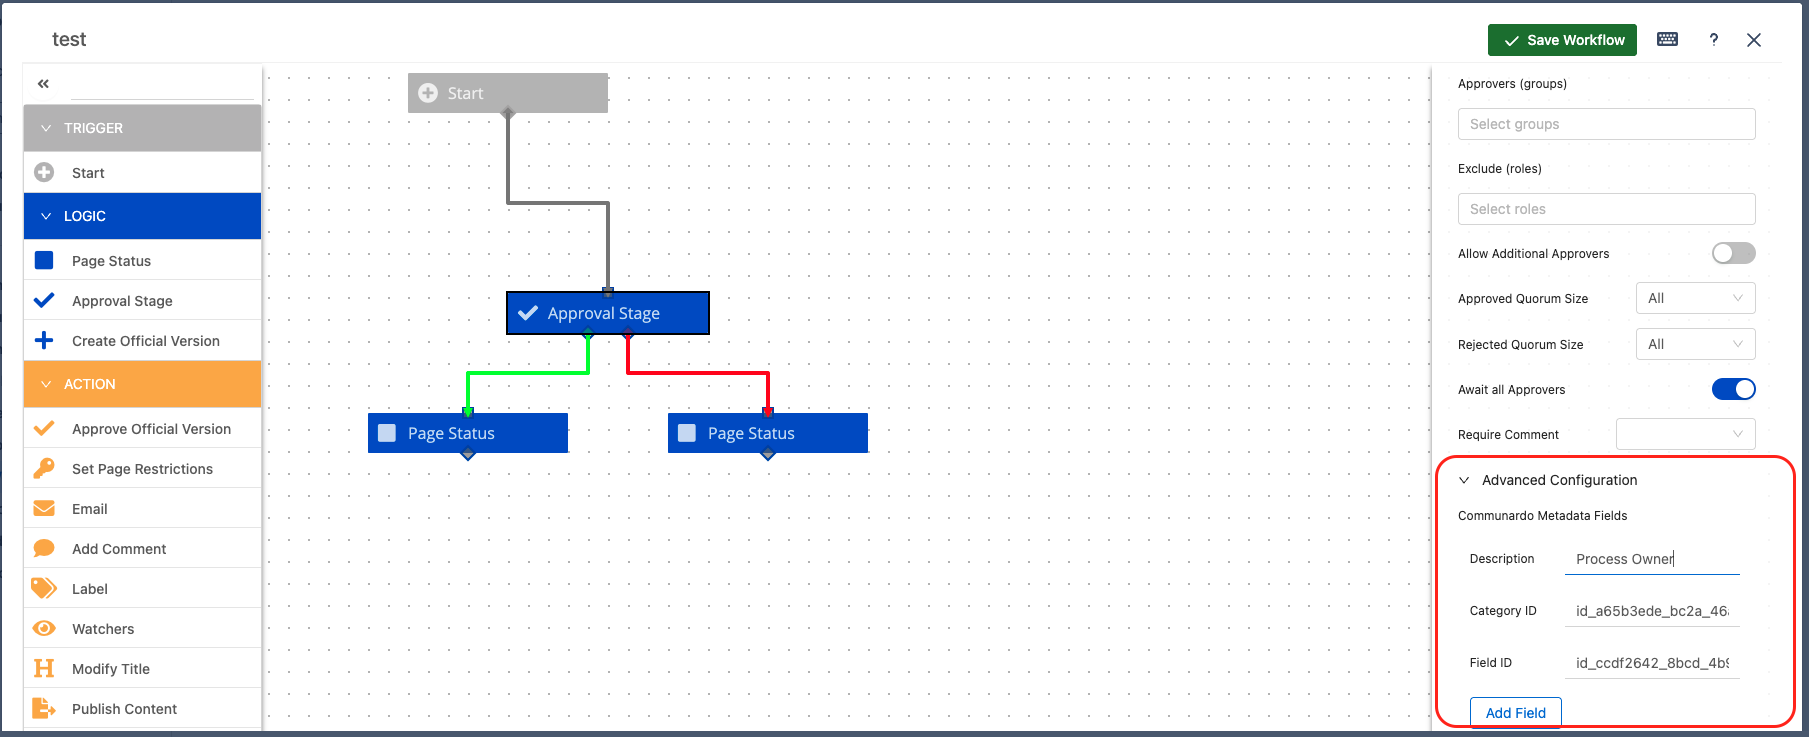
Image 5: Advanced Configuration panel (click to enlarge)
-
-
Save the workflow.
The Video below shows the workflow of Step 2:
As soon as you apply this workflow to a page with Process Metadata assigned, the page's Process Owner is automatically assigned as the page approver.
䷻ Limitations
-
Valid Values: The Metadata User field must have a value when you apply the workflow.
-
Static Assignment: The approver is set when the workflow starts. If you change the Metadata field after the workflow starts, the approver will not update automatically.
Need help?
If you have questions, please raise a support request.