
In the Apps admin section inside of the User Profiles configuration on the “Configuration of custom fields” tab you can manage your existing User Profiles for Jira custom fields or create new ones.
Create custom field
To create a new custom field, you can use either the “Create custom field” button or the “Click here to add one.” link.
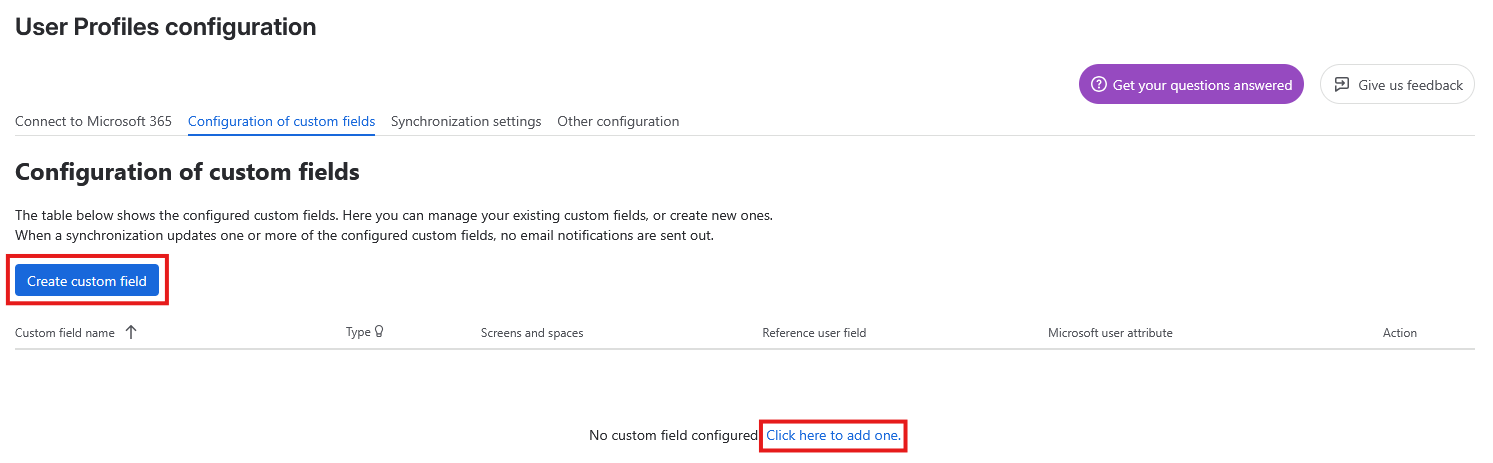
Clicking either the button or the link, the “Create custom field” dialog will open up. There you can provide a name for the custom field, choose a Microsoft user attribute from the list, and the reference user field identifying the user for whom the selected Microsoft user attribute will be displayed.
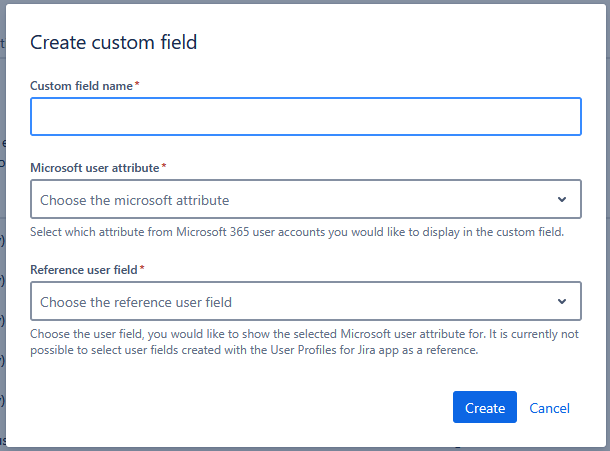
Available reference user fields
The following fields are supported as reference user fields:
-
Assignee
-
Reporter
-
Custom fields of type User Picker (single user)
-
But not fields created by our app that use Microsoft attribute Manager. Because of technical limitations, this is not supported.
-
You want to use fields not currently supported? Please and describe your use case.
Available Microsoft attributes
You can choose one of the following attributes:
-
Age group
-
Business phones
-
City
-
Company name
-
Consent provided for minor
-
Country
-
Created date time
-
Creation type
-
Deleted date time
-
Department
-
Display name
-
Employee hire date
-
Employee ID
-
Employee type
-
External user state
-
External user state change date time
-
Fax number
-
First name
-
IM addresses
-
Job title
-
Last name
-
Last password change date time
-
Legal age group classification
-
Mail
-
Mail nickname
-
Manager
-
Mobile phone
-
Object ID
-
Office location
-
On-premises distinguished name
-
On-premises domain name
-
On-premises immutable ID
-
On-premises last sync date time
-
On-premises SAM account name
-
On-premises security identifier
-
On-premises user principal name
-
Other emails
-
Password policies
-
Preferred data location
-
Preferred language
-
Proxy addresses
-
Refresh tokens valid from date time
-
Security identifier
-
Sign in sessions valid from date time
-
State or province
-
Street address
-
Usage location
-
User principal name
-
User type
-
ZIP or postal code
You want to use other Microsoft attributes? Please and describe your use case.
After you create a custom field
A new custom field is not available in any space until you link it to a field scheme. The "Create custom field" and "Edit custom field" dialogs remind you of this. Fields that are not linked to a space are not updated. Read Make custom fields available in spaces below to link the field.
Delete custom field
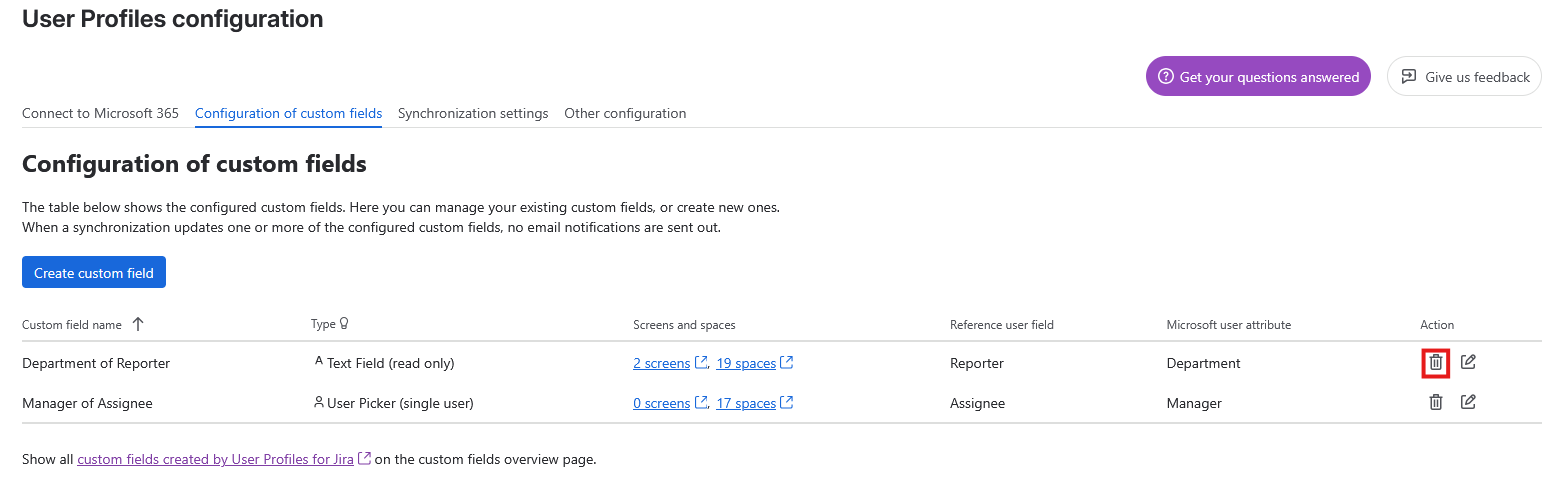
In the table of configured custom fields, you have the option of deleting a custom field by clicking the trash icon positioned in the “Action” column.
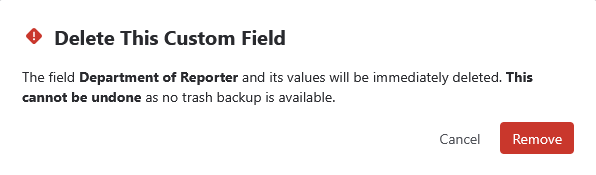
When you click the trash icon a confirmation dialog will pop up emphasizing that the deletion of this custom field will delete its values and that this is irreversible.
Edit custom field
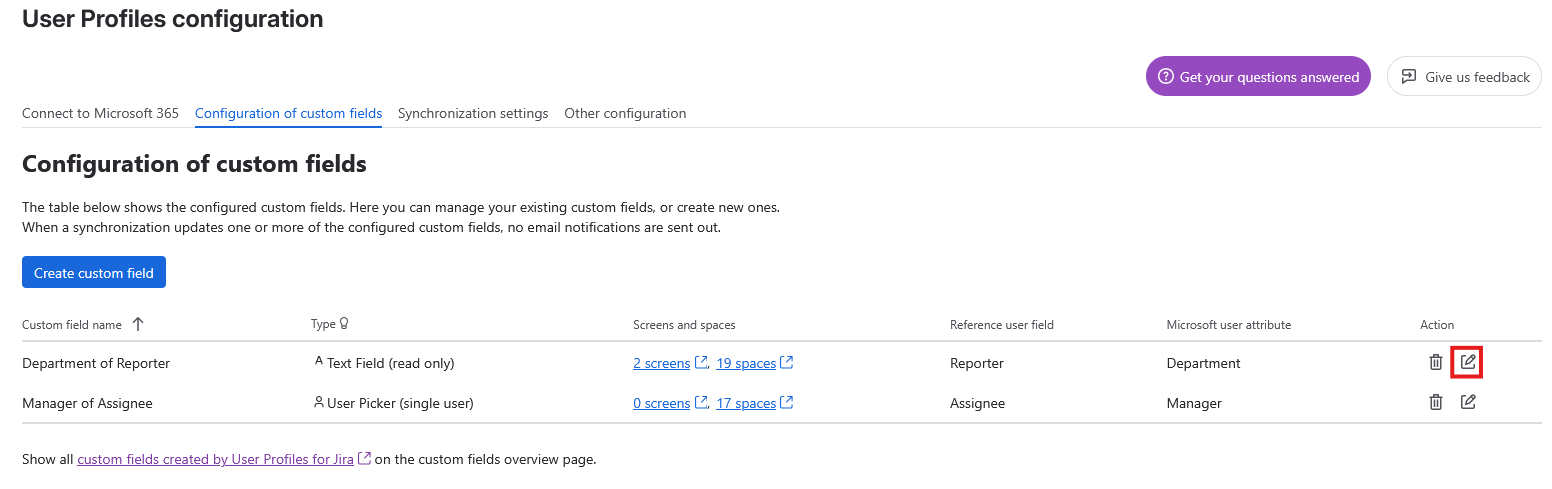
In the table of configured custom fields, you have the option of editing a custom field by clicking the pen icon positioned in the “Action” column.
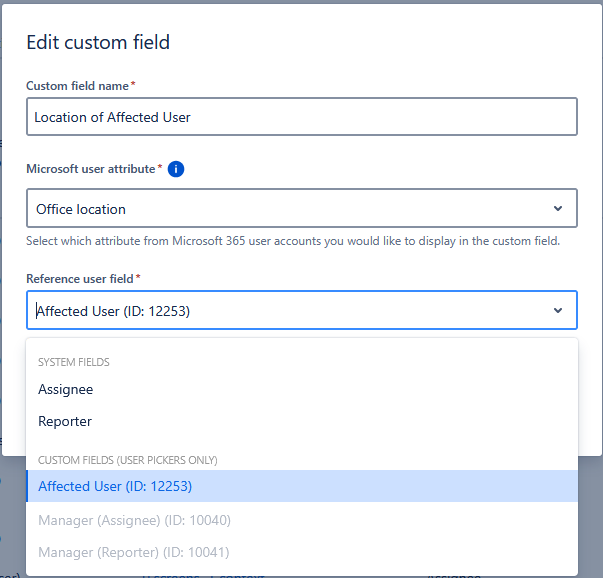
As soon as you clicked on the edit icon, the “Edit custom field” dialog will open up. Once it is opened you can change the name for the custom field, choose one of the different Microsoft attributes provided, and also change the reference to the user field identifying the user for whom the selected Microsoft user attribute will be displayed.
Assignment of custom fields to screens
Once you are finished with the creation of the custom fields you can assign these custom fields to the desired screens.
If you want to see the custom fields in issues you need to add them to the screens that are used for “view issue” operations in your spaces.
To make custom fields of type “User Picker” or “Date Time Picker” read-only, simply remove them from the screens used for “edit issue” operations in your spaces.
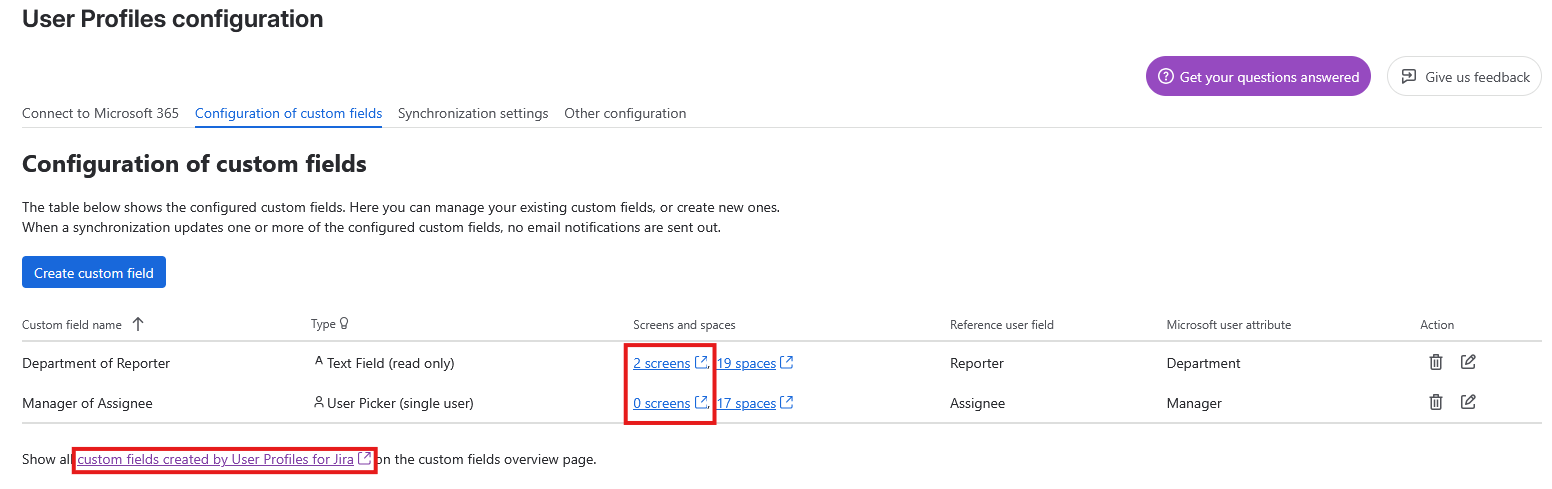
To get to the screen configuration of a custom field, you can use the link on the number of screens in the Screens and spaces column. You can also use the link below the table. It opens the Jira custom field overview, filtered by the description of the custom fields.
Make custom fields available in spaces
Jira uses field schemes to decide in which spaces a custom field is available. User Profiles for Jira updates a custom field only in the spaces that are linked to the field. It does not update work items in other spaces.
Custom fields that you create with the app are not linked to a field scheme automatically. You must link them yourself with the standard Jira settings. For more information, see Atlassian's documentation What are field schemes?
Find fields that are not linked to a space
The app shows you which fields need your action:
-
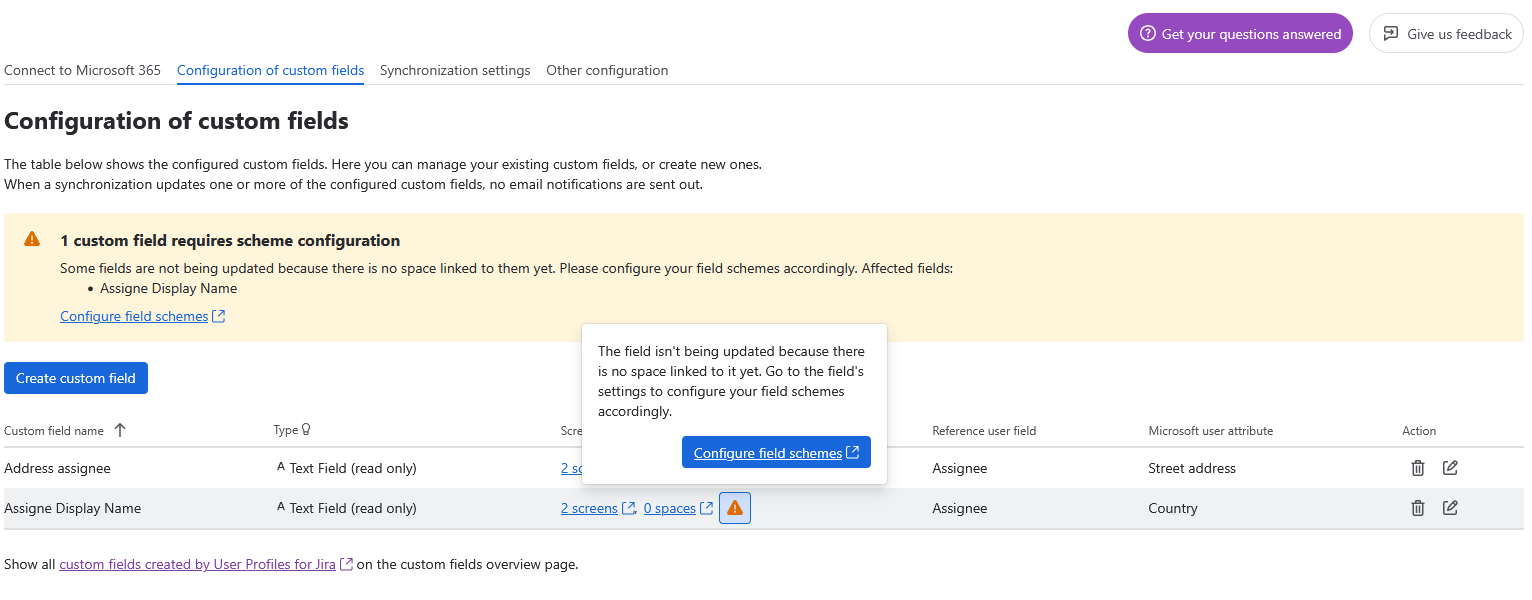
Banner above the "Create custom field" button. It shows how many custom fields need a scheme configuration and lists their names. Click Configure field schemes to open the field scheme overview in Jira.
-
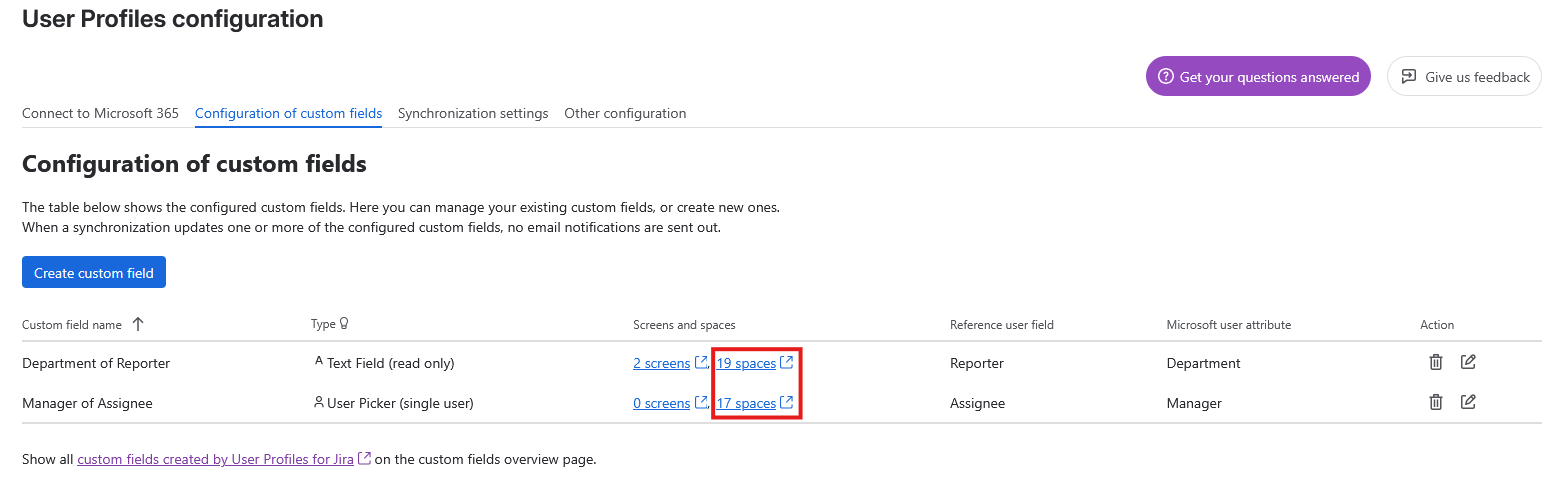
Warning icon in the "Screens and spaces" column. It appears in the row of every field that has no space (0 spaces). Click the icon to read the note. Click Configure field schemes in the note to open the settings of this field.
Link a custom field to spaces
-
Click the link with the number of spaces (for example "2 spaces") in the Screens and spaces column. Jira opens the field scheme settings of this field.
-
Configure field schemes of that field accordingly.
Limit a custom field to some spaces
To make a custom field available in some spaces only, add it only to the field schemes of those spaces. The app then stops updating issues in all other spaces.
You can also hide a field in a space if you remove it from the screens of the space, or if you remove the permission to edit custom fields for our app in that space. However, we recommend to leverage field schemes instead. When the field is not linked to a space, our app does not update the issues of that space. Updates are then faster in the spaces where you want them.
Sites that do not support field schemes yet
On a site that does not support field schemes yet, custom field contexts are used to make the field available in spaces. A custom field that you create with the app has a global context. This makes the field available in all spaces and on all work types.
To make a field available for some work types or spaces only, change the context. The app honours this configuration and stops updating issues that the context excludes.
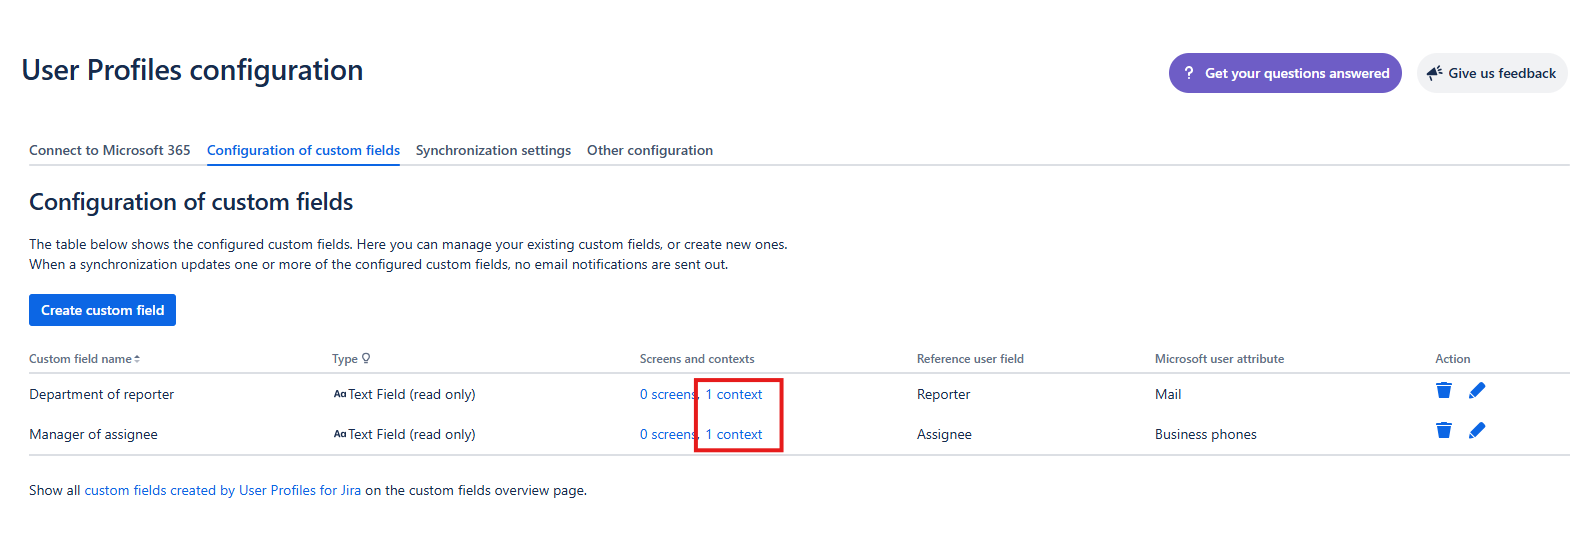
If a field has no context, the app does not update it. The Screens and contexts column then shows a warning icon.
You can adjust the context by following these steps:
-
Click the context link in the Screens and contexts column on the Configuration of custom fields tab.
-
If there is no context configured for your custom field you can add a new one
-
If there is a context configured you can adjust the existing one
You can also hide a field in a space if you remove it from the screens, or if you remove the permission to edit custom fields for our app. We recommend contexts instead, because the app then updates the issues faster in the spaces that you want.
For more information regarding contexts please check out Atlassian documentation here.