
Use this procedure to have the Viewtracker Agent deliver a report on a schedule, for example, a weekly list of the most viewed pages published to a Confluence page. A scheduled report also removes the waiting time for reports that cover large data sets.
Because a report can take longer than a single automation step allows, the setup uses two flows connected by a webhook. The first flow receives the finished report and delivers it. The second flow starts the report on your schedule.
Before you begin
-
Required access: You can create flows in the Global Automation or in a Space's Automation.
-
The Viewtracker Agent is available in your Confluence Cloud site.
Create the receiving flow
This flow takes the agent's response and writes it to the destination you choose.
-
In Automation, create a new flow.
-
Select the trigger Incoming webhook.
.png?cb=350029e3b085790cfc5e57ea9e4917eb)
Image 1: Incoming webhook (click to enlarge) Note: The webhook URL and secret appear only after you save the flow, and you can save a flow only after you add at least one action.
-
Add the action Use agent.
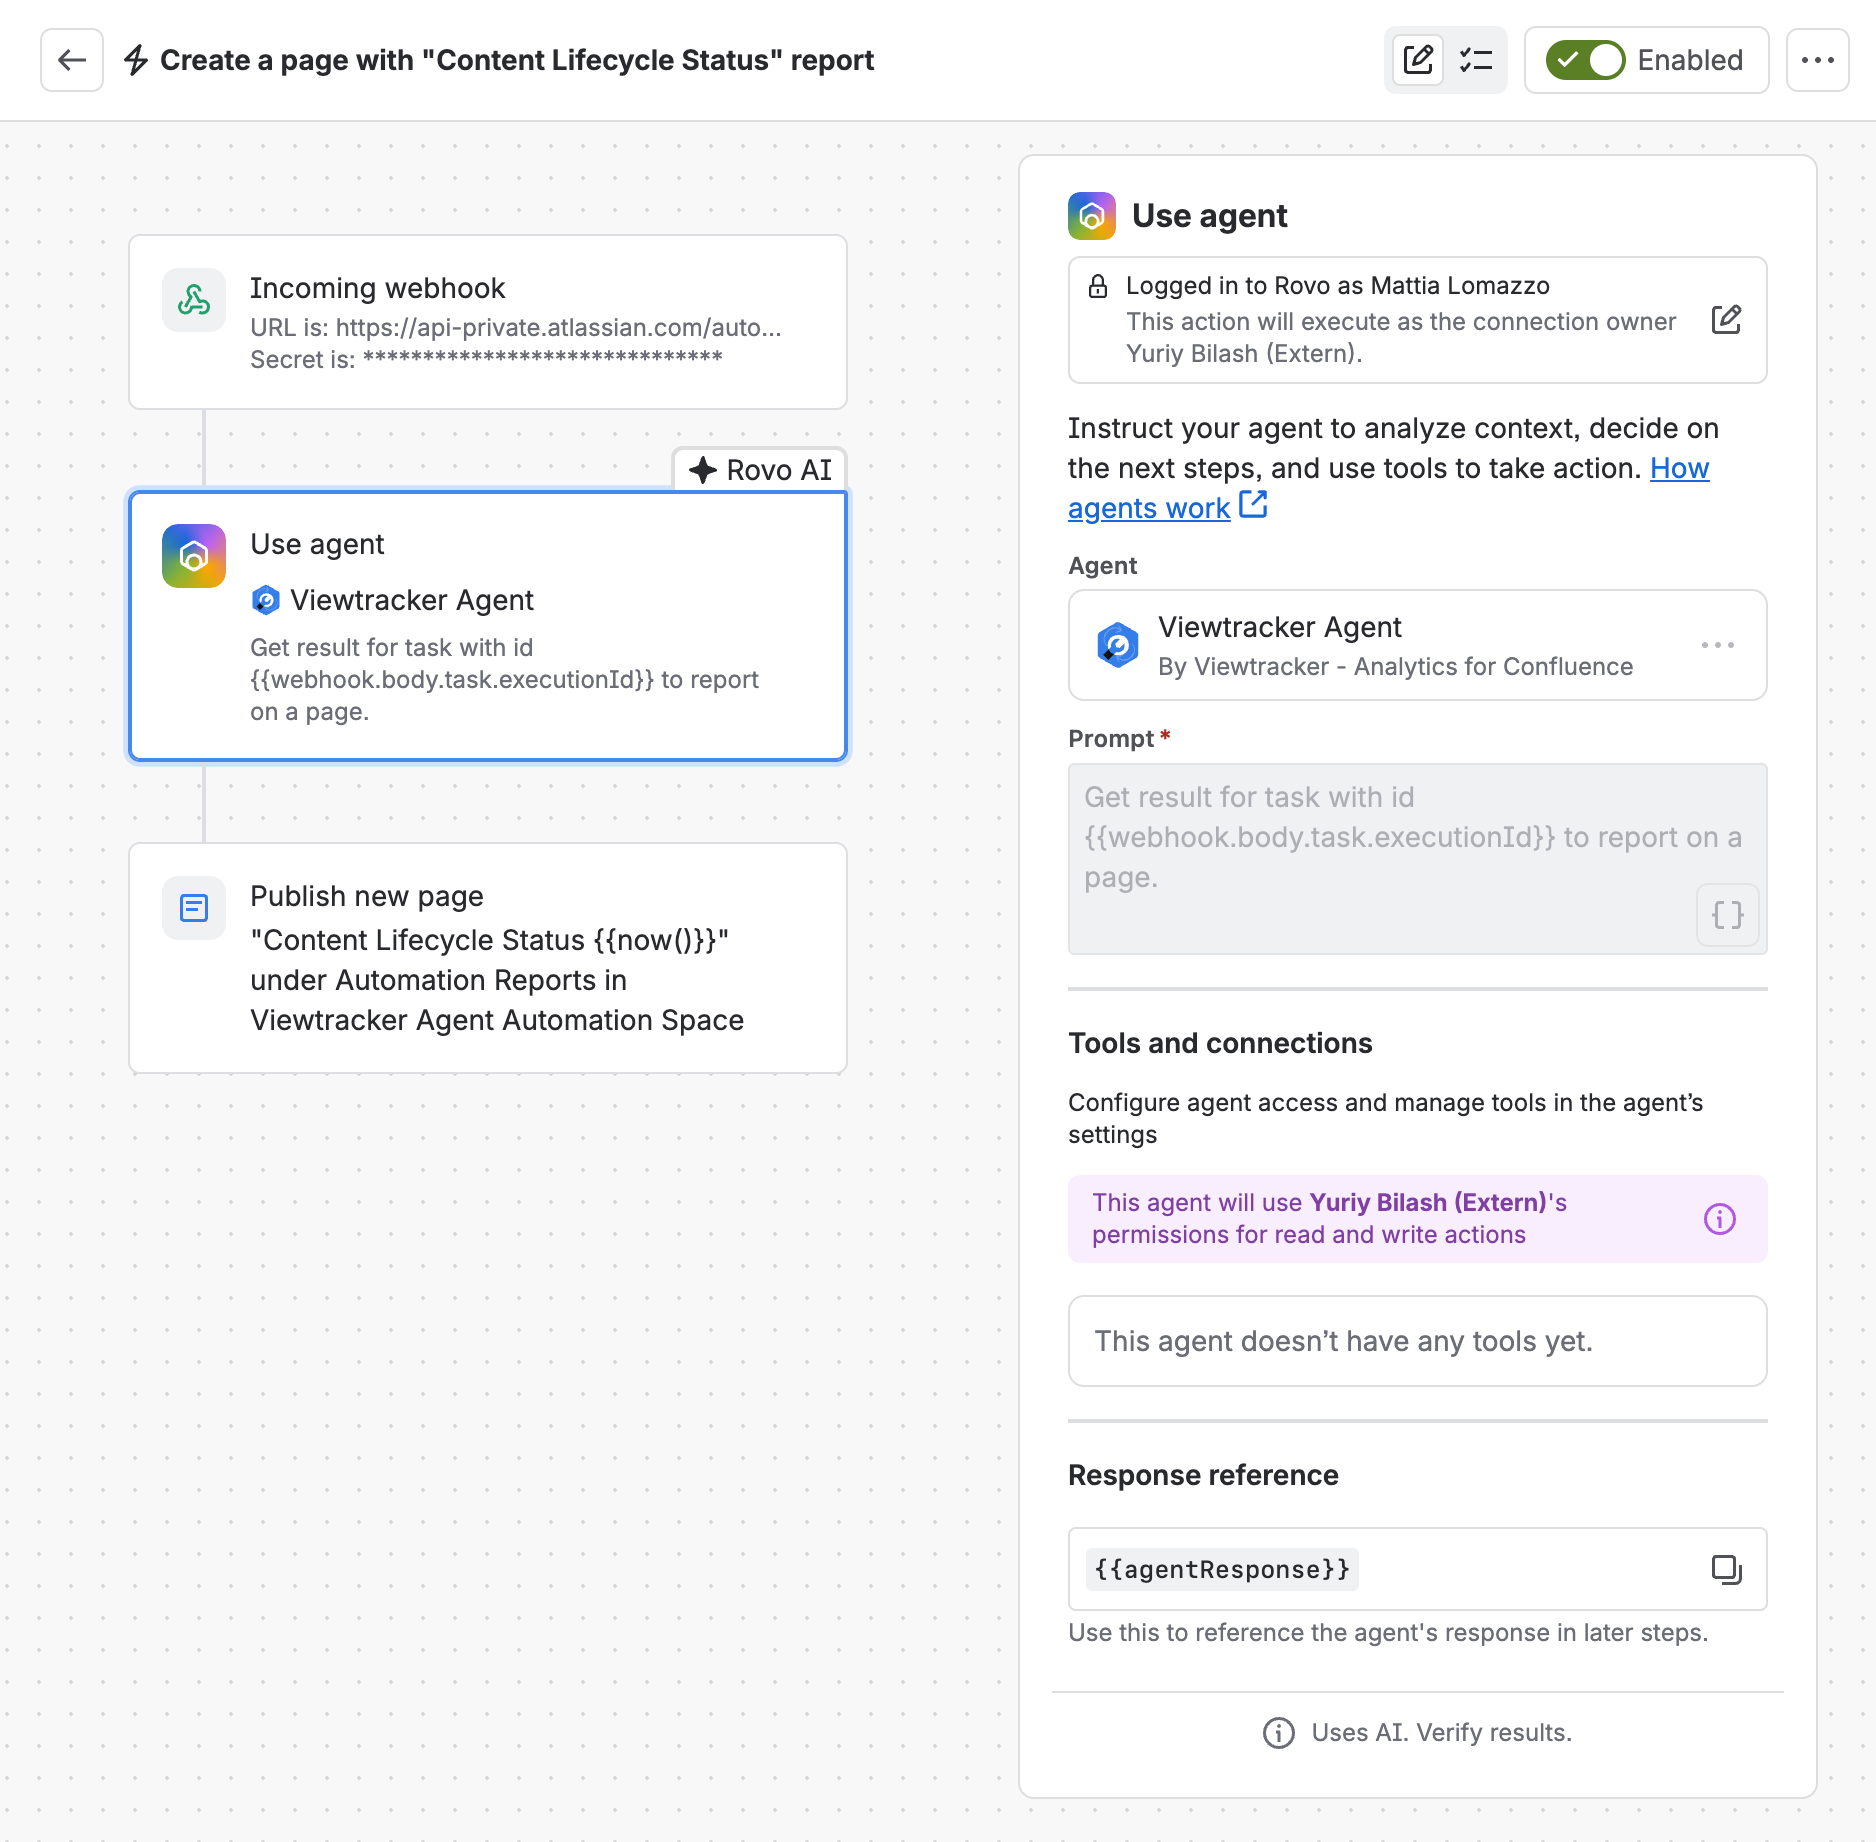
Image 2: Use agent (click to enlarge) -
Select the agent
Viewtracker - Analytics for Confluence Agent. -
Enter the prompt
Get the result for the task with the ID {{webhook.body.task.executionId}}. -
Set the response reference to
{{agentResponse}}. -
Add a second action for the delivery and set the report as its content, for example:
-
Publish new page: Set the page body to
{{agentResponse}}. -
Send customized email: Set the email body to
{{agentResponse}}. -
Create a work item in Jira: Set the description to
{{agentResponse}}.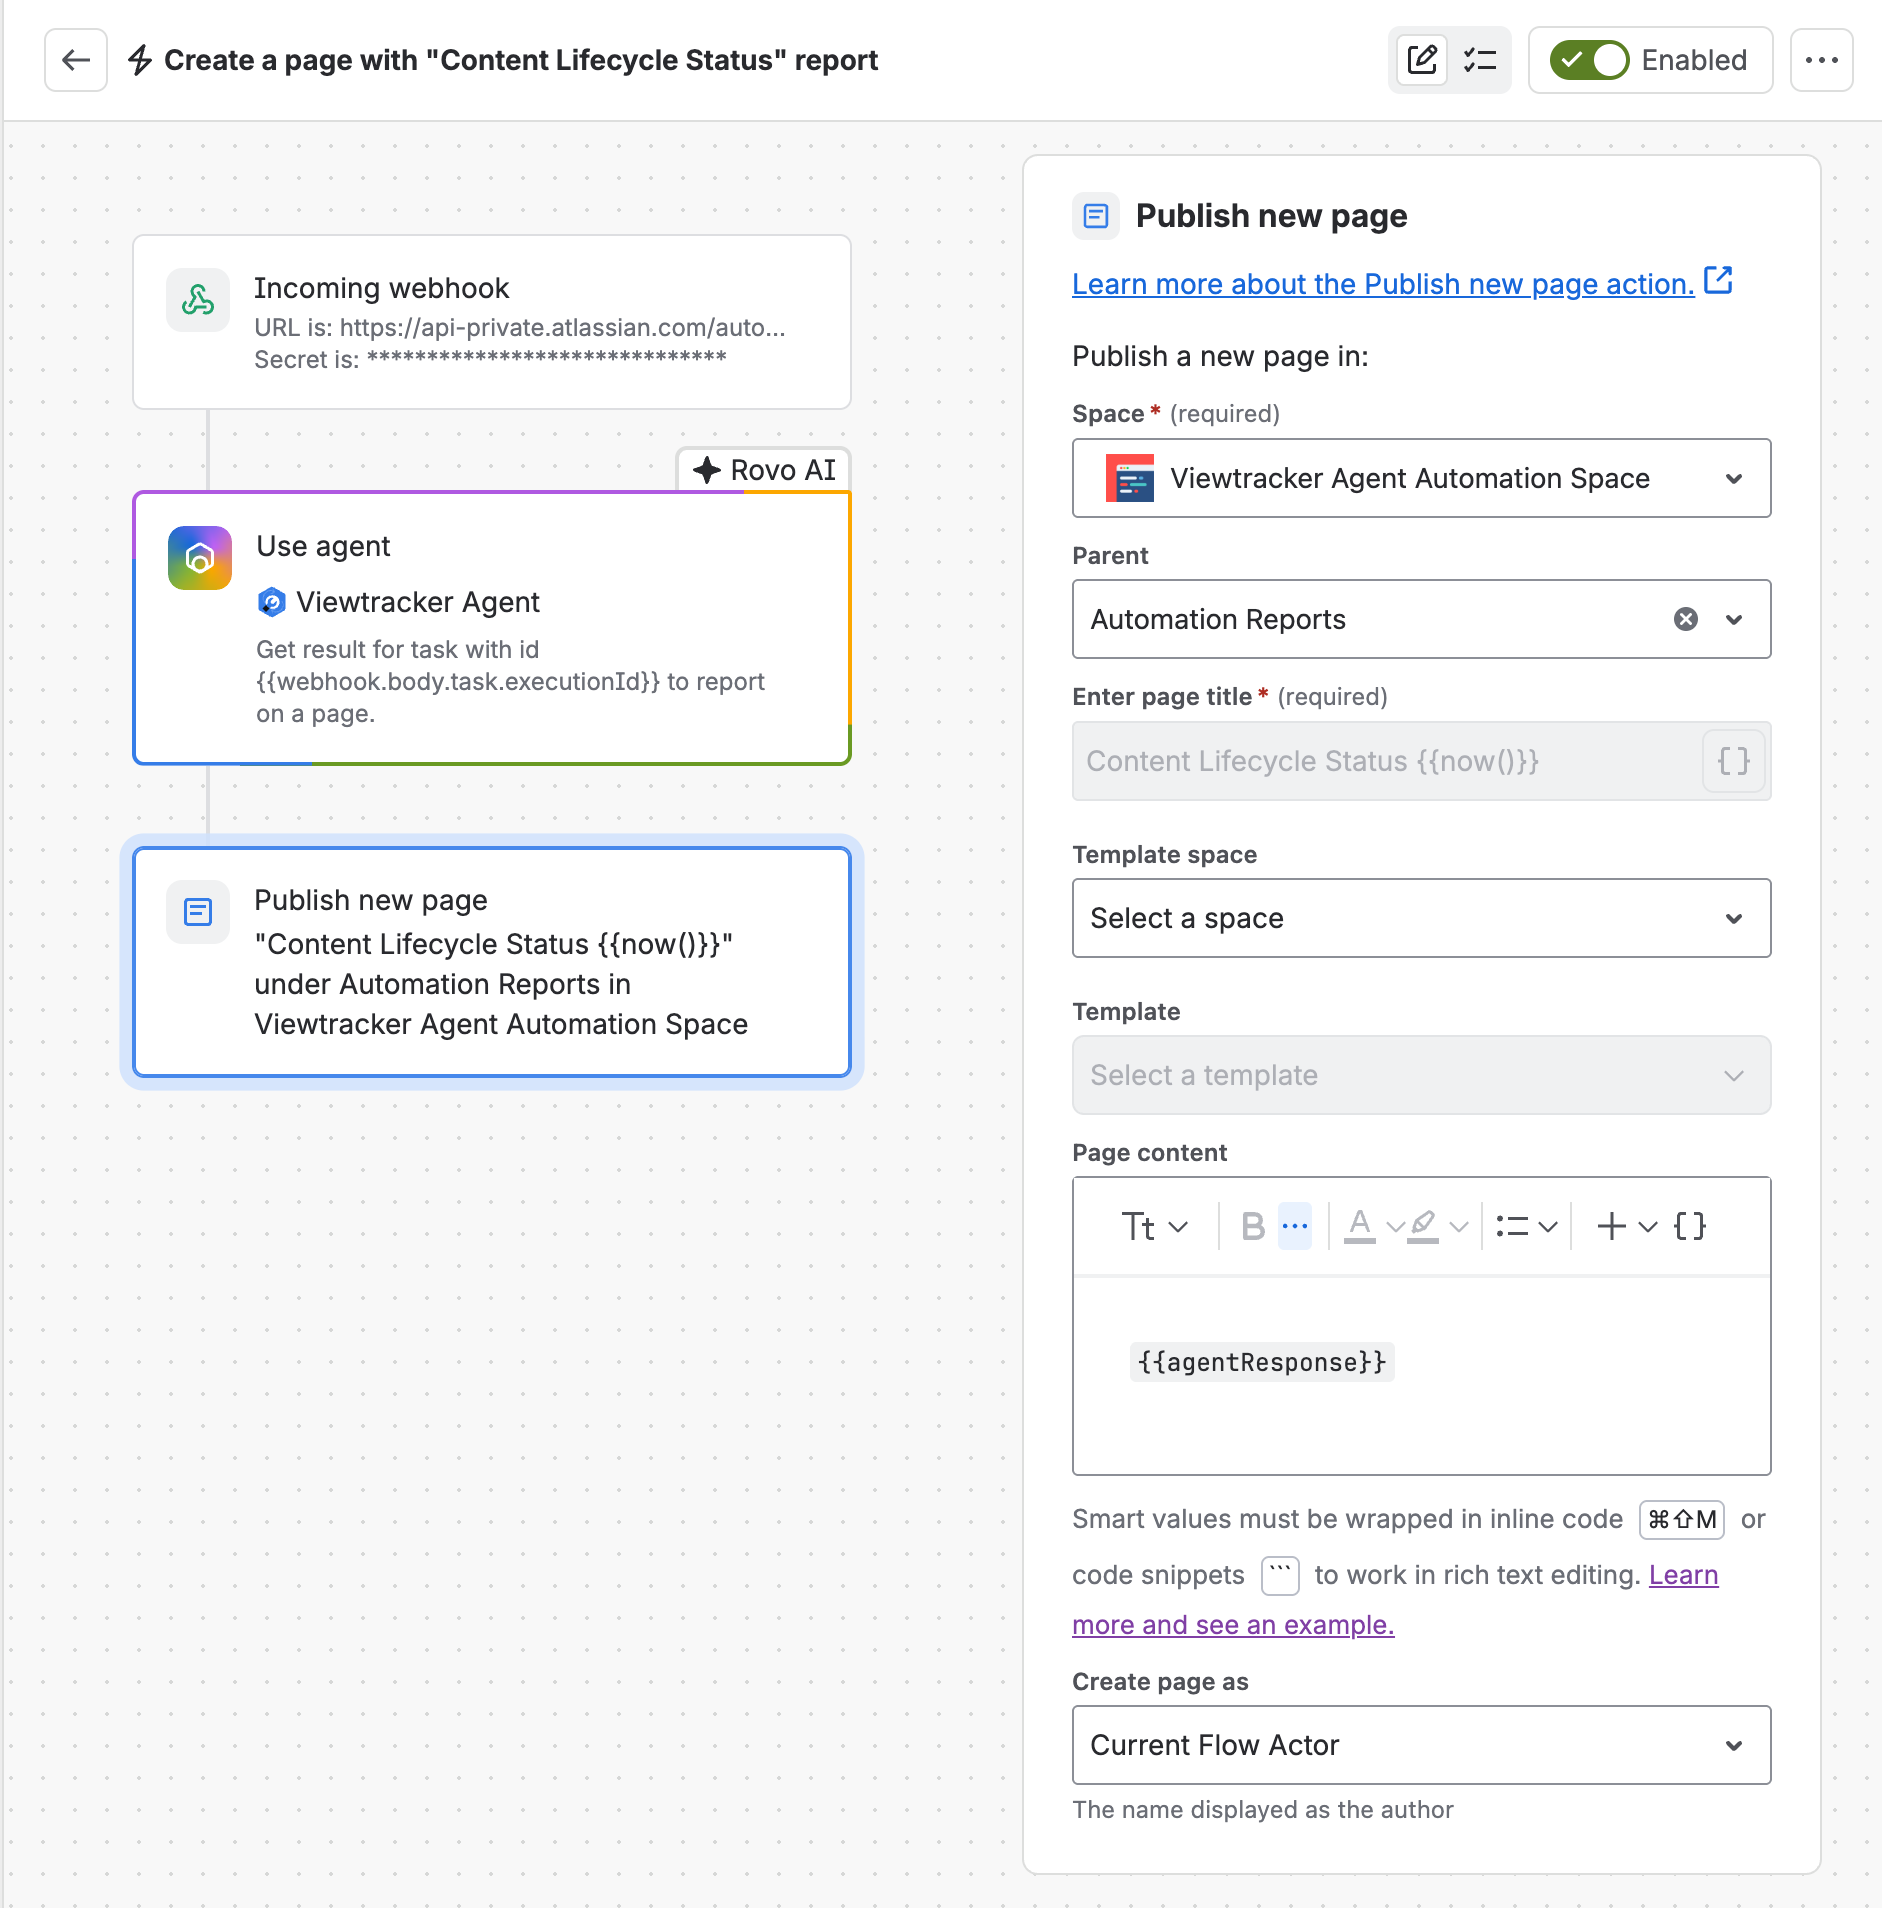
Image 3: Add second action (click to enlarge)
-
-
Save and enable the flow.
-
Copy the webhook URL and the webhook secret.
For other properties you can use in the delivery step, see the Atlassian documentation on automation smart values for Rovo agents.
Create the scheduling flow
This flow runs on your schedule and asks the agent for the report.
-
Create a second flow.
-
Select the trigger Scheduled and define the frequency, for example, the first day of the month at 9 am.
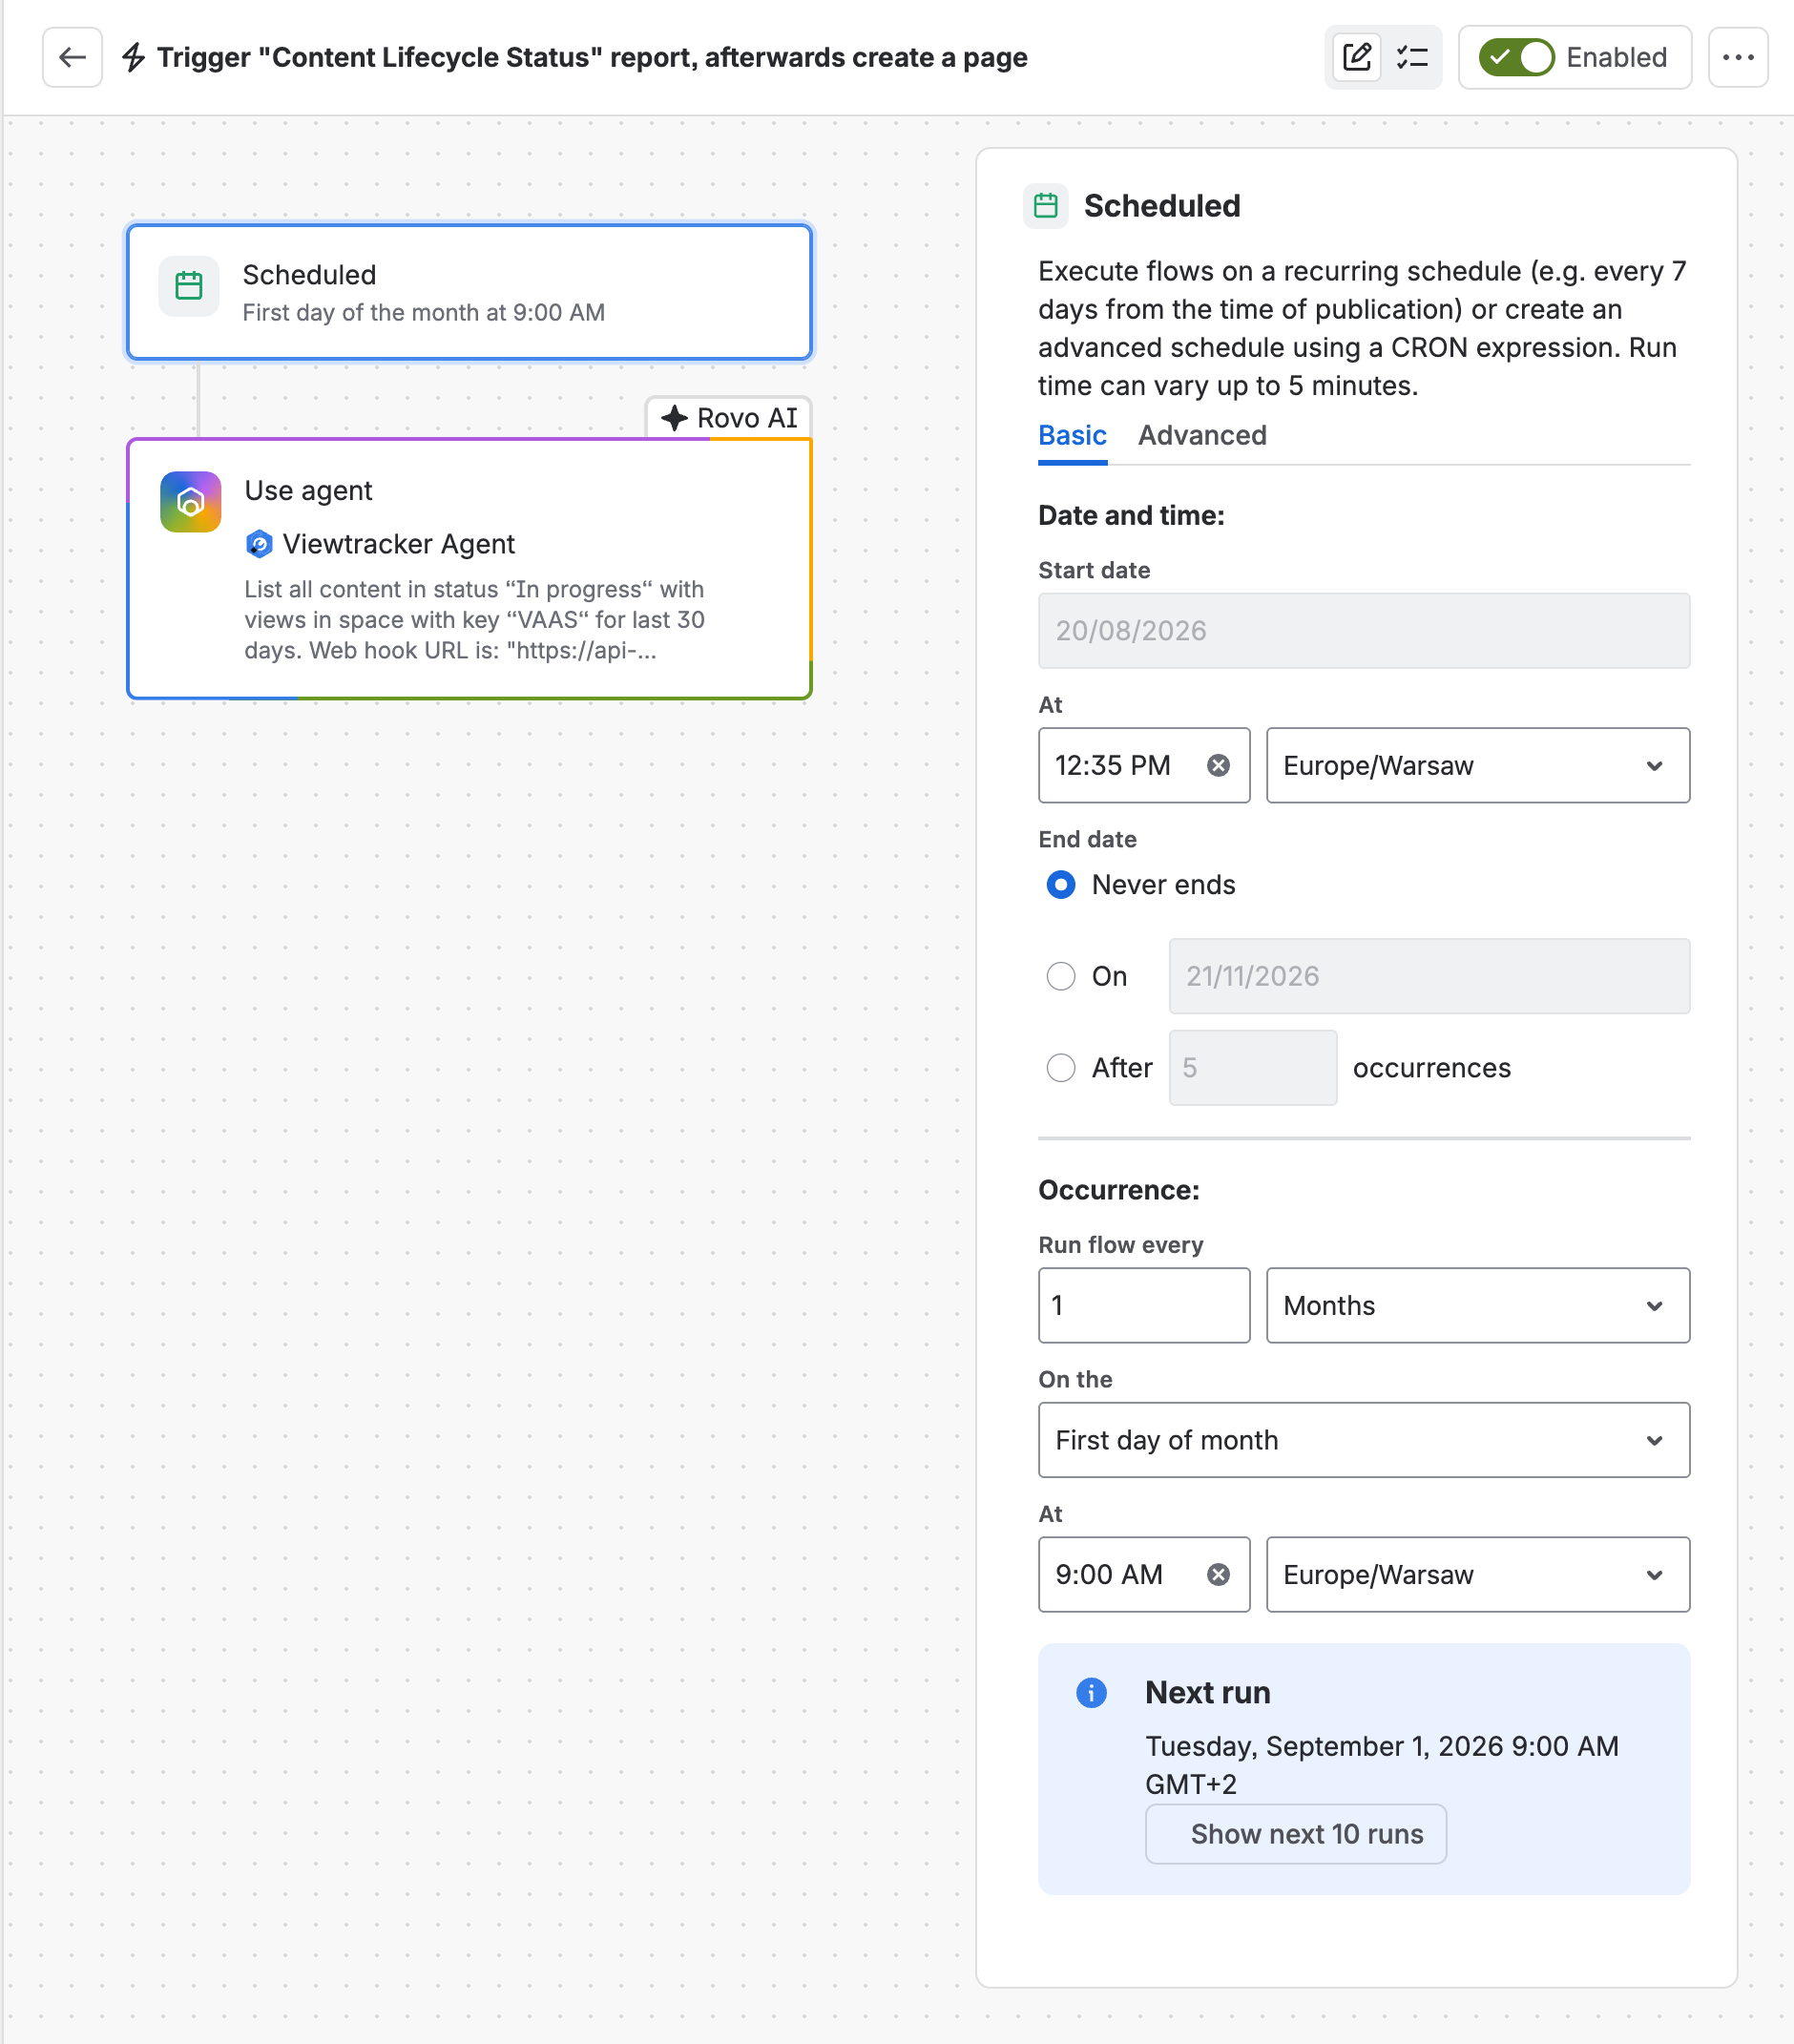
Image 4: Select Scheduled (click to enlarge) -
Add the action Use agent.
-
Select the agent
Viewtracker - Analytics for Confluence Agent. -
Enter the report request as the prompt, for example: "List the top 10 most viewed pages in the HR space for the last 7 days, to report on a page".
-
Add the webhook URL and the webhook secret from the receiving flow to the same prompt field. Example prompt:
"List the top 10 most viewed pages in the HR space for the last 7 days, to report on a page. Webhook URL: https://automation.atlassian.com/..., Secret: your-secret-key" -
Set the response reference to
{{agentResponse}}.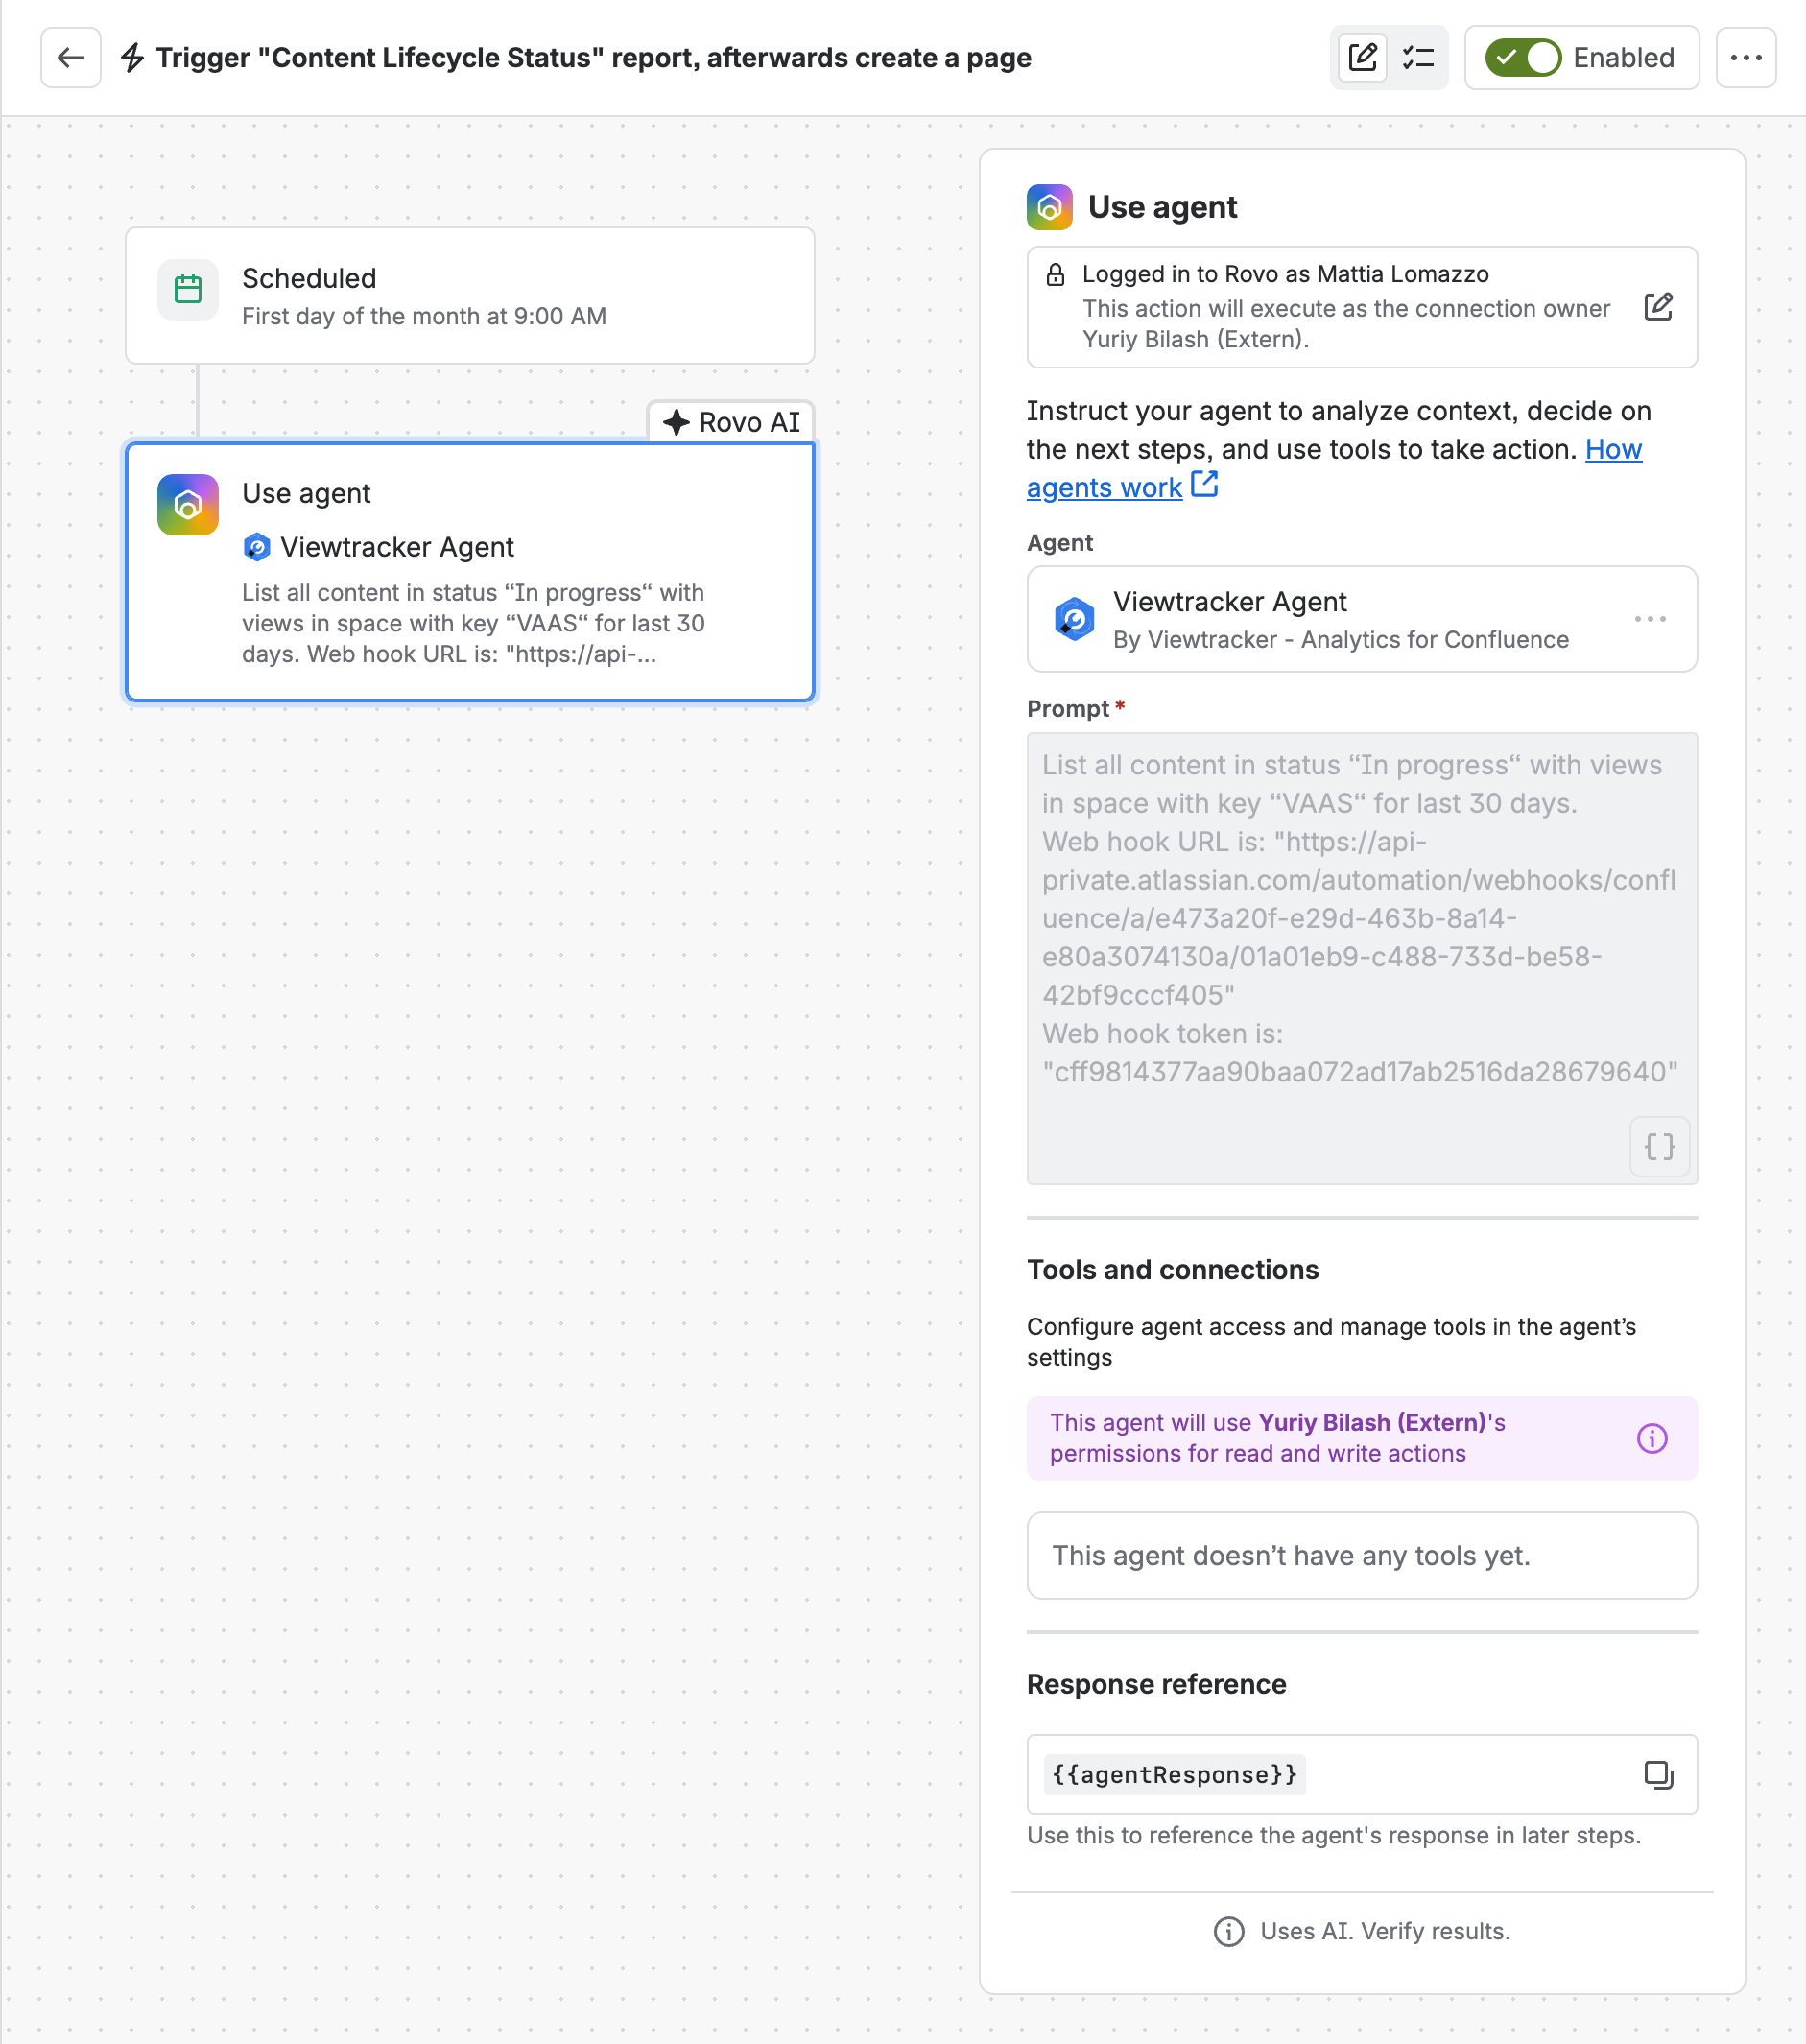
Image 5: Use agent (click to enlarge) -
Save and enable the flow.
-
Run a test and check the destination.
At the scheduled time, the agent generates the report and the receiving flow publishes it to the destination you configured.
Write the prompt for an automation
In an automation, the agent cannot ask you for missing information. Name every parameter you care about: Space or content, date range, content type, sorting, number of results, and filters.