
Confluence Cloud metadata lets admins define globally available Content Categories. Each category has a name, an optional description, and one or more Metadata fields. A Content Category can link to one or more Confluence page templates, or none.
When creating a new Confluence page, you can use a linked template to automatically assign the category, or assign it manually if you don't use a template or the template isn't linked to a content category.
1️⃣ Assign a Content Category
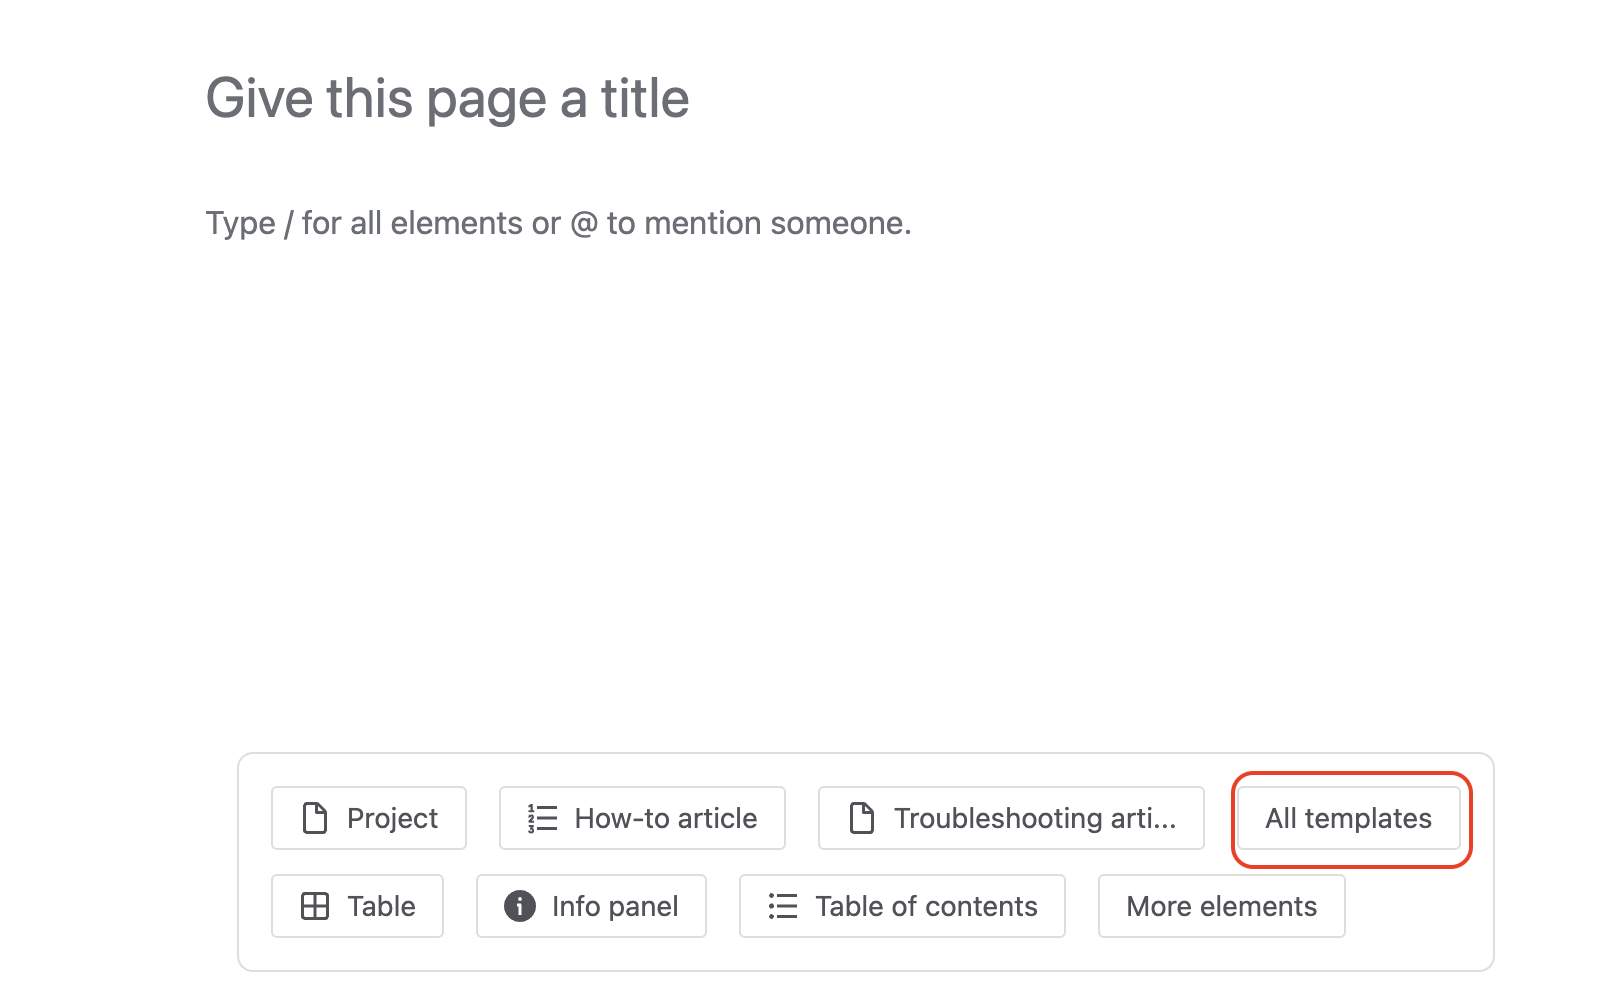
At the bottom of the Confluence editor when creating a new page, there are some templates listed and also the option “All templates”. Click “All templates” to open the templates selector.
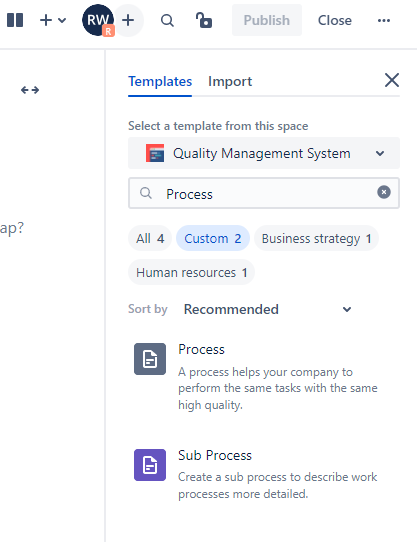
The template selector opens on the right side of the page editor. It also lists templates linked to a Content Category. Since linked templates are usually named after the category, you can find them easily. Use the search field at the top or one of the other filters to find it even faster.
After you select the Content Category template, a dialog will pop up that lets you enter values for the Category's Metadata fields. As soon as you save the dialog, the Content Category will be assigned to the page, and the Metadata values will be stored.
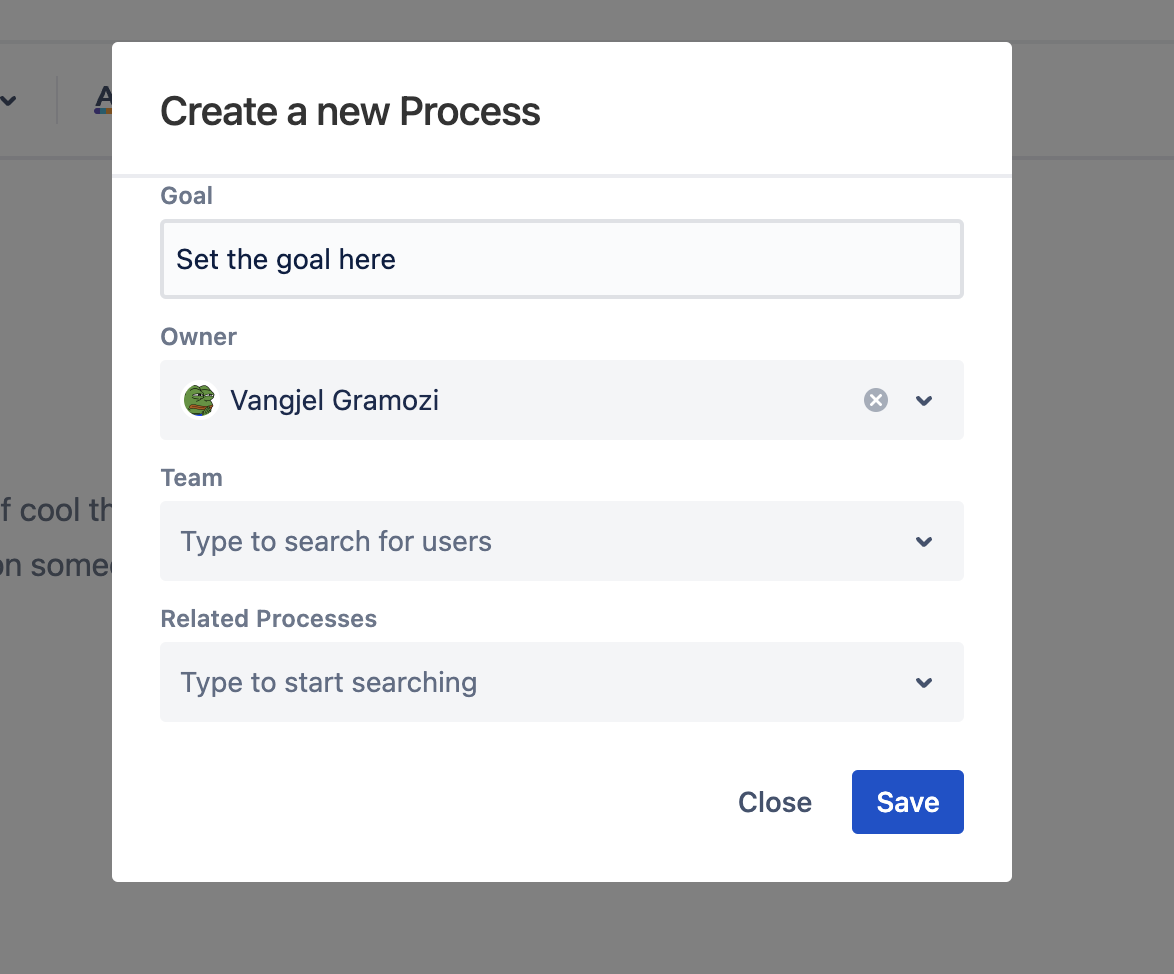
In case you prefer to focus on the page content first, you can also close the dialog right away. The Content Category will still be assigned, and you can fill the Metadata later as described in the next section.
If a Content Category has no linked template, you can assign it manually in the editor's Metadata panel.
2️⃣ Edit Metadata while creating the page
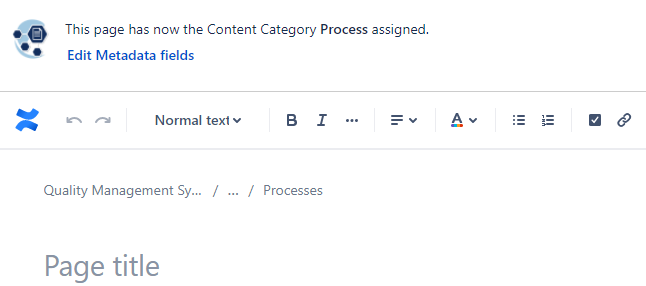
After assigning the Content Category to the new page, you will see a small panel above the editor that shows the Category name and lets you edit the Metadata values.
3️⃣ View and edit Metadata after publishing the page
After you publish the page, everyone with appropriate access can view and edit the Metadata. For more details, see View and edit Metadata.