
The SharePoint Online List macro allows you to display SharePoint lists and document libraries directly on a Confluence page. It supports most SharePoint list types, including generic lists and document libraries.
Before you start
Keep in mind that the SharePoint Online List macro displays content based on the viewer’s SharePoint permissions. Users will only see lists, folders and items they are authorized to access in SharePoint.
Special SharePoint list types, such as calendars and tasks, are displayed as standard lists in Confluence. The underlying SharePoint data is not changed.
Add the macro
-
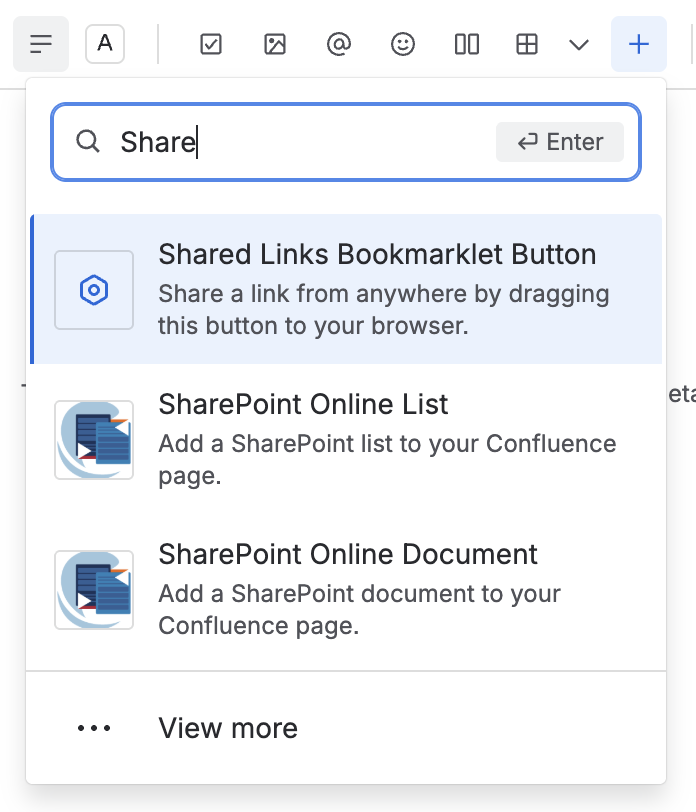
In the Confluence editor, open the macro browser by typing
/or clicking the + icon (URL pasting is not supported). -
Search for SharePoint Online List and select it.
-
The macro editor dialog will open.
Configure the macro
The macro editor features a side navigation menu to guide you through the selection and configuration process.
Select a list
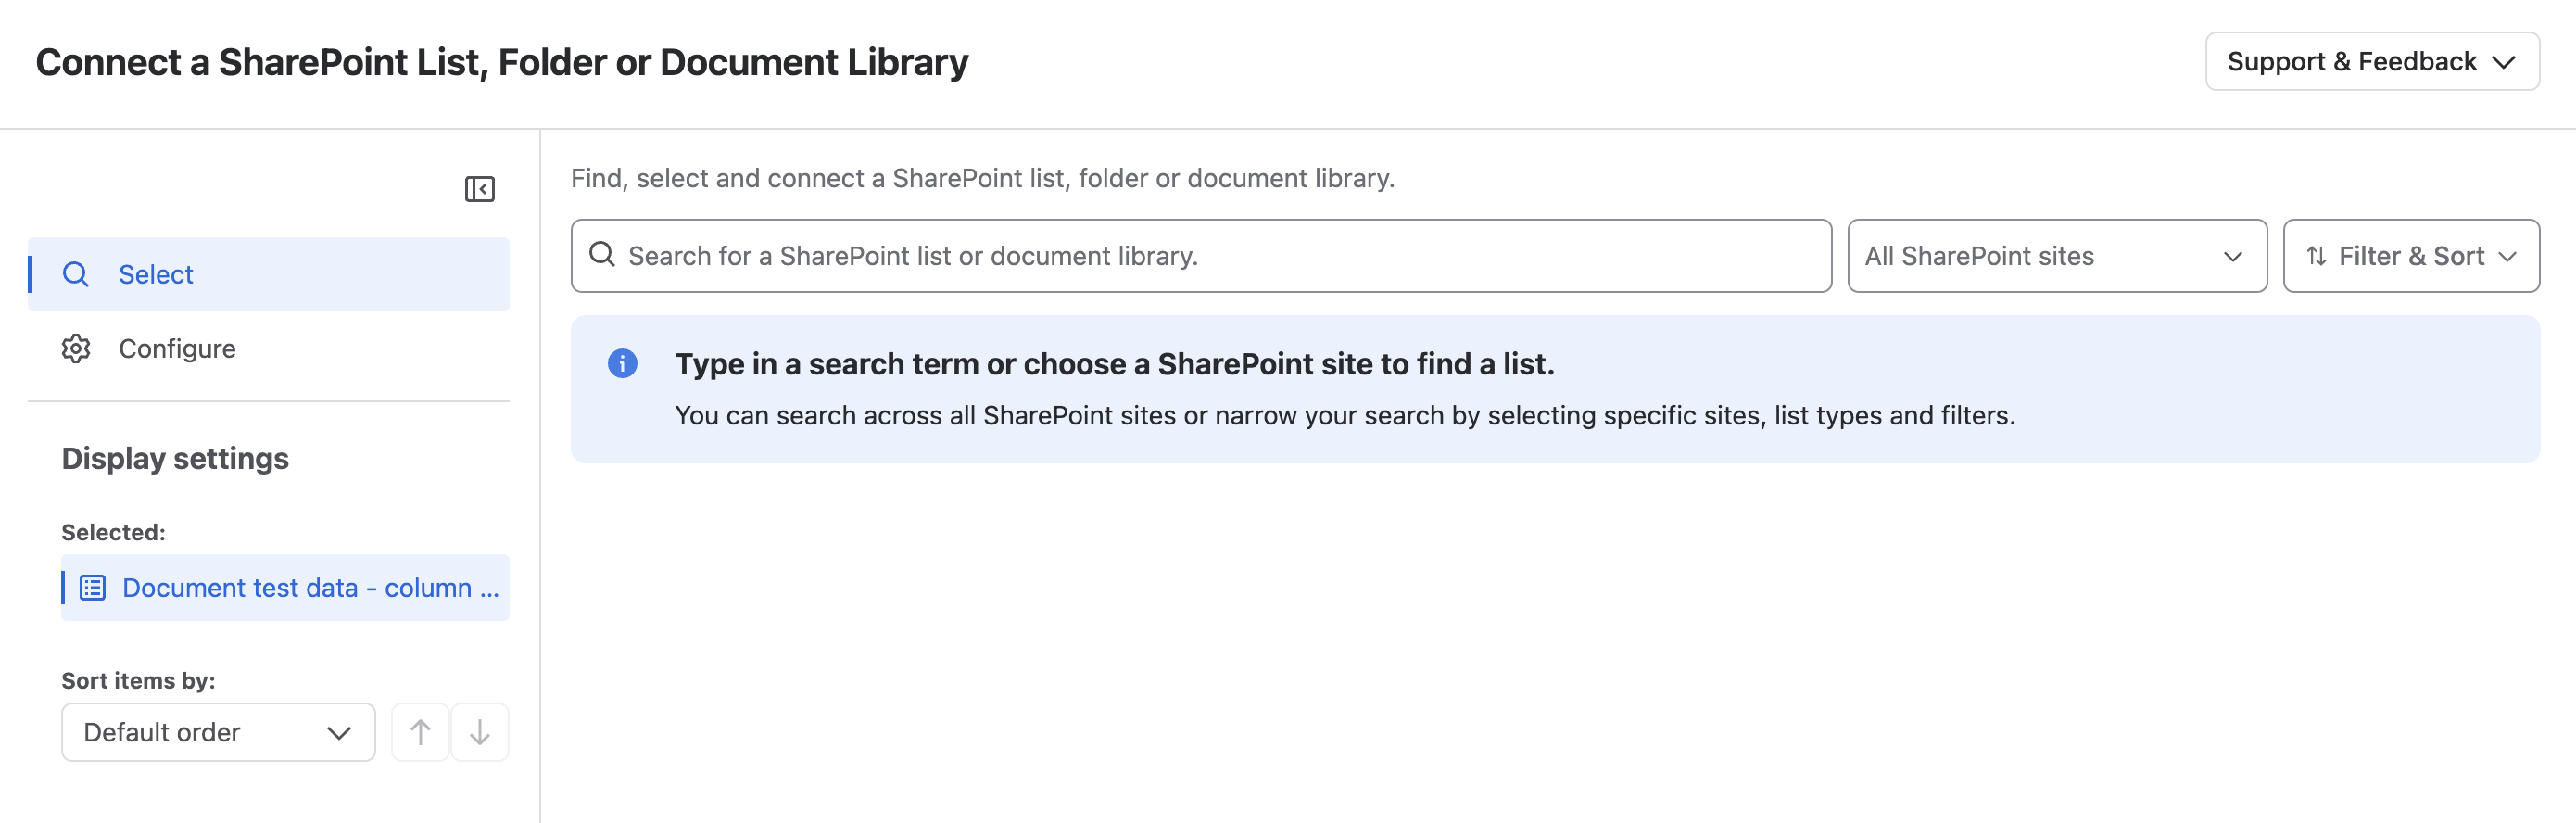
In the Select tab, find the SharePoint content you want to embed:
-
Search for a SharePoint list or document library: Use the search bar for full-text search across SharePoint sites. You can also paste a valid SharePoint list or document library URL directly into the search bar to locate it.
-
All SharePoint sites: Choose the SharePoint site that contains the list or document library you want to embed.
-
Filter & Sort:
-
Sort the results by:
-
SharePoint default order
-
Last modified (newest first)
-
Last modified (oldest first)
-
-
Select the list type:
-
All List Types
-
Document Library
-
Generic List
-
-
.png?cb=ec155e691ea108ece90e9f818aba97a4)
-
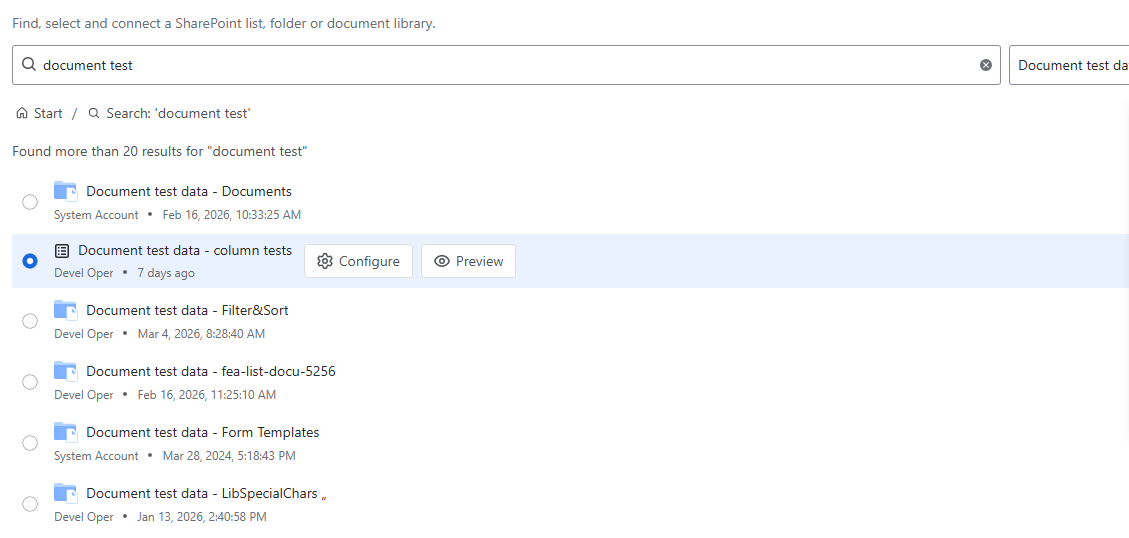
Selection: Click on a list or folder to select it. A Configure and Preview button will appear for the selected item.
Display settings
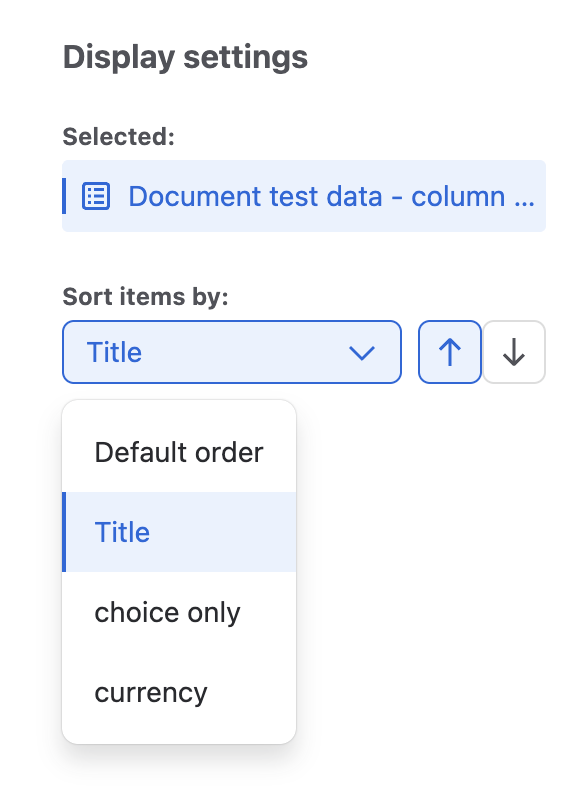
The left column shows display settings available in the Select and Configure menus:
-
Selected: Displays the list you chose
-
Sort items by: Choose the column used to sort the displayed items. The available options are based on the columns selected in the Configure tab and only include columns that are indexed in SharePoint.
Configure the view
Once a list is selected, switch to the Configure tab (or click the Configure button on the item) to define settings:
Configuration
-
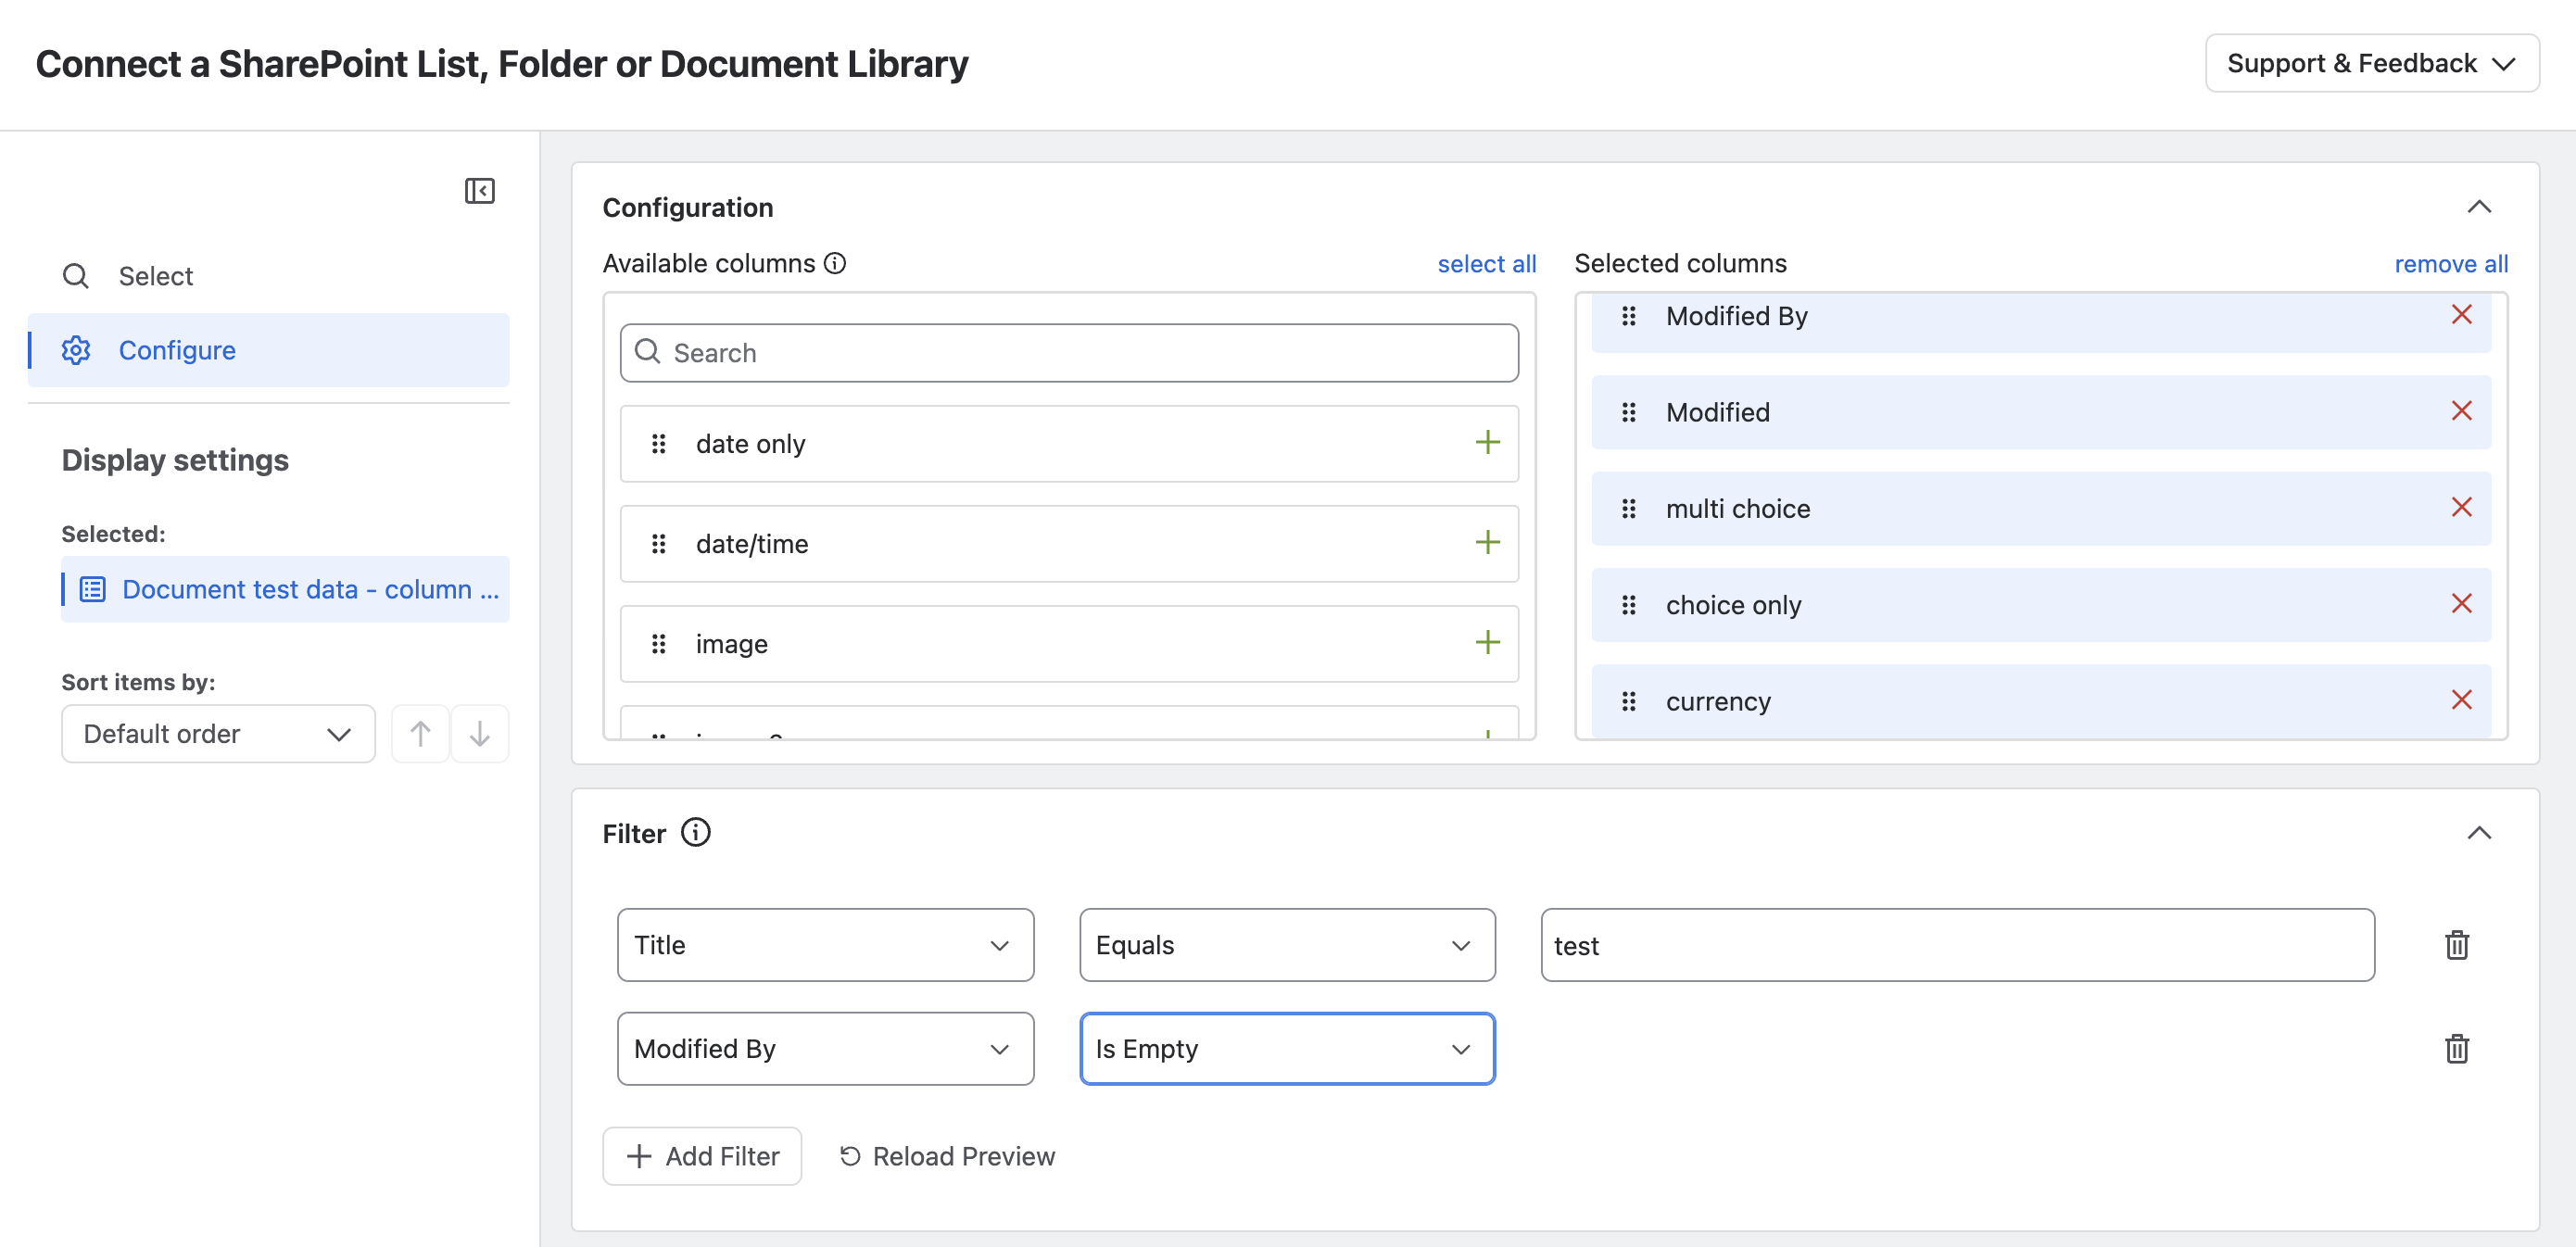
Available Columns: Displays all columns from the SharePoint list. Use the search bar to find specific columns.
-
Selected columns: Drag and drop columns from "Available" to "Selected" or click the + symbol to add them to the macro. Reorder columns by dragging them within the list
Select or deselect all columns using the select all and remove all buttons at the top right.
NEW Filters
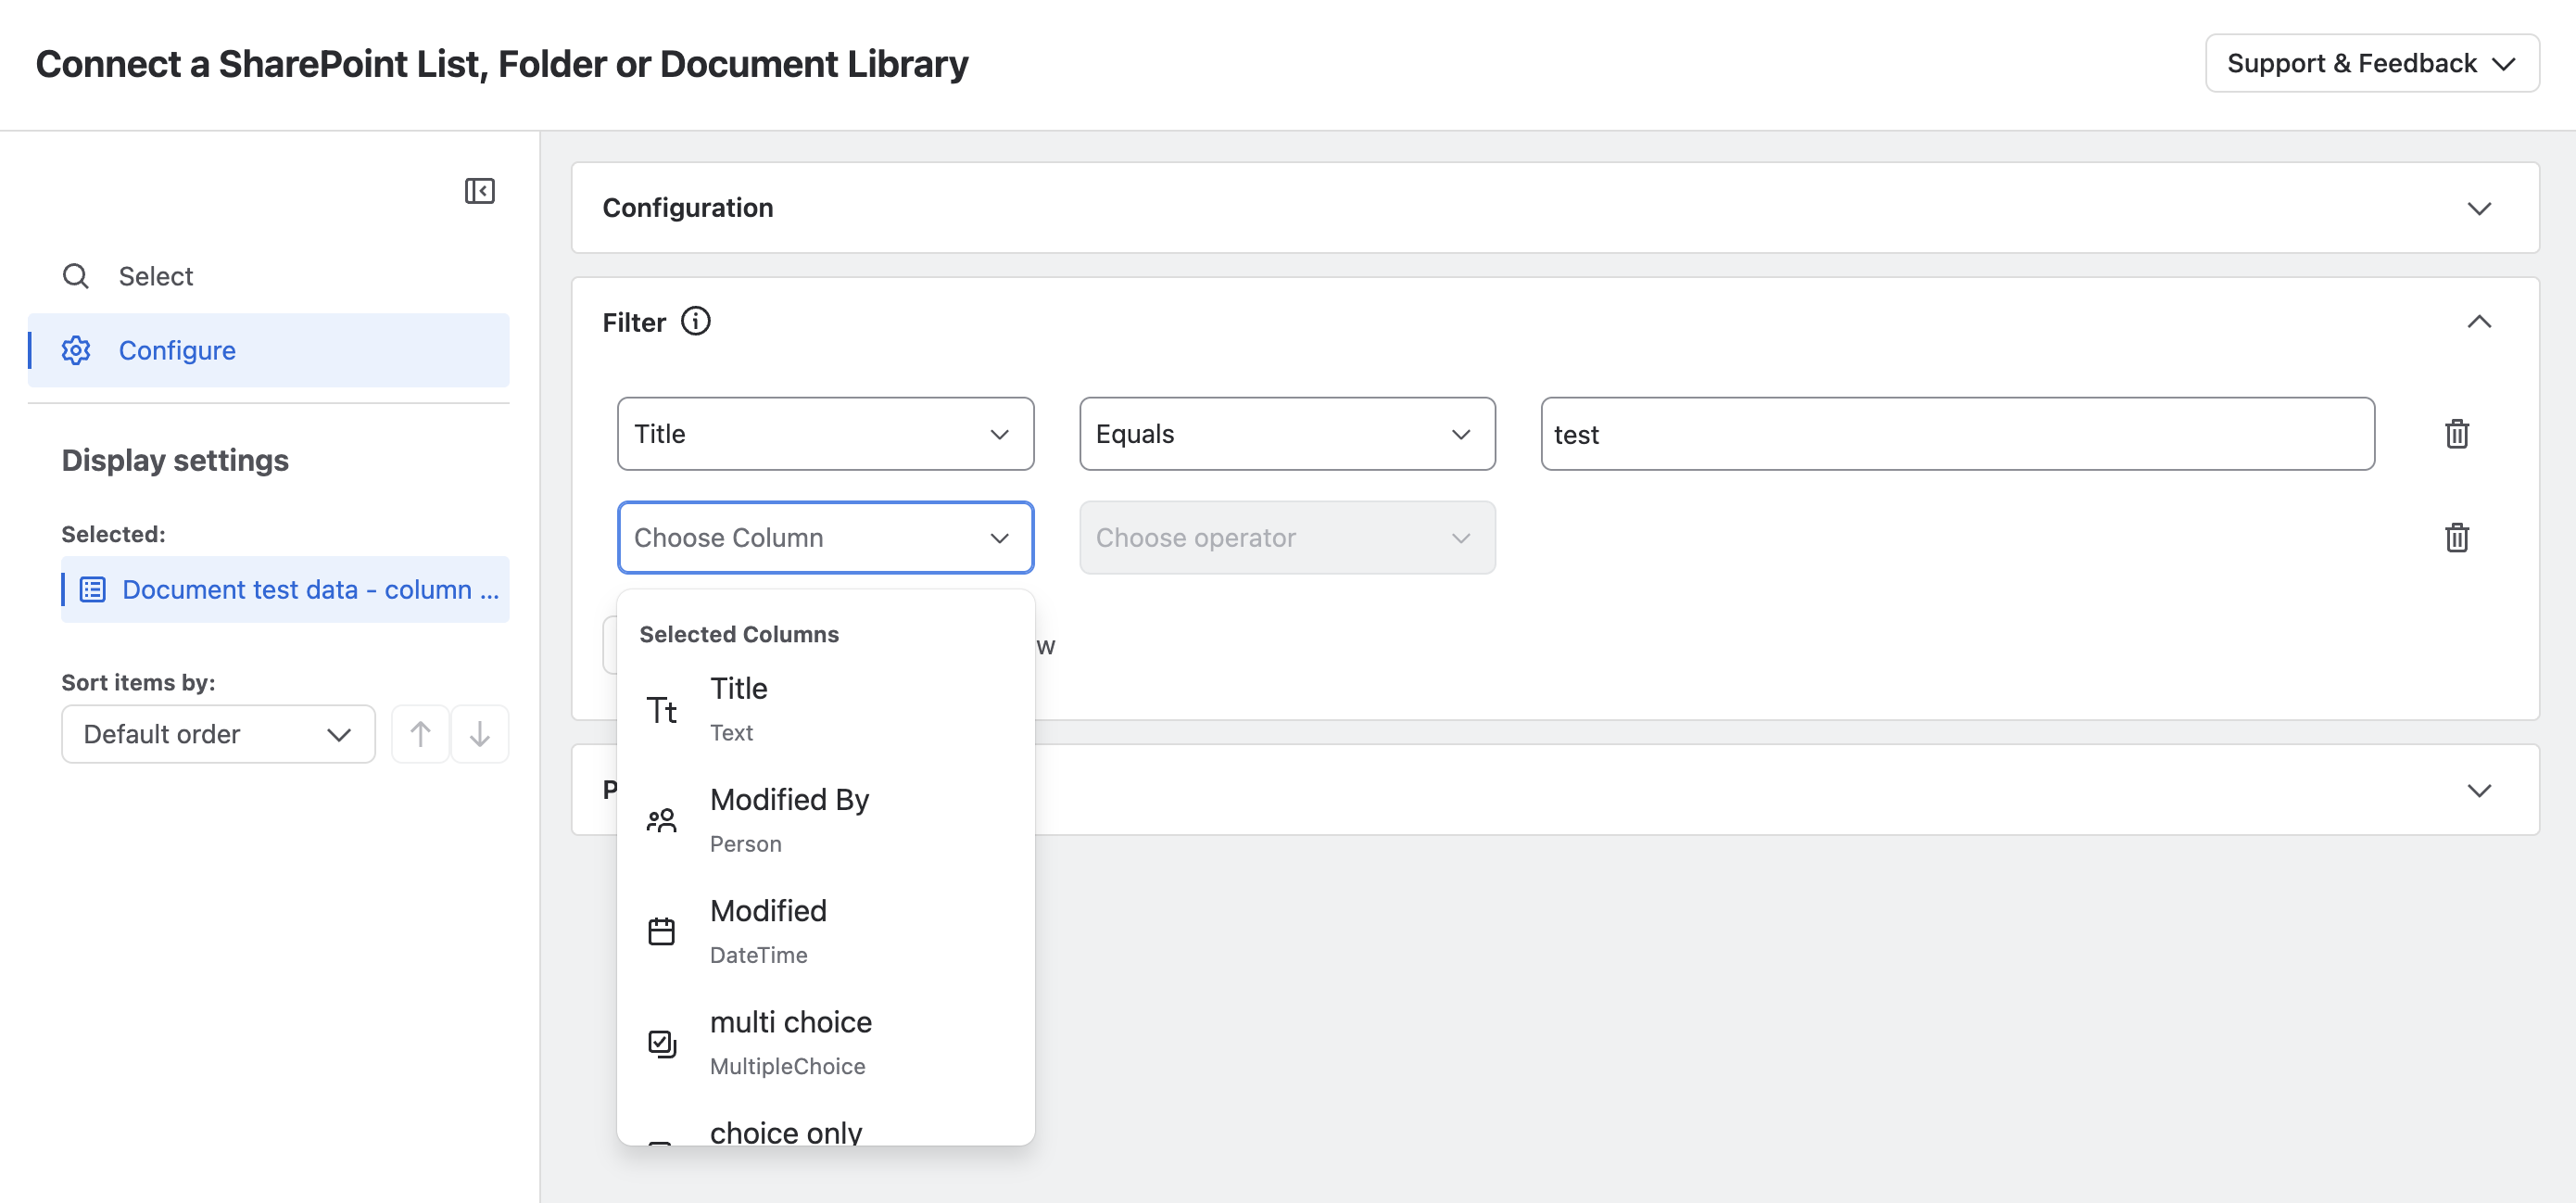
Use filters to display only items that match the conditions you define. Click Add Filter to add a filter row, then select the column, operator and value for that condition. Click the trash bucket to remove a custom filter.
When you add multiple filter rows, the rows are combined with AND. This means an item must match every filter row to appear in the macro.
Within a single filter row, multiple selected values are combined with OR. This means an item can match any of the selected values for that row.
-
Choose Column: Select the column you want to filter.
-
Choose Operator: Select how the filter should compare the chosen column with the value, for example, whether the column value is equal to, contains, starts with or is greater than the value you enter or select.
-
Choose Value: Depending on the selected column, choose or enter one or more values to filter by. If you select multiple values in the same filter row, the macro shows items that match any of those values.
Preview
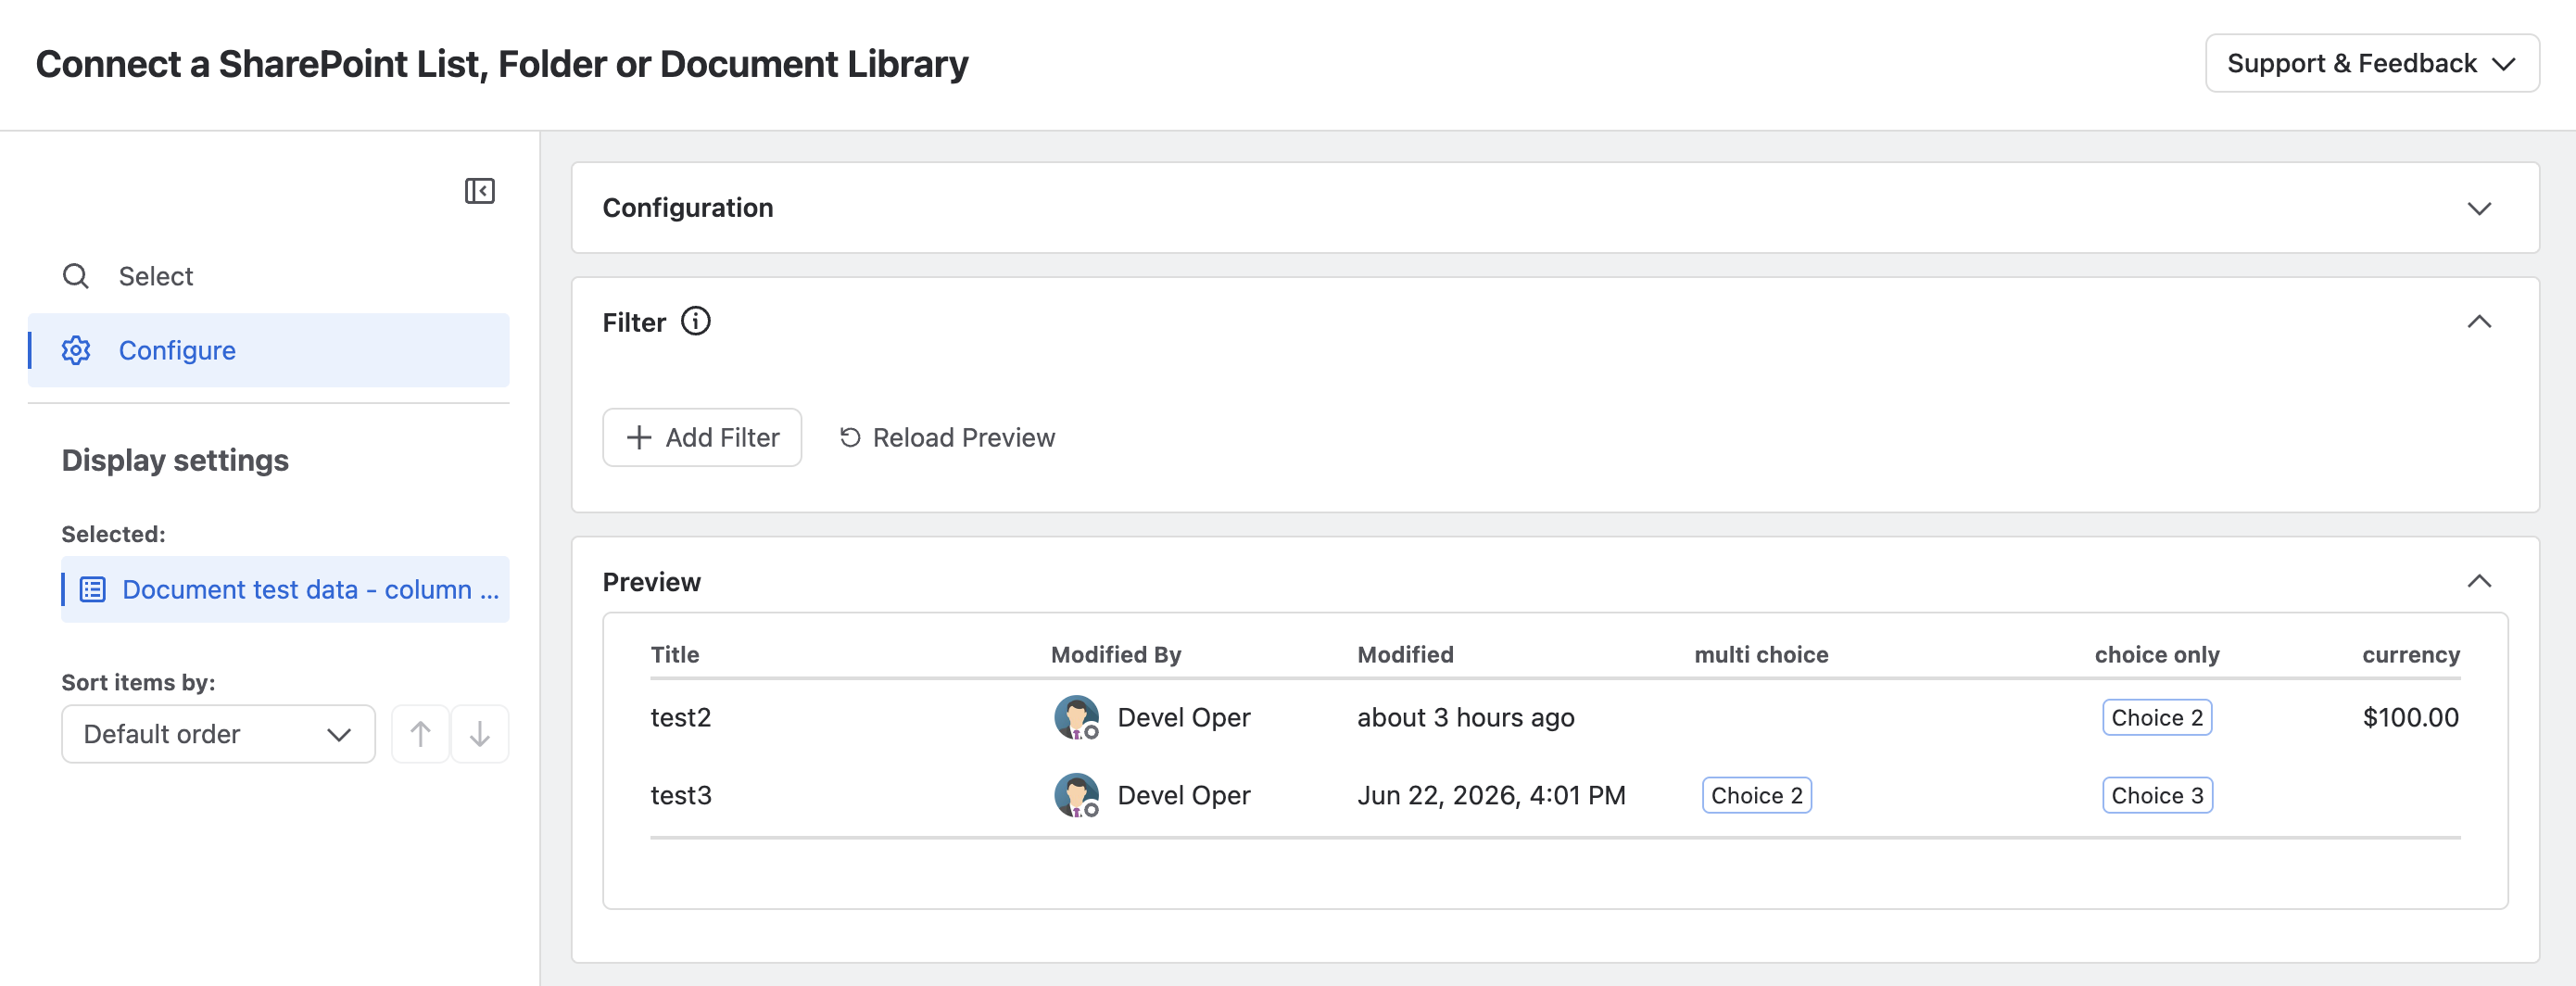
The Preview panel provides a live sample of your configuration. If the list is empty or no columns are selected, a message will be displayed.
Use the Reload Preview button to update the preview with the latest SharePoint data, as the preview section doesn’t refresh automatically.
Click Connect List at the bottom right to save your configuration.
Use the list macro
After you insert the SharePoint Online List macro, the selected SharePoint list or document library is displayed directly on the Confluence page.
Permissions apply: The macro respects each viewer’s SharePoint permissions. Users only see SharePoint lists, folders and items they are authorized to access, so visible content may differ between users.
For document libraries, users navigate through folders and open supported files, such as Office documents, images and PDFs, in a new browser tab. Other file types follow the browser’s default download or open behavior.
Some values may be formatted differently from how they appear directly in SharePoint. This is expected and does not change the underlying SharePoint data.
-
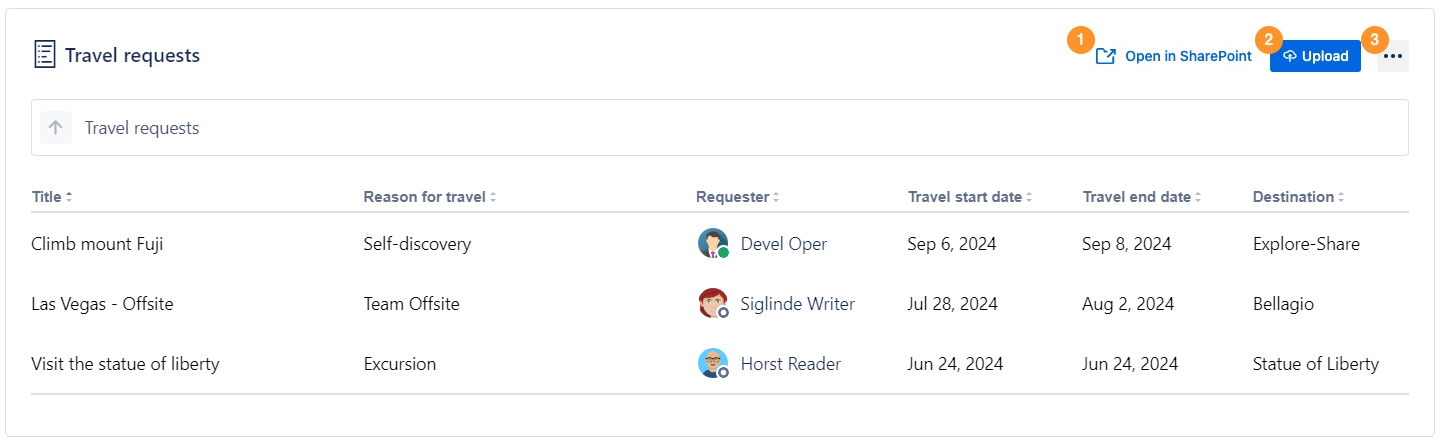
Open in SharePoint: Opens the configured SharePoint list, document library or current folder in a new browser tab.
-
Upload: Allows users to upload files to the current folder. This option is only available for document libraries. For detailed instructions, see Upload files below.
-
Support & Feedback: Opens the support menu for help and feedback.
Upload files
If the macro is configured for a document library, you can upload files directly from Confluence:
-
Click the Upload button in the top right corner or drag and drop files directly into the macro area.
-
A progress dialog will appear.
-
Conflict Handling: If a file with the same name already exists, you will be prompted to Replace the existing file or Cancel the upload for that specific file.
-
Click Done once the upload is complete.
.png?cb=d9777aeeb85183a876fd917d7ac6c1b6)