
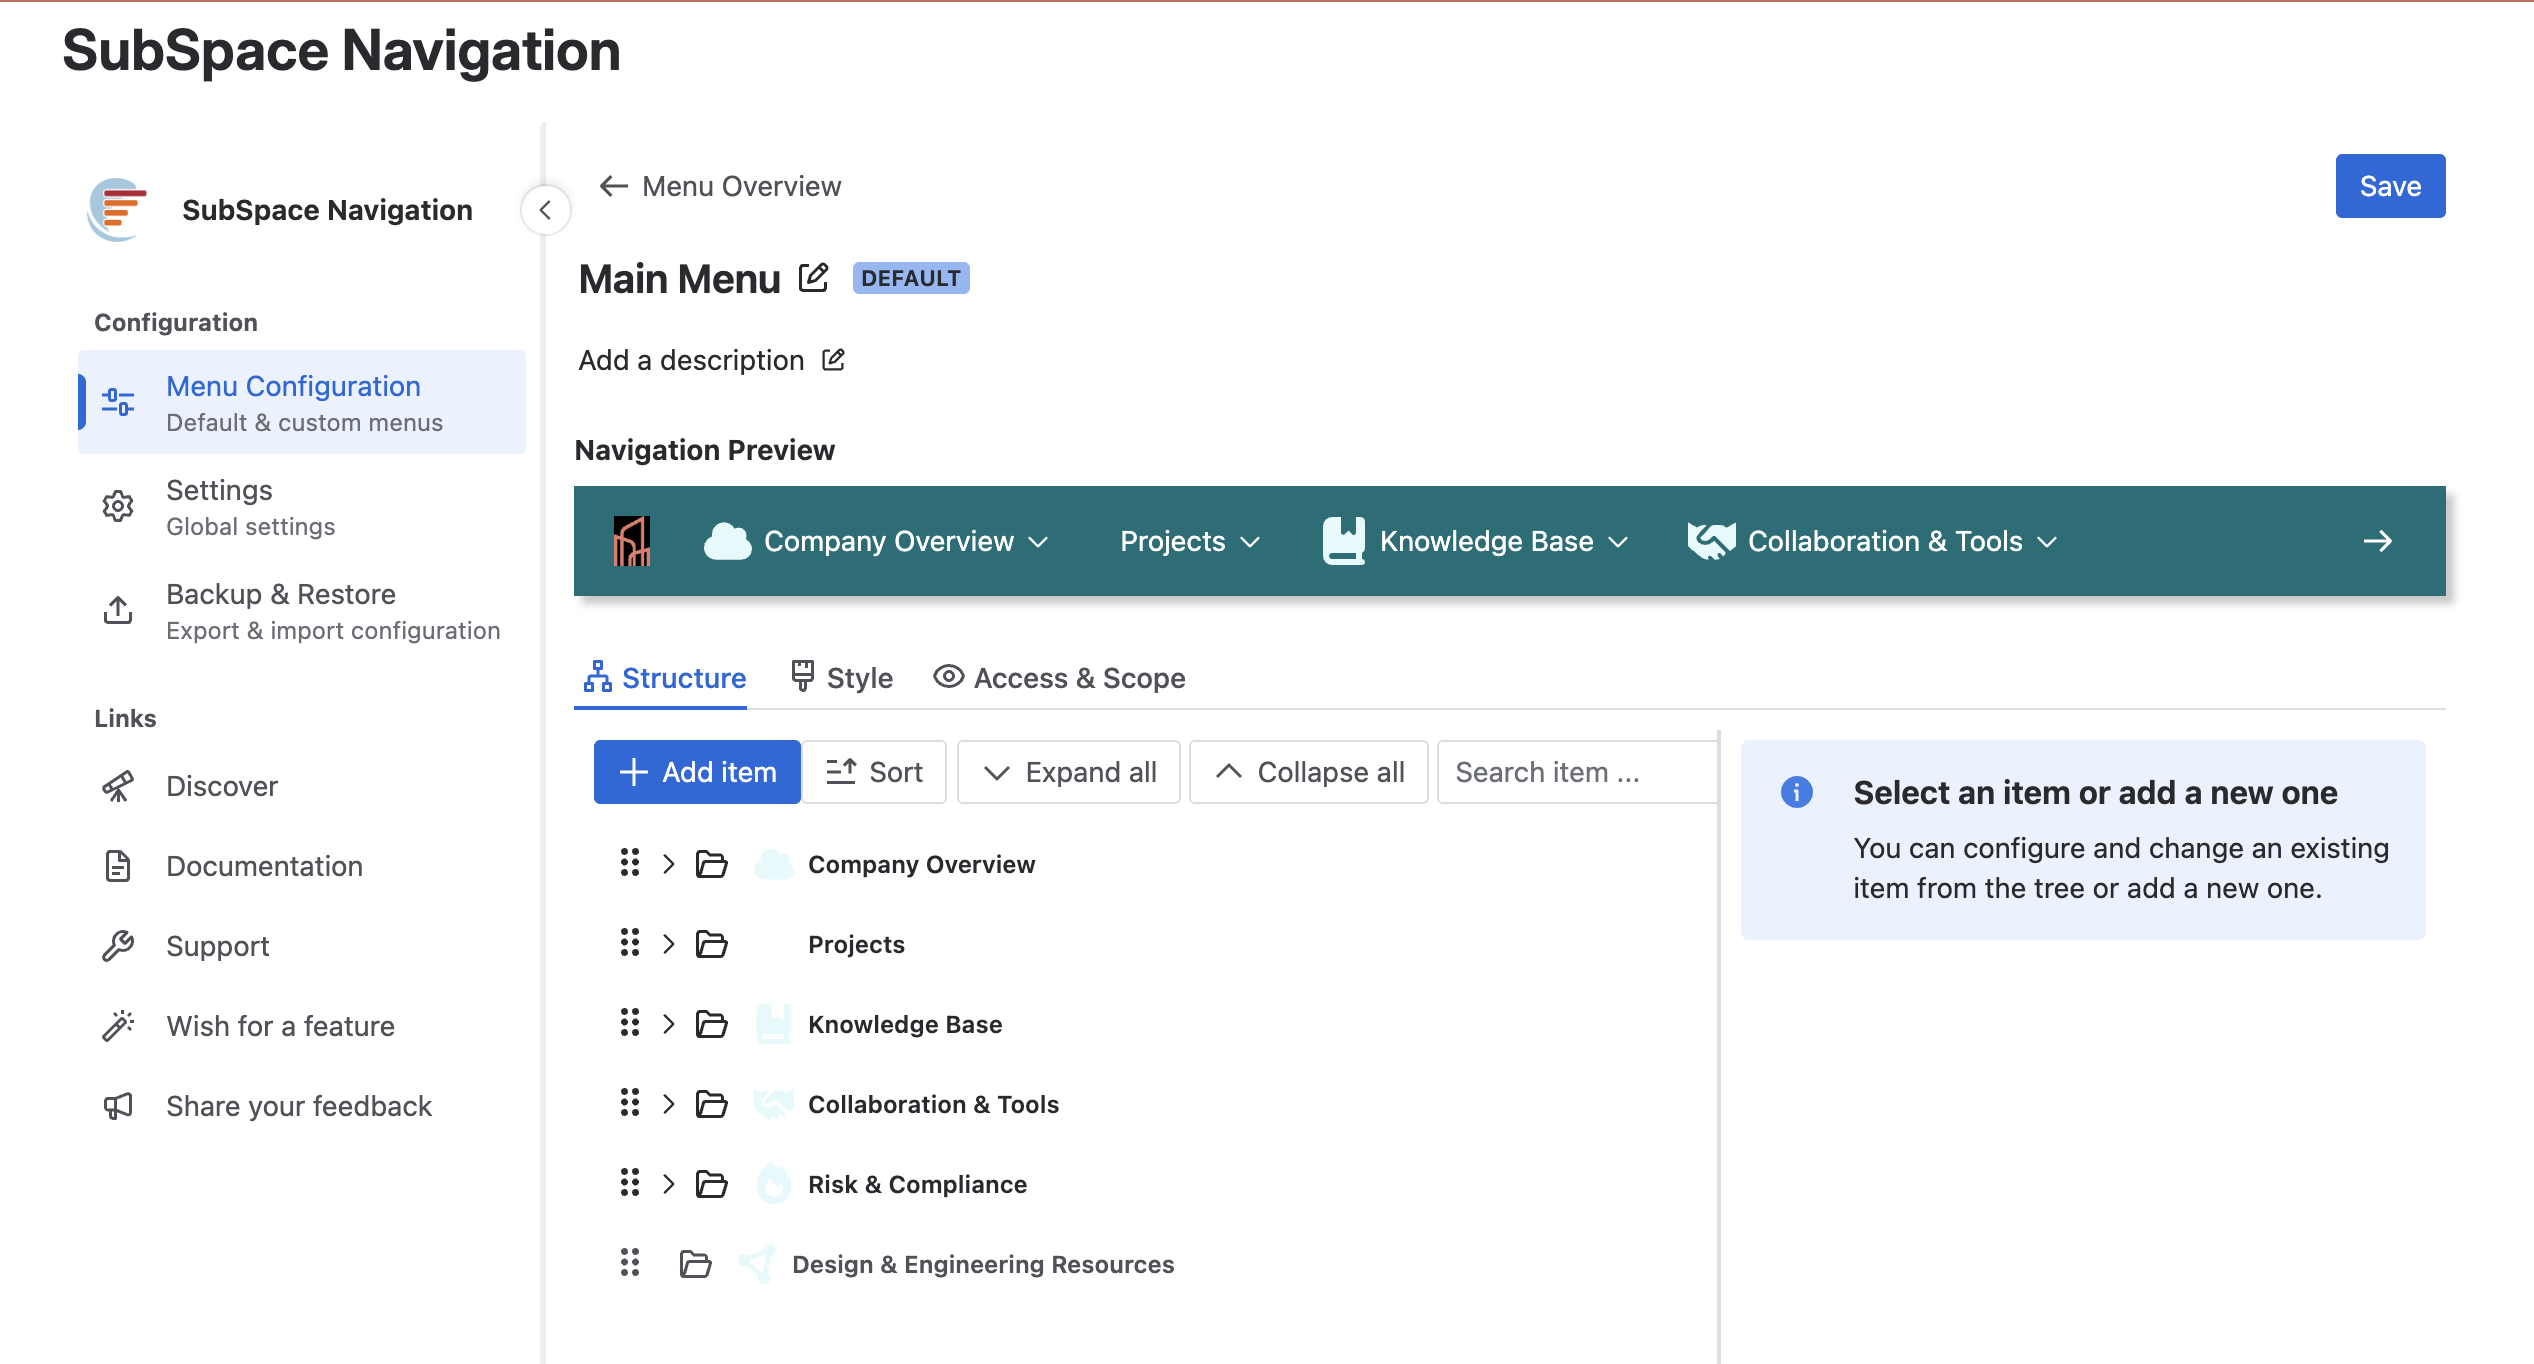
After creating a new menu or selecting an existing one (default or custom), you are taken to the Editing menus screen.
On this screen, you can:
-
Set a custom name for the menu
-
Add an optional description
While you make changes, a live preview appears at the top of the configuration screen and updates automatically. This allows you to review the menu before publishing.
The preview initially displays only top-level menu items. When you click on a top-level item, its submenu items become visible.
When you click Save, your changes are stored, and the newly created or updated menu appears in the menu overview.
You can return to editing this menu at any time by clicking the Configuration icon (pen) in the menu overview or by clicking on the title of the menu you would like to edit.
Configuration Tabs
In the lower half of the screen, you can customize the menu using three tabs:
Define the top-level menu items and their hierarchy.
Configure the menu icon and background color.
Configure visibility and access rules for the menu.