
Navigating Structure Menu
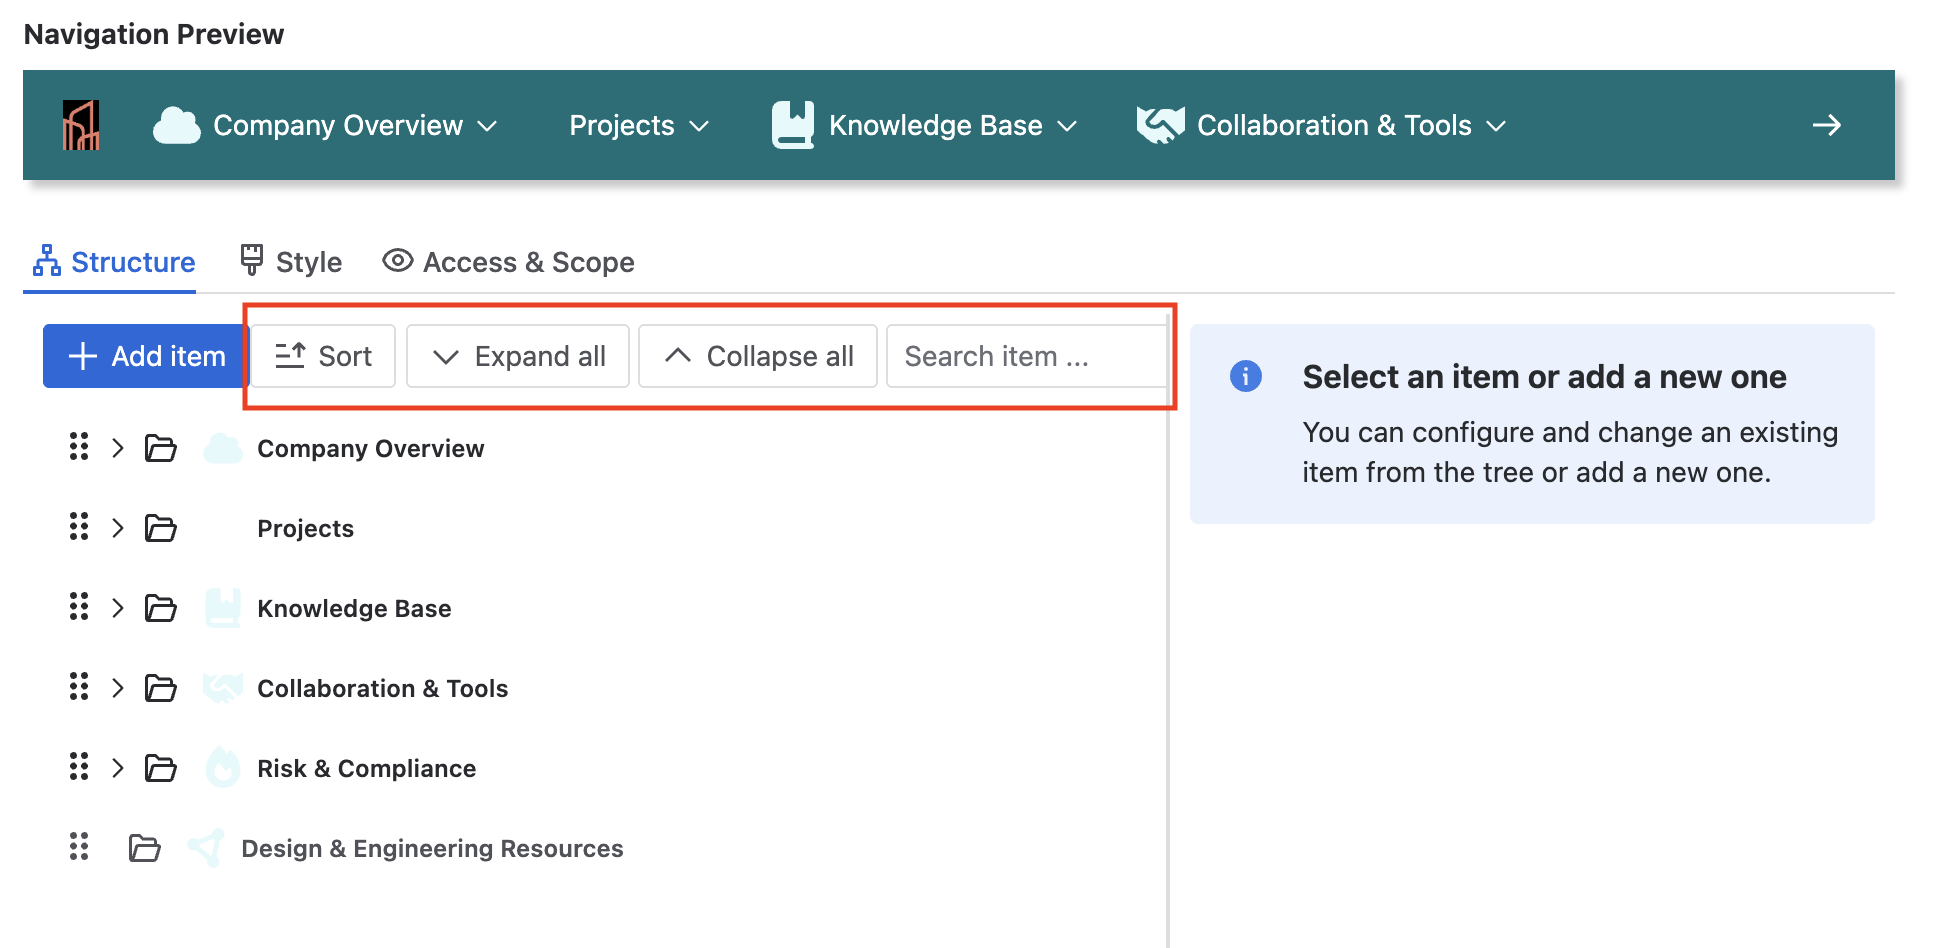
On the left, in the Structure section, the current Menu elements are displayed. You can expand or collapse them all with one click, as well as sort the elements alphabetically and backward, and search for a navigation item within the structure.
Add Menu elements
To add a first-level item: Click Add item and select the desired element type from the dropdown.
To add a second-level item: Hover over the parent element and click the "+" icon to add a nested item.
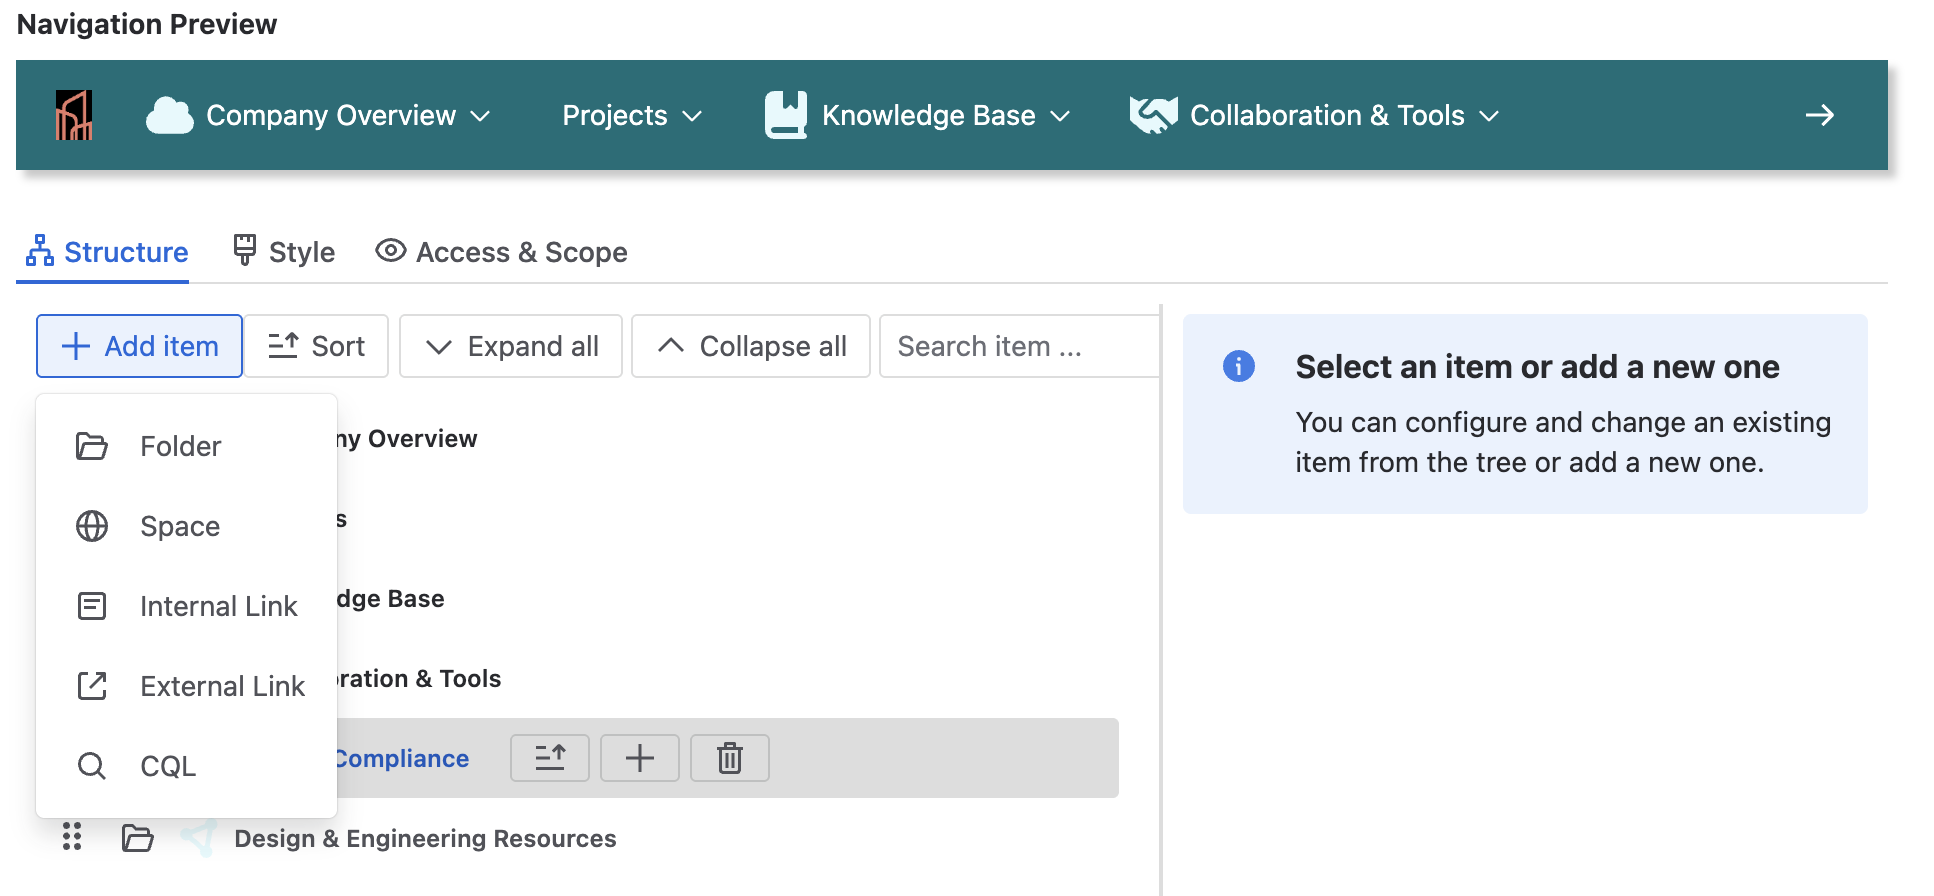
There are five SubSpace Navigation element types: external or internal links, folders, spaces, or CQL queries. You can find a description of each type and the corresponding configuration options in the table below.
|
Type |
Description |
Options |
|---|---|---|
|
Internal Link |
Link to Confluence content like pages, blog posts, databases, smart links or whiteboards |
|
|
External link |
Link to external web page |
|
|
Folder |
Folders allow you to group navigation elements. They can hold navigation elements of any type, including other folders. |
|
|
Space |
Link to a Confluence space |
|
|
CQL |
Show up to 10 results of a CQL query (please refer to the documentation of the Confluence Query Language). This allows you to dynamically display pages and blog posts that fit the search criteria. |
|
CQL-based navigation entries
With CQL-based elements, you can build dynamic navigation entries that adapt to each user.
Example 1: Recently created content for the current user
Use this query to show recently created pages and blog posts for the logged-in user:
contributor = currentuser()
AND type IN ("page", "blog post")
ORDER BY created DESC
Each user sees their most recently created pages and blog posts. The number of results is based on the result limit (default: 10 if no limit is set).
Example 2: Favorite content of the current user
Use this query to show the favorite pages and blog posts of the logged-in user:
favourite = currentUser()
After configuring your CQL element, confirm your changes with Save.
Title Translations
-
Expand the Title Translation Section: Navigate to the bottom of the Menu item set up and expand the Title Translation (Localization) section.
-
Select the Language: Choose the desired language from the list. Note that only languages supported by Confluence are available.
-
Enter the Translated Title: Input the translated title for the menu item in the selected language.
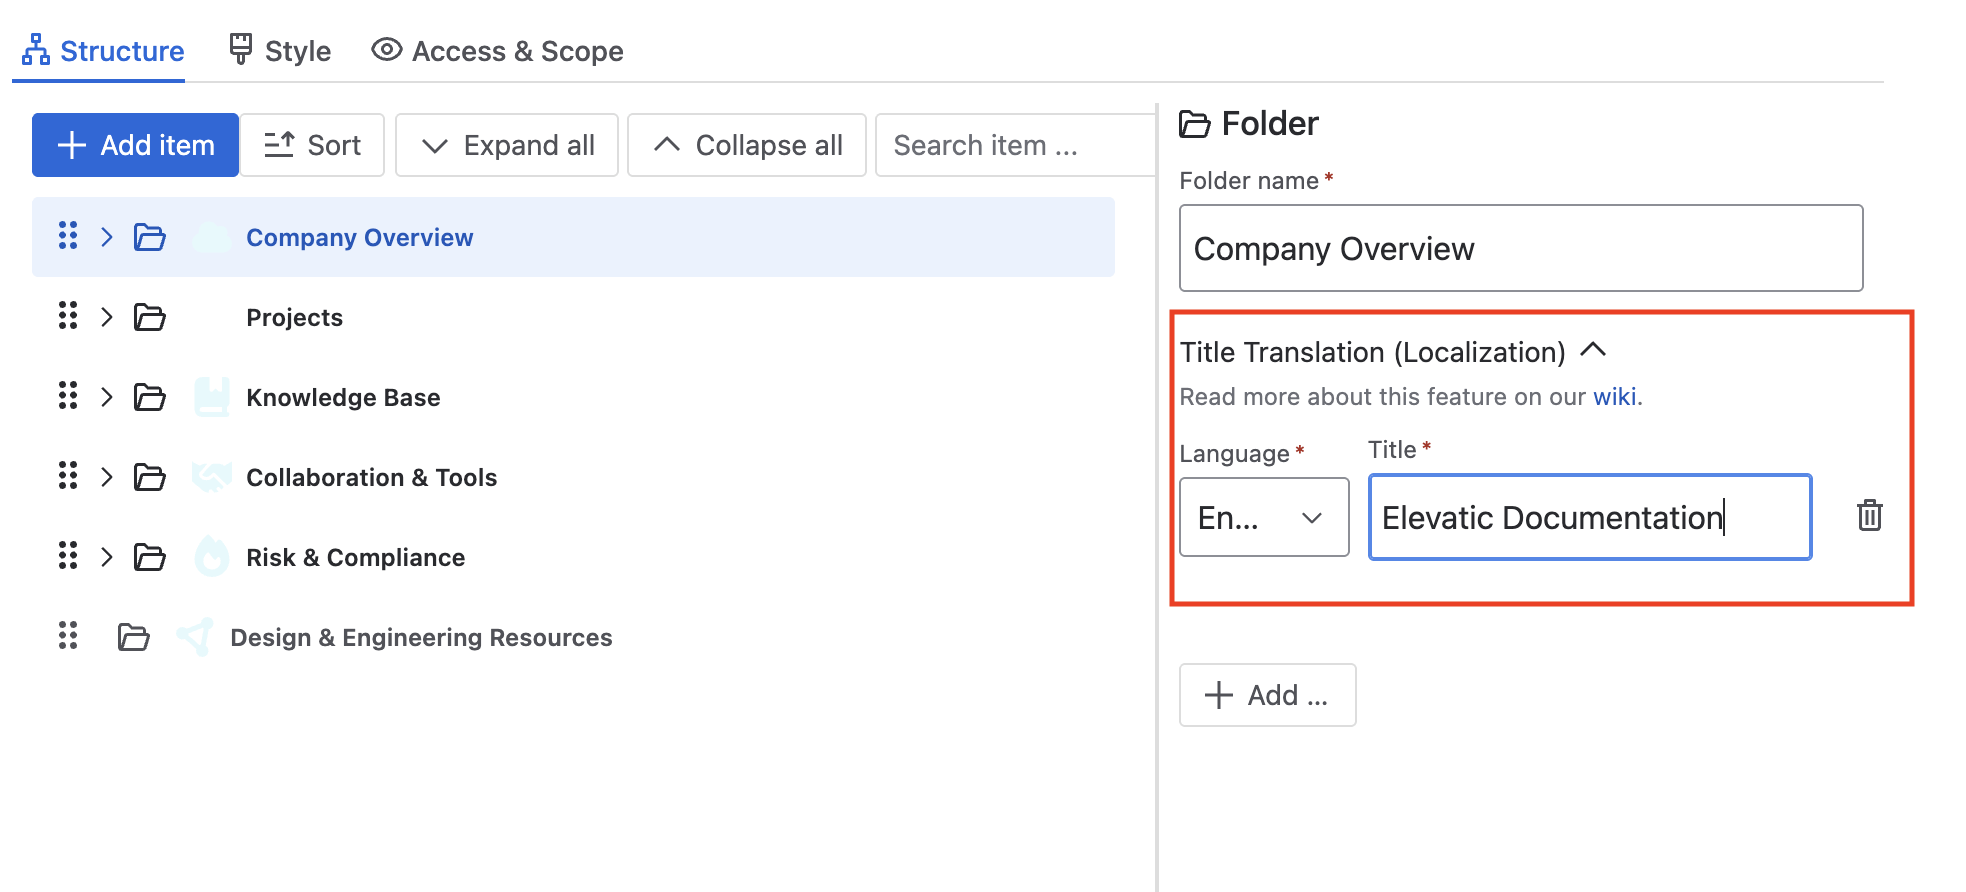
When users log in, they will see the menu titles in the language set in their profile settings. This ensures a seamless, personalized user experience across the languages supported by Confluence.
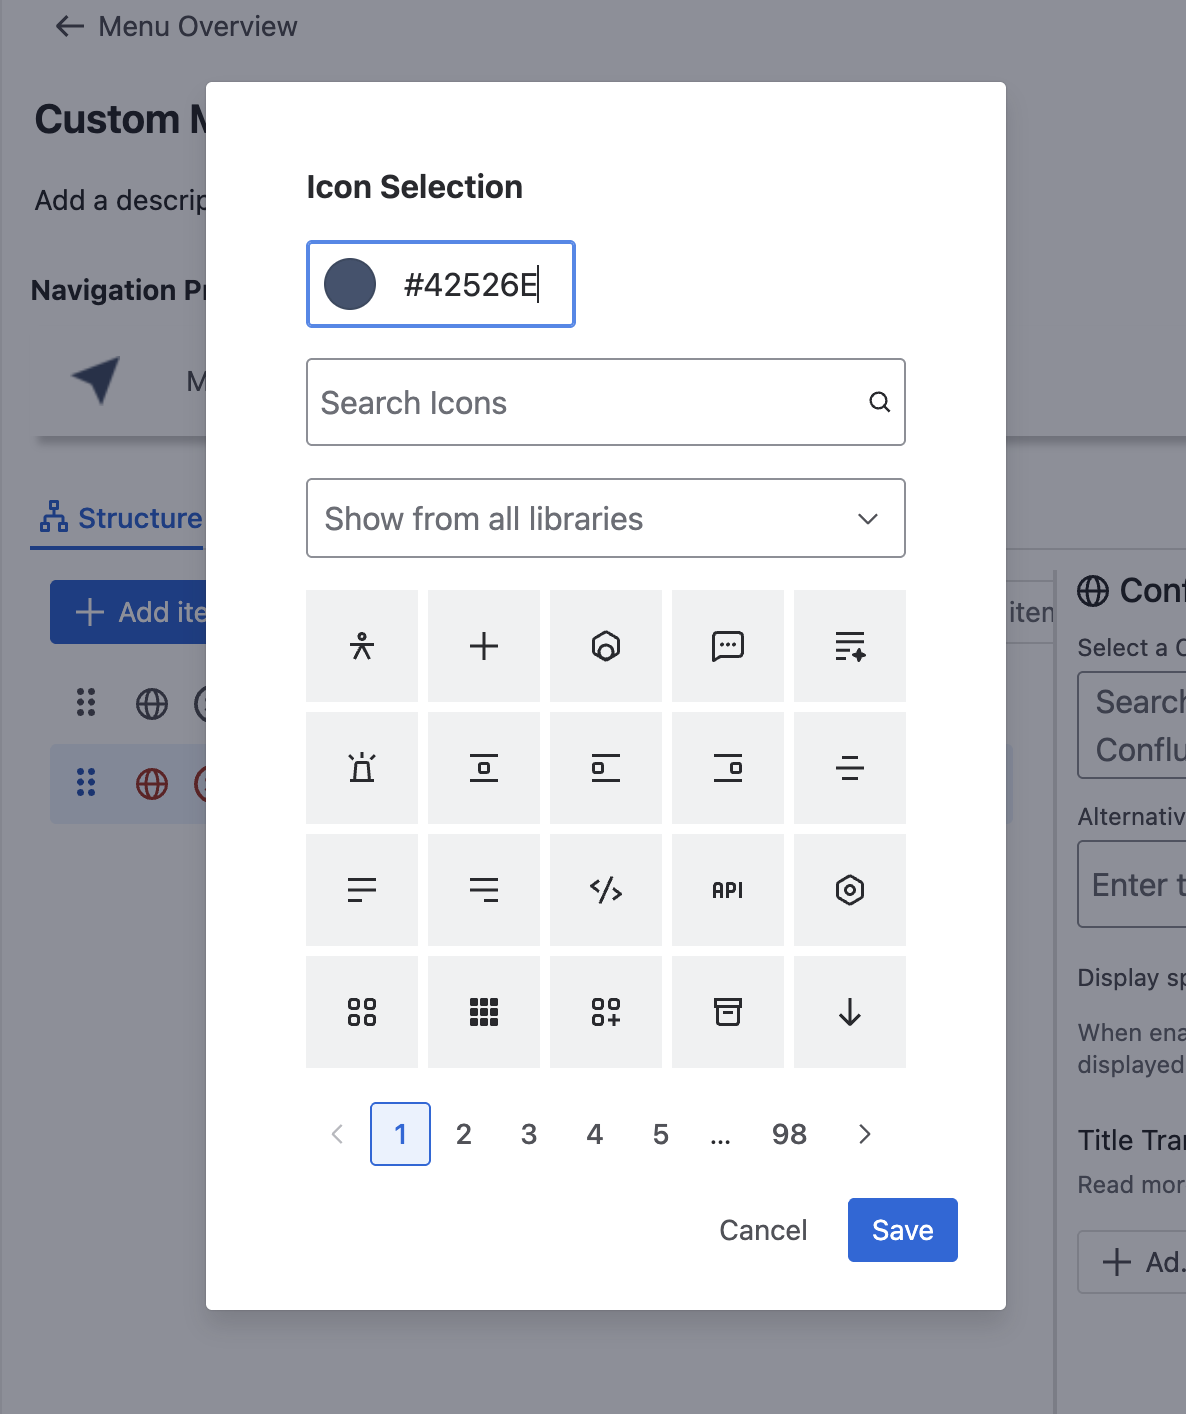
Adding icons
You can add icons by clicking the icon logo next to the Menu name. An icon selection will pop up, and you can select from the icon library.
Delete Menu elements
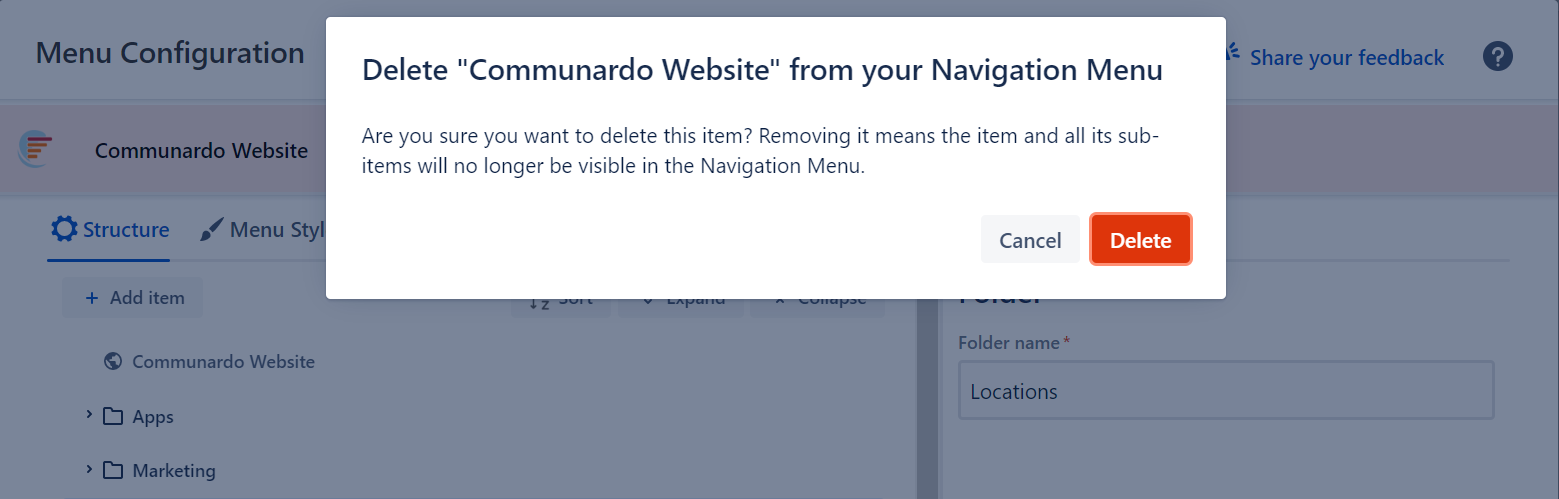
To delete an element, move your mouse over the target element and click on the trash icon next to it.
To ensure you don't take any action unintentionally, we have added a confirmation dialogue when you try to delete an item (see Image 5). You can hit the "Delete" button or press Enter to confirm the deletion, or you can hit Cancel and avoid unintentional deletion.
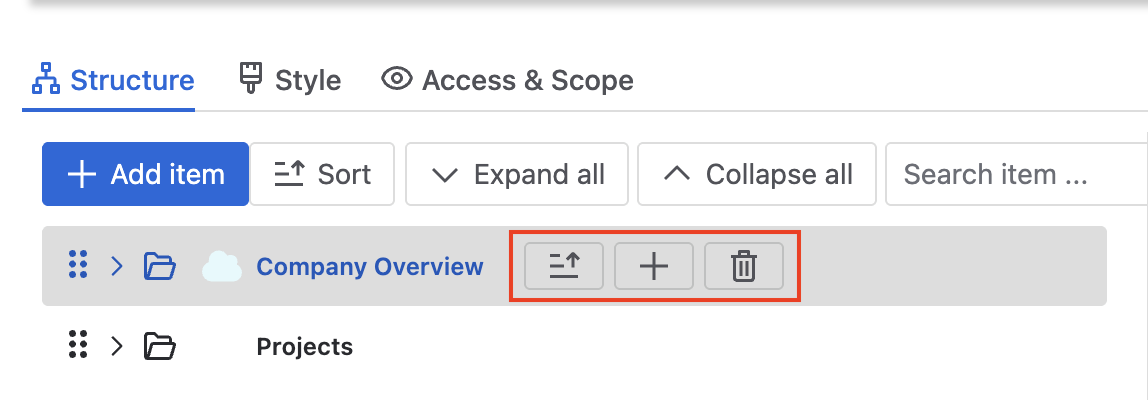
Edit Menu elements
Menu elements can be edited as follows:
-
Hover over the menu element you want to edit.
-
The available editing options appear next to the element name.
-
Choose one of the following options (see Image 6):
-
Sort alphabetically
-
Add an element below
-
Delete the element
-
-
Confirm your changes by selecting Save.
Elements can be moved by simple drag-and-drop. They can be moved within the same hierarchy level, or to a higher or lower level in the Menu hierarchy.
Multiple Top-level Items
If you configure multiple top-level Menu items that don't fit on one screen, an arrow will appear on the far right of the Menu, allowing you to navigate to the rest of the items.
Once you click on the arrow, you will see the rest of the remaining items, which were not visible on the first screen. Additionally, a left arrow will be displayed to let you go back to the previous screen.
Cancel Your Changes
After you make changes to the menu structure, be careful not to click the Menu overview button by accident. This takes you back to the Overview menu and discards any unsaved changes. To prevent this, a confirmation pop-up appears whenever the menu structure has been modified. Select Cancel to return to the Structure menu, or select Discard changes to lose all changes made since you opened the configuration.
