
TUTORIAL 3 OF 6 10 MIN INTERMEDIATE SPACE ADMIN
Attachments added while creating a work item are copied to its new SharePoint folder right away.
Why a separate tutorial? Attachments added during creation are part of the creation event, so the trigger from Copy attachments as they’re added doesn’t fire for them. Instead, this tutorial extends the rule from A SharePoint folder for every new work item and goes through all attachments of the new work item.
What you’ll learn
-
Why attachments at creation need their own setup
-
Go through all attachments with advanced branching
-
Use a branch variable as input
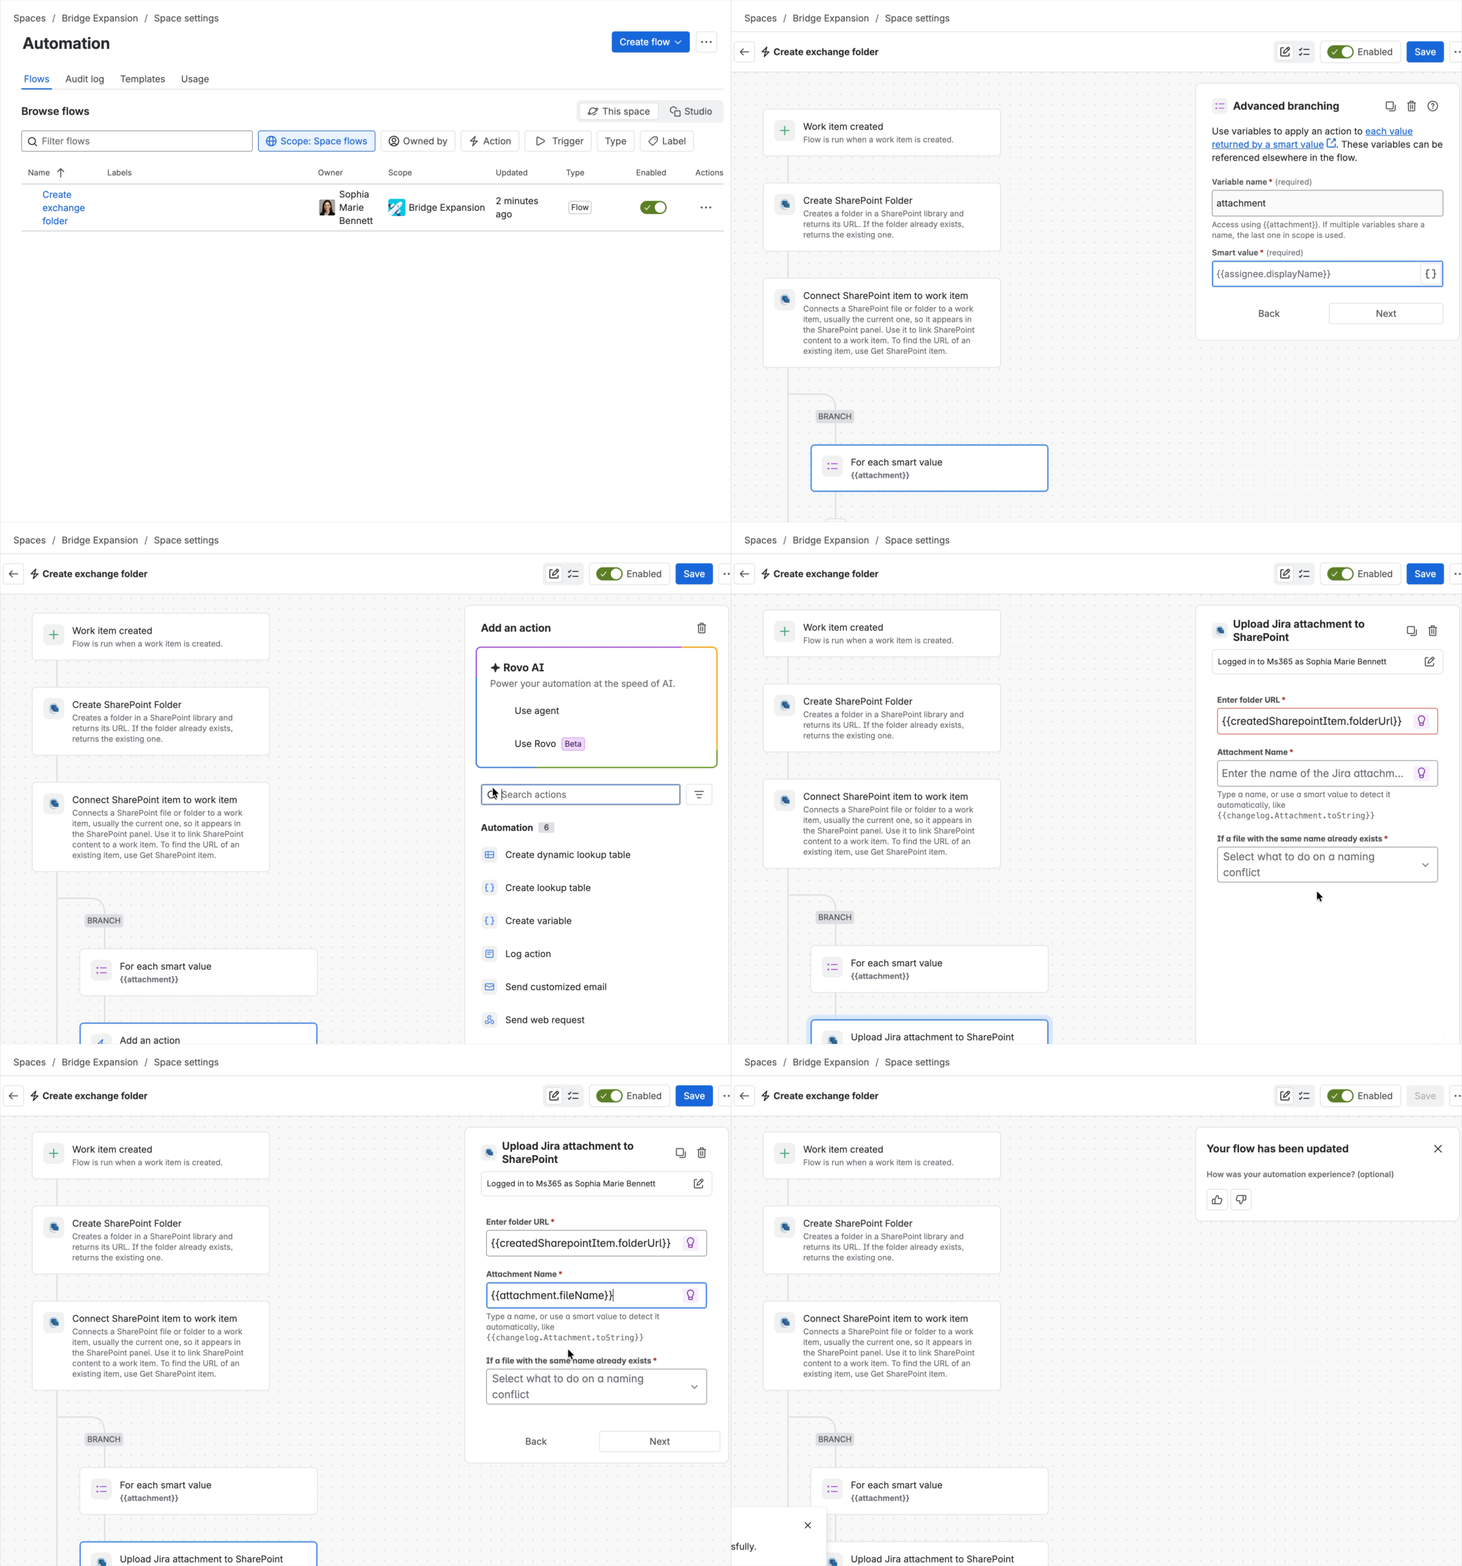
Outcome: When you create a work item with attachments, copies of the attachments appear in its new folder.
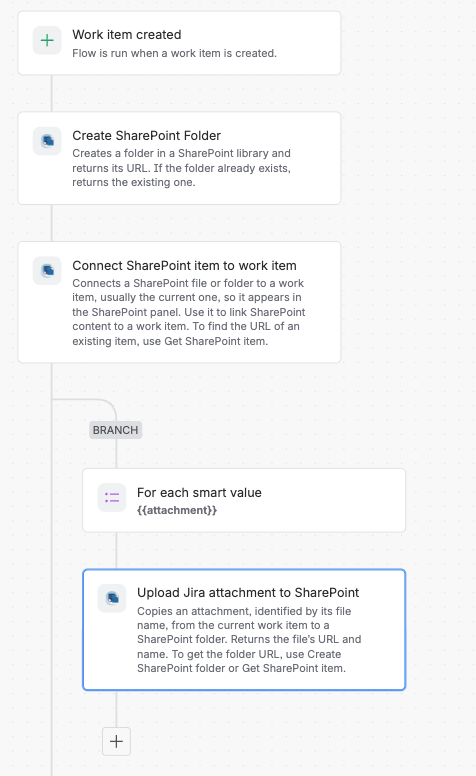
Rule at a glance
-
TRIGGER Work item created
-
ACTION Create SharePoint folder
-
ACTION Connect SharePoint item to work item
-
BRANCH For each attachment in
{{issue.attachment}}-
ACTION Upload Jira attachment to SharePoint
-
ACTION Connect SharePoint item to work item
-
Steps 1 to 3 are the rule from A SharePoint folder for every new work item.
Step-by-step setup
1. Open the rule from tutorial 1
Go to Space settings > Automation and open the rule from A SharePoint folder for every new work item, for example Create exchange folder.
Keep everything in one rule. That way, the folder exists before the first upload starts.
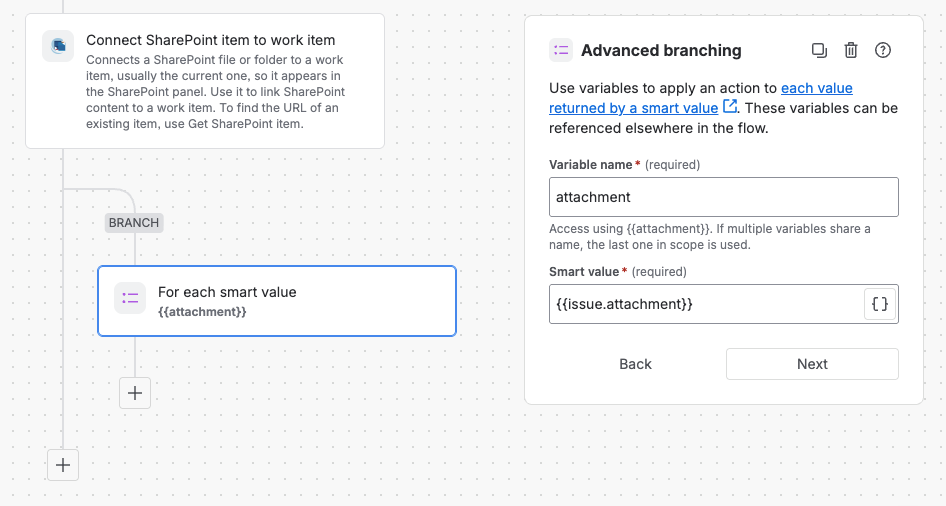
2. Add an advanced branch
After Connect SharePoint item to work item, add Branch > Advanced branching and fill in the fields.
|
Field |
Value |
|---|---|
|
Smart value |
|
|
Variable name |
|
The branch runs the next steps once for each work item attachment.
3. Copy each attachment
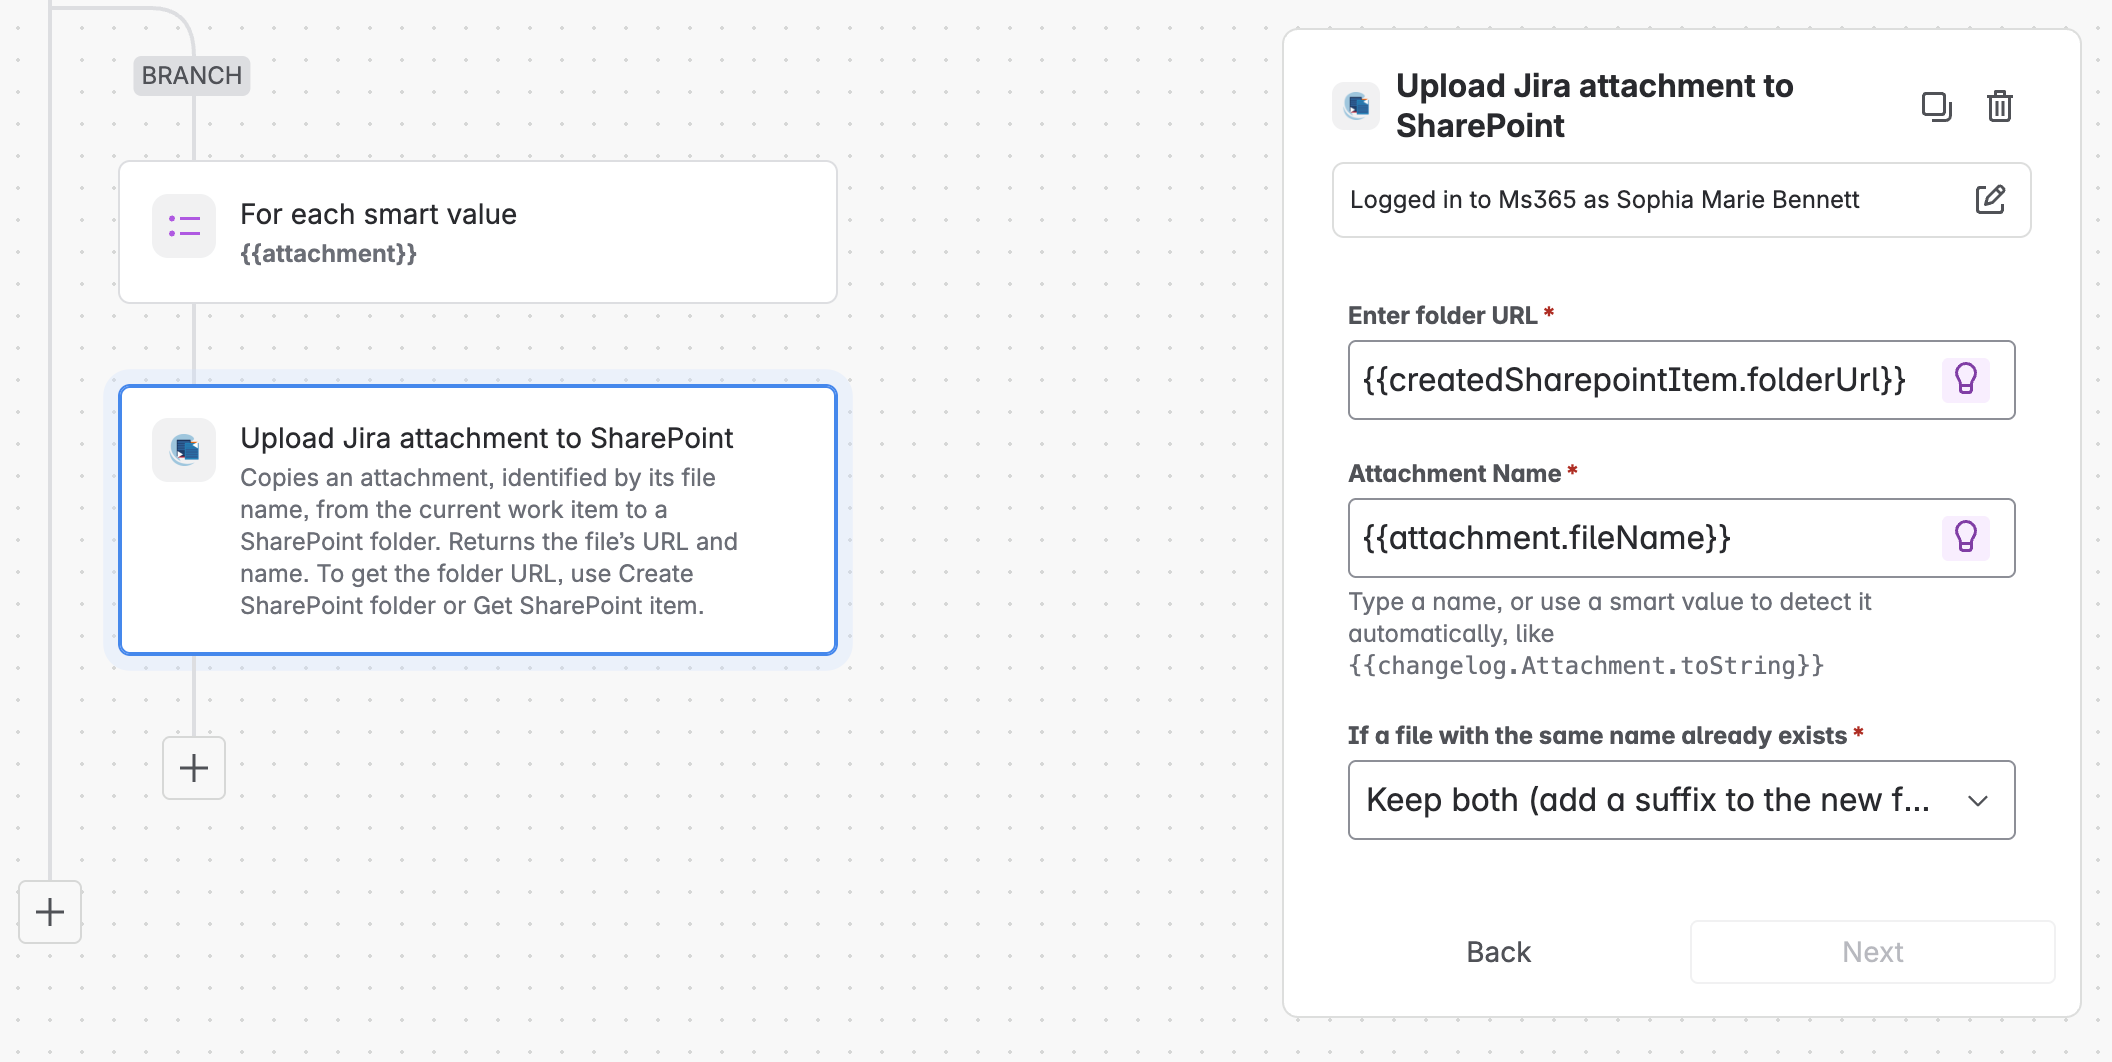
In the branch, add the Upload Jira attachment to SharePoint action and fill in the fields.
|
Field |
Value |
|---|---|
|
Location |
|
|
Attachment name |
|
|
Conflict behavior |
Keep both |
The variable name from step 2 becomes the start of the smart value: attachment turns into {{attachment.fileName}}. Smart values are case-sensitive, so {{attachment.filename}} doesn’t work.
4. Show each file on the work item
Inside the branch, after the upload, add the action Connect SharePoint item to work item and fill in the fields.
|
Field |
Value |
|---|---|
|
Work item |
|
|
Item URL |
|
5. Save the rule
Select Save. The rule stays enabled.
Create a work item and attach two files in the create dialog. Both copies appear in the new folder and in the work item’s SharePoint panel. If they don’t, check the rule’s audit log.
Make it yours
|
Recipe |
Change |
|---|---|
|
STANDALONE Without tutorial 1 |
Create a new rule with the trigger Work item created and the action Create SharePoint folder, then continue with step 2. |
|
CLEANUP Remove the files from Jira |
Inside the branch, after the upload, add Jira’s Delete attachments action with |
|
NOTIFY Post the link in a comment |
After the upload, add Jira’s Comment on work item action, for example: |